

Today, the professional creators of presentations in PowerPoint depart from the canons and standard requirements for the procedure for creating and designing such documents. For example, the meaning of creating various non-indexed slides for technical needs has long been substantiated. In this and many other cases it may be necessary to remove the title.
Delete header
Performance of this procedure will make the slide completely nameless and allocate on the background of others. There are two ways to remove the title.Method 1: Simple
The easiest and most common way, and at the same time the most affordable.
You will need to click on the border area for the header to highlight, the field as an object. After that, you can simply click the Delete button "DEL".
Now the title is nowhere to introduce, and, as a result, the slide will not have names. This method is convenient for creating single, non-name unnamed frames.
Method 2: Layout without title
This method involves the user's need to systematically create single-type pages with the same filling and without title. To do this, you have to create an appropriate template.
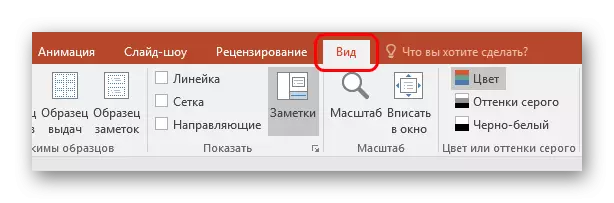
- To enter the mode of operation with layouts, you need to go to the "View" tab.
- Here you need to press the Slide Sample button in the "Sample Modes".
- The system will go from editing the main presentation to work with templates. Here you can create your own layout of the corresponding button with the "Insert layout" title.
- A blank sheet is added with the title alone. It will be necessary to remove the above way to stay completely blank page.
- Now you can add any filling to your taste using the "Insert Filter" button. If it takes exactly a clean sheet, then you can do anything.
- It remains to give a slide name. To do this, serves a special button to "rename".
- After that, you can exit the template constructor using the "Close Sample Mode" button.
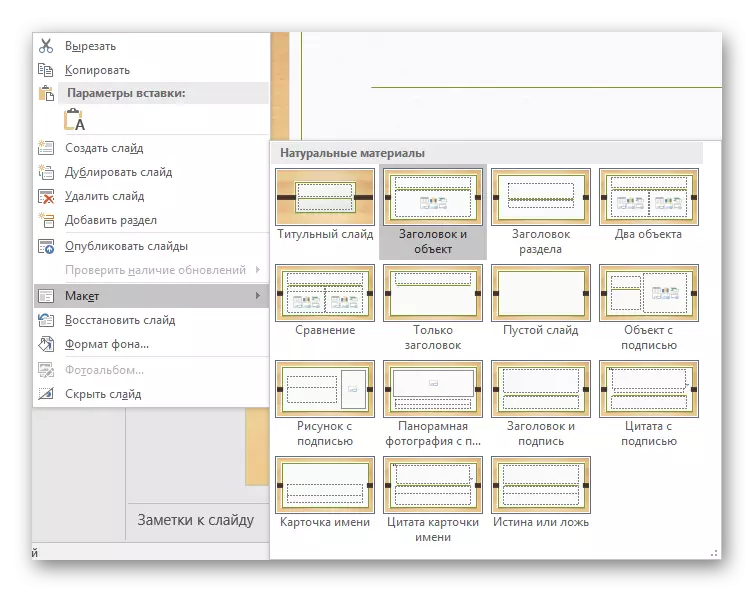
- Apply the created template to the slide is simple. It is enough to click on the right mouse button you need in the left list and in the pop-up menu select "Layout".
- Here you can choose any template. It remains only to find the previously created and click on it. Changes will occur automatically.


Such an approach is designed for systematic reconfiguration of slides into specific headlines.
Hiding header
You do not always need to remove the title. When creating a presentation, there may be a need for slides that have a header when editing and markup, but it is not visually at the demonstration. There are several ways to achieve such a result, but they are all nontrivial.Method 1: flaps
The easiest and most universal way.
- To hide the header, you will need to insert any corresponding image for the slide.
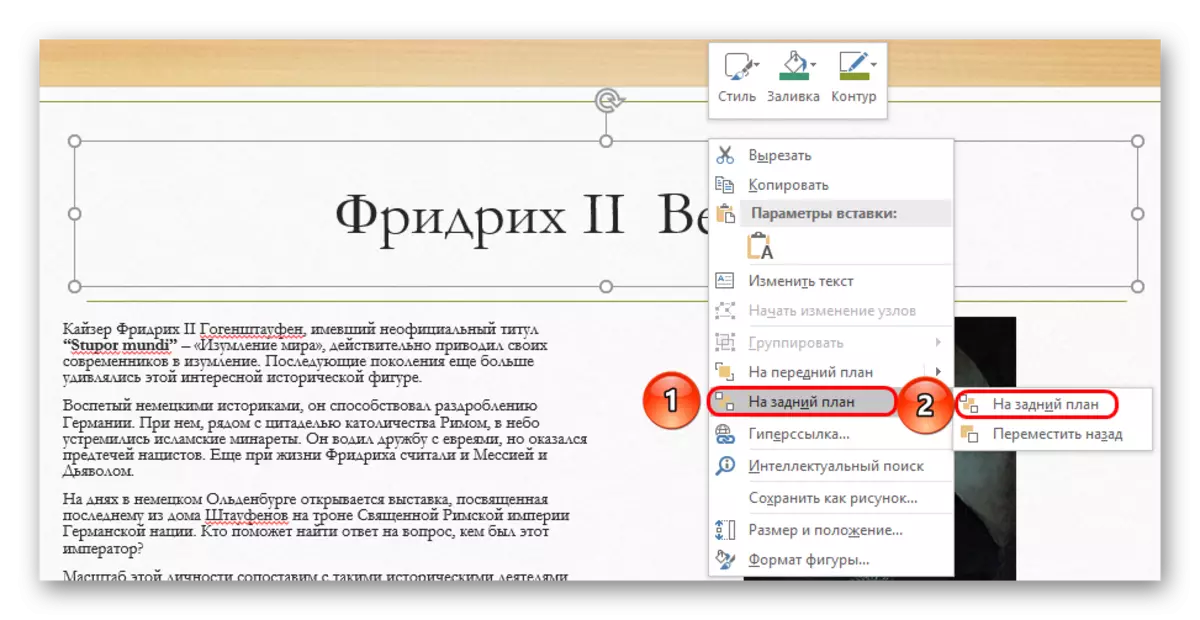
- Now there are two ways. You need to either click on the header border to select it, and then open the menu with the right mouse button. Here you need to choose "to the background".
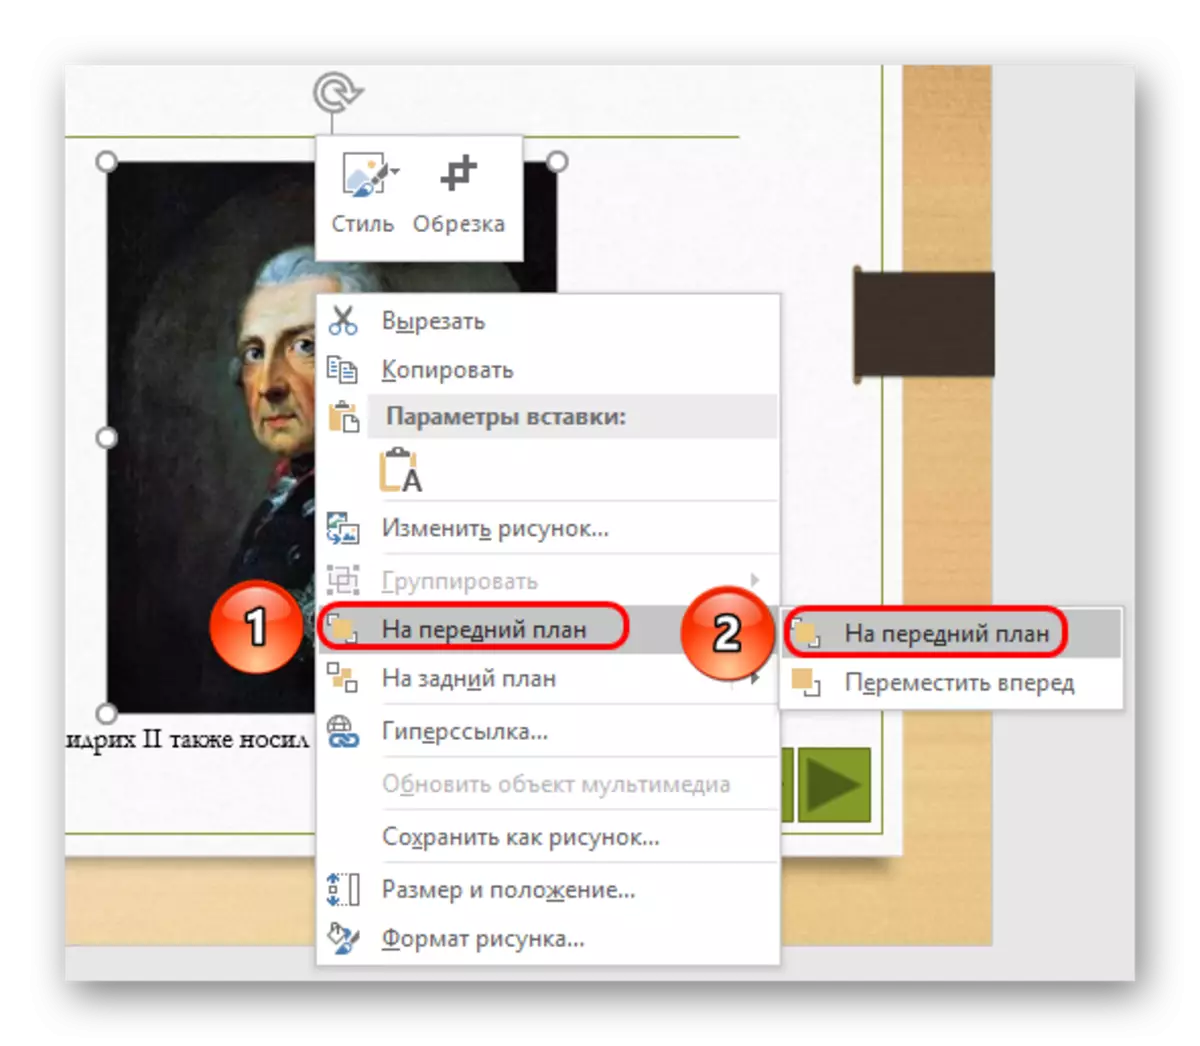
- Either right-click on the image and choose, respectively, "on the foreground".
- It remains only to put the picture above the title so that it is not visible.
- If necessary, you can change the size of the text and the header field so that the object becomes less.

The method is not suitable for situations where pictures are not provided on the slide. In this case, you can try to hide the field inserted by manually elements of the slide decor if they are.
Method 2: disguise under the background
Also a simple method, but it is not always easy to execute it.
You just need to change the color of the header text so that it merges with the background image.
Lesson: Change text color in PowerPoint

When viewing nothing will be seen. However, it will be difficult to implement the method if the background is not monophonic and has a difficult for accurate selection of the shade.

Can be useful tool "Pipette", which is located at the bottom of the color settings of the text. It allows you to accurately choose a shade under the background - it is enough to choose this function and click on any place of the background image. For text, the exact shade will automatically be selected, similar to the back.
Method 3: Display
This method is universal in cases where the described above is difficult to perform.
You can simply drag the header field abroad slide. As a result, you need to achieve the area to be completely outside the page.

When viewing it will not be displayed - the result is achieved.
The main problem here is that the displacement and stretching of the workspace on the slide may cause discomfort.
Method 4: Embedding to Text
A little more complex method, however, it looks much better than the rest.
- The slide must have an area with some text.
- First you need to reconfigure the title so that it has the size and style of the font, like the main text.
- Now you need to choose a place where you can insert this section. In the selected place, it is necessary to clear the space to insert with the "Space" or "Tab".
- It remains only to insert the header smoothly so that it all looks like a single data block.


The problem of the method is that the header is not always such that it can be harmoniously embedded in the text area.
Conclusion
It is also worth noting that the slide remains unnamed if the header field is simply not filled. However, it may interfere with the placement of other objects. So professionals are usually advised to truly delete this area if necessary.