
The power supply is needed to supply electricity to the motherboard and some of its components. In total, there are 5 cables for connecting, each of which has a different number of contacts. Externally, they differ from each other, so they must be connected to strictly defined connectors.
Read more about connectors
The standard power supply has only 5 wires with different characteristics. Read more about each:
- 20/24-pin wire is required to feed the motherboard itself. It can be distinguished by characteristic size - this is the largest module of all that go from BP;
- 4 / 8th pin module is used to connect to a separate power to the cooler with the processor;
- 6/8 Contact module for the video card;
- The wire for nutrition of SATA hard drives is the thinnest of all, as a rule, is different from the rest of the cable color;
- Additional wire for feeding the Molex standard. We are needed to connect old hard drives;
- Connector for powering a drive. There are models of power supplies, where there is no such cable.
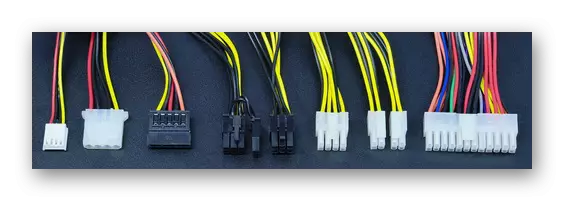
For the normal operation of the computer, you must connect at least the first three cables.
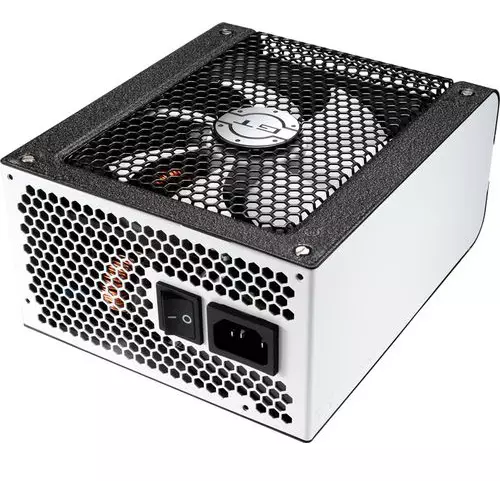
If you have not yet purchased a power supply, then you need to make sure that it matches your system as much as possible. To do this, compare the power supply power and energy consumption by your computer (first of all, the processor and the video card). We still have to find a power supply under the form factor of your motherboard.
Step 1: Installation of the Power Supply
Initially, you just need to fasten the power supply on the inner surface of the computer case. For this, special screws are used. Step-by-step instruction looks like this:
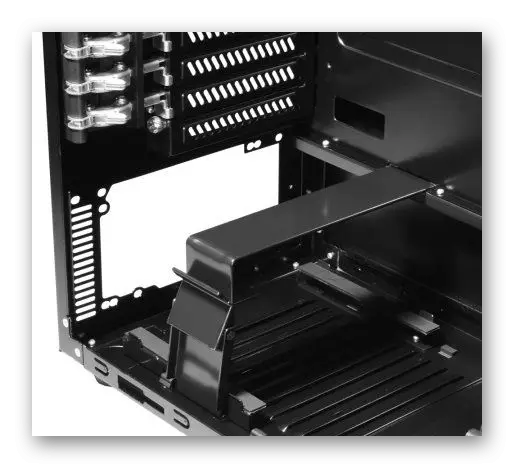
- To begin with, disconnect the computer from the network, remove the side cover, make cleaning from dust (if required) and dismantle the old power supply. If you just bought the case and installed a motherboard with the necessary items in it, then skip this step.
- Almost all the housings have special places for the power supply. Install your BP there. Be sure to note that the fan from the power supply is opposite the special opening in the computer case.
- Try to fix the BP so that it does not fall out of the system, while you will fasten it with screws. If you fix it in a more or less stable position, it does not work, then hold your hands.
- Tighten the screws on the BP on the back side of the system, so that it is well fixed.
- If there are holes for screws outside, then they also need to be spinning.

Stage 2: Connection
When the power supply is enshrined, you can start connecting the wires to the main component of the computer. Prior to the connection looks like this:
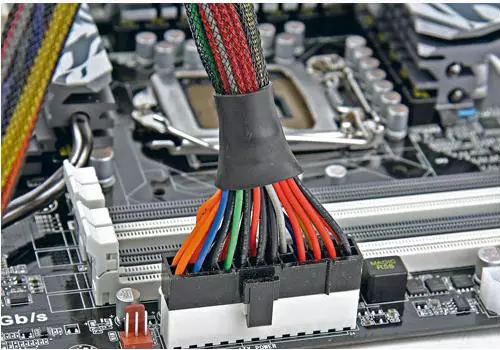
- Initially connects the largest cable for 20-24 contacts. Find the largest connector (most often it is white) on the motherboard for connecting this wire. If the number of contacts is suitable, it will be installed without any problems.
- Now connect the wire to power the central processor. It has 4 or 8 contacts (depends on the power supply model). It is very similar to a cable for connecting to a video card, so in order not to be mistaken, it is desirable to study the documentation for the motherboard and BP. The connector for the connection is located either near the largest connector for nutrition or next to the processor socket.
- Similarly, with the 2nd step, connect to the video card.
- To make the computer when turned on, you start loading the operating system, you must connect to BP and hard drives using SATA cable. It has a red color (black plugs) and is very different from the rest of the cables. The connector where you need to insert this cable is on a rigid disk, at the bottom. Old hard drives are powered by Molex cables.
- If there is a need, you can also save the drive, connecting the desired cable to it (cables). After connecting all the wires, try turning on the computer using the button on the front panel. If only collect PCs, before that, do not forget to connect the front panel itself.


Read more: How to connect the front panel to the maternal card
Connect the power supply is not too difficult, but this process requires accuracy and patience. Do not forget that the power supply must be selected in advance, adjusting to the requirements of the motherboard to ensure maximum performance.