

ASUS smartphones are deservedly enjoy a high level of demand among buyers of modern devices, including at the expense of excellent performance of most of their functions. At the same time, in any device you can find shortcomings, especially in the programmatic part of it. The article we will talk about one of the most popular solutions among the smartphones of the Taiwanese manufacturer ASUS - model Zenfone 2 Ze551ml. Consider how the software is installed in this phone in various ways.
Before switching to manipulations with the software part of the device, it should be noted, ASUS Zenfone 2 Ze551ML is quite protected from foreign intervention in a smartphone based on an Intel processor. Understanding the processes occurring, as well as preliminary familiarization with all the steps of instructions will help predetermine the success of future procedures.
Clear execution of instructions leads to minimization of possible negative consequences. At the same time, no one is responsible for the results of manipulations conducted by the user with their smartphone! All the following is performed by the owner of the device at their own peril and risk!
Preparation for the firmware ZE551ML
Before proceeding with procedures involving the interaction of special programs and sections of the device's memory, as in all other cases, it is necessary to prepare. This will allow the process to quickly and get the expected result - a flawlessly working device Asus Zenfone 2 Ze551ML with the desired version of software.

Step 1: Install Driver
To work with the address under consideration, almost all methods use PCs. To pair your smartphone and computer, as well as the correct interaction of the device with applications, you need drivers. Be sure to be needed by the ADB and FastBoot drivers, as well as Intel Isocusb Driver. Packets of drivers used in manipulations in methods below are available for download by reference:Download Drivers for ASUS Zenfone 2 Ze551ml
About the process of installing drivers required when working with programs for the Android firmware, is told in the article:
Lesson: Installing Drivers for Android Firmware
Step 2: Backup Important Data
Before moving to the execution of the following instructions, it should be understood that the firmware is manipulations with the device memory sections and many operations imply their full formatting. Therefore, it is necessary to conduct procedures that ensure the safety of user data by any acceptable / affordable way. On how to save the information contained in the android apparatus, is told in the article:
Lesson: how to make a backup Android device before firmware

Step 3: Preparation of the necessary software and files
In the ideal case, the software that will be needed for manipulation must be loaded and installed in advance. The same applies to the necessary firmware files. We download and unpack everything into a separate folder on the disk from:, the name of which should not contain spaces and Russian letters. To a computer that will be used as a tool for conducting manipulations, there are no special requirements, the only thing - the PC must be good and running Windows 7 or higher operating system.Firmware
As for most other android devices, several methods for installing software are applicable to Zenfone 2. The location of the described methods in the article - from the simplest to a sufficiently complex one.
Method 1: Reinstall software and update without using PC
This method is considered to be an official solution to the issue of reinstallation of software and is quite simple, and most importantly - practically safe. Suitable for updating software if OTA updates arrive for various reasons, as well as to reinstall Android without losing user data. Before switching to manipulations, it should be noted that for android devices ASUS exist different types of firmware.

They are presented, depending on the region for which a smartphone is made:
- Tw. - For Taiwan. Contains Google-Services. From unpleasant features - the programs in Chinese are influenced;
- CN. -The order of China. Does not contain Google services and replete Chinese applications;
- Cucc. - Operator of Android from China Unicom;
- JP. - Software for users from Japan;
- WW. (WORLD WIDE) is deciphered - for asus smartphones implemented worldwide.
In most cases, the Ze551ml sold on the territory of our country is initially equipped with WW software, but not uncommon and exception. To find out what type of firmware is installed in a specific instance of the device, you can watch the assembly number, going along the path in the phone menu: "Settings" - "On the phone" - "System Update".

- Download the update for your region from the official site asus. OS - "Android", the "Firmware" tab.
- When you select the downloadable update, you should be guided not only by the region, but also the version number. The version number of the file used for the firmware should be higher than installed in the phone.
- Copy the resulting file * .zip. In the root of the internal memory of the smartphone or the root of the memory card installed in the apparatus.
- After copying, we simply wait for the appearance on the ZE551ML screen notification about the availability of the new software version. Until the appearance of the corresponding message, 10-15 minutes may pass, but usually everything happens instantly.
- If the notification does not come in any way, you can restart the device in the usual way. As soon as the message appears, click on it.
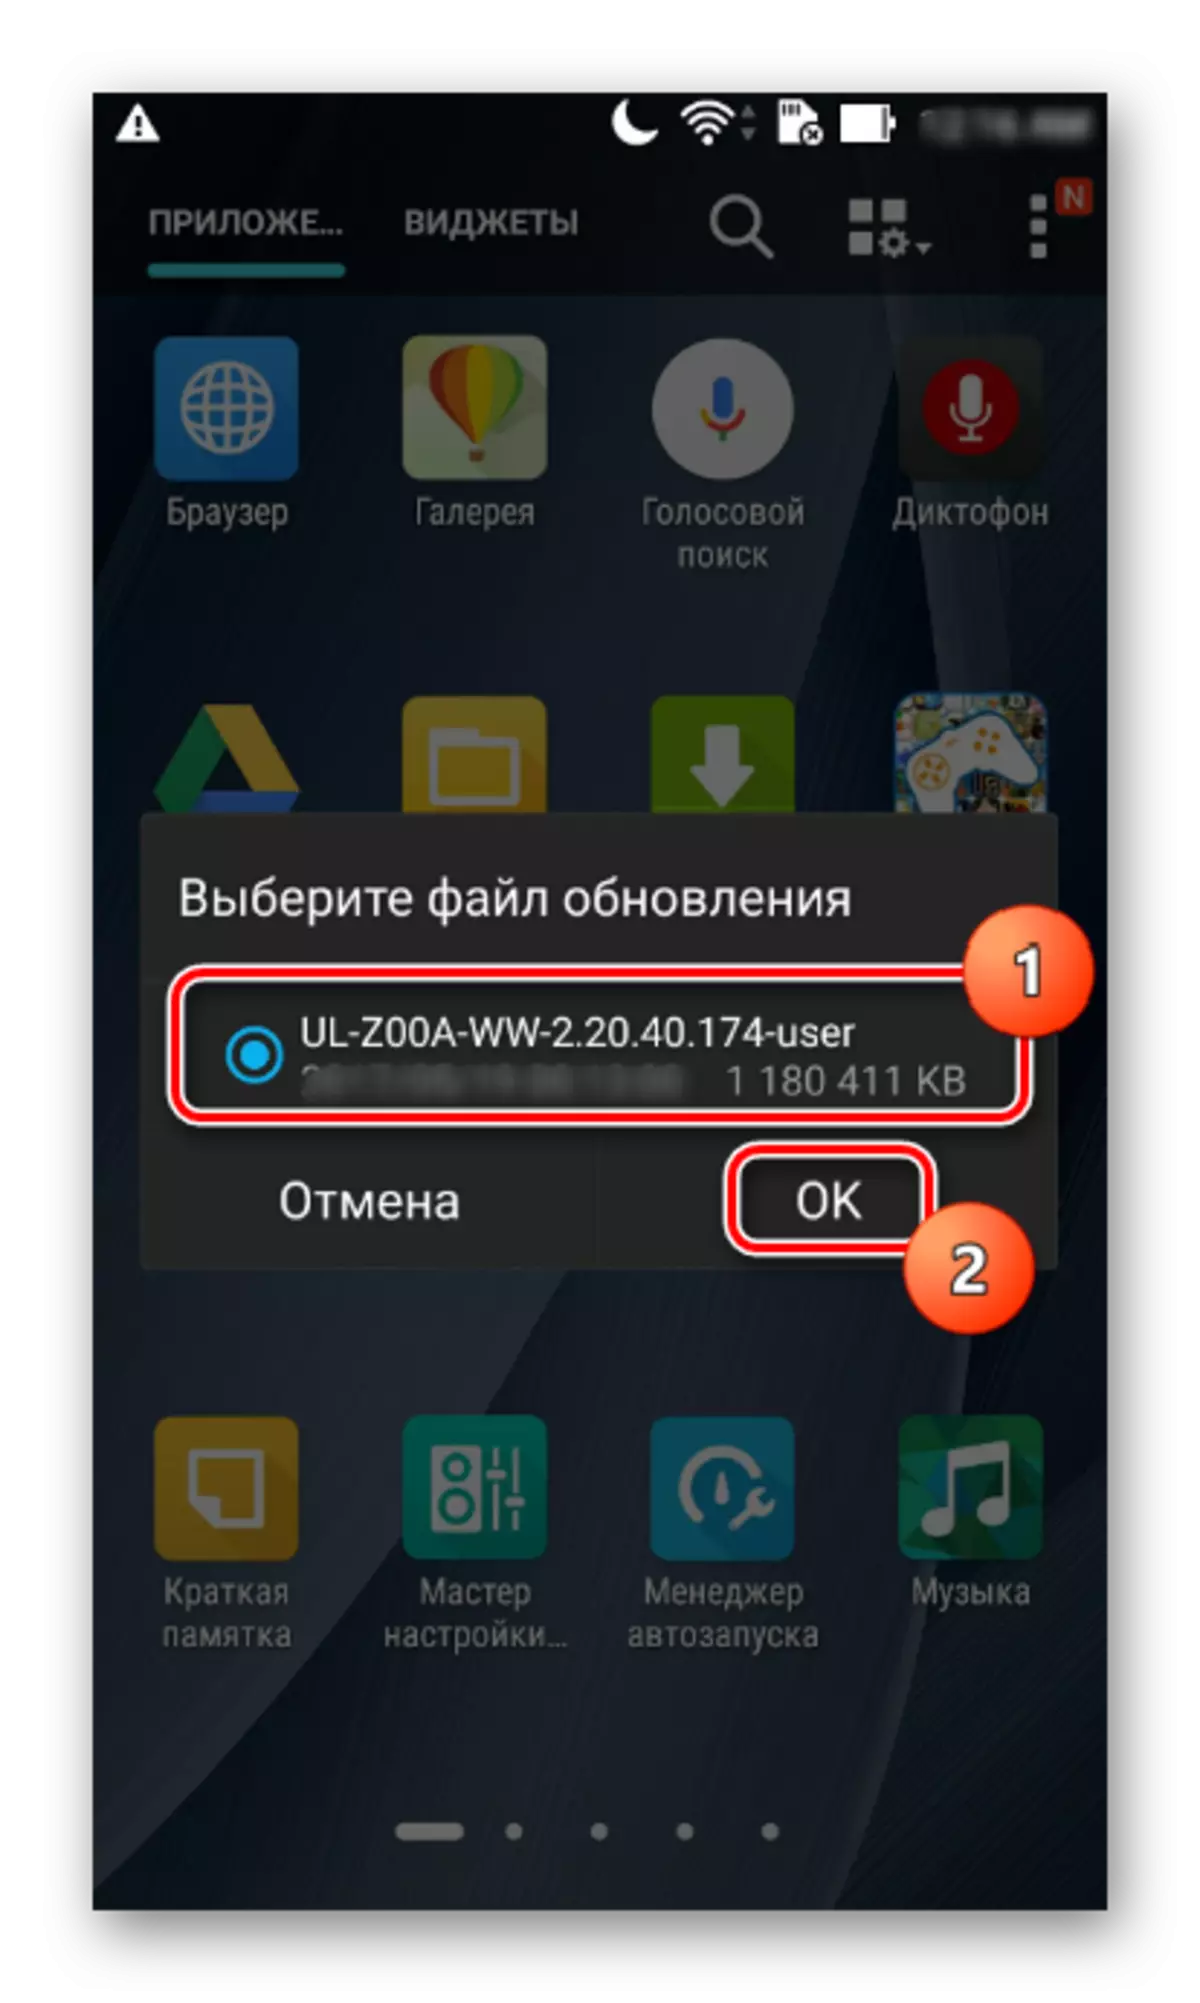
- A window appears with a selection of the update file. If several packets are copied to the memory, select the desired version and click the "OK" button.
- The next step is to confirm the notification of the need for a sufficient charge of the device accumulator. It is better that the device is fully charged. We are convinced of this and press the "OK" button.
- After pressing the "OK" button in the previous window, the device will automatically turn off.
- And boot in software update mode. The process passes without user intervention and is accompanied by animation, as well as a fill indicator of execution.
- Upon completion of the installation operation of the new software version, the device will automatically restart android.

Download software update for ASUS ZE551ML from the official website


Code 2: ASUS Flashtool
For full flashing of smartphones, ASUS Flash Tool (AFT) is used to fulfill the company ASUS Flash Tool. This method of installation of software in devices is quite fundamental and can be used in some cases. The method is suitable not only for the usual update, but also for the complete reinstallation of android with the preliminary cleaning of the device memory sections. Also, using the method, you can replace the software version, including rollback to a higher solution, change the region, as well as restore the device's performance, when other methods are not applicable or not triggered.

As you can see, working with the memory of the device via AFT is a practically universal solution. The only factor impeding its widespread use is a rather difficult process of searching for RAW firmware used when working with a program, as well as some failures that sometimes occur in the application. As for the ZE551ML considered, the RAW file from the example below can be downloaded by reference:
Download RAW firmware for ASUS ZE551ML Android 5
In addition, you can use the search for RAW on the official forum. Asus Zentalk..

Download RAW images for ASUS ZE551ML from the official forum
To successfully implement the manipulation with ASUS ZE551ML, it is recommended to use the RAW firmware version to 2.20.40.165 inclusive. In addition, we apply ASUS Flashtool version 1.0.0.17 . It is permissible to use new versions of the program, but the experience shows that in this embodiment errors in the process are not excluded. You can download the desired version of AFT here.
- We translate the device to the "bootloader" mode. To do this, turn off the smartphone completely and climb the "Volume +" button on the disabled device. Then, without releasing it, press the "Power" button and hold both buttons to a double vibration, after which we release "power", and "Volume +" continue to hold.
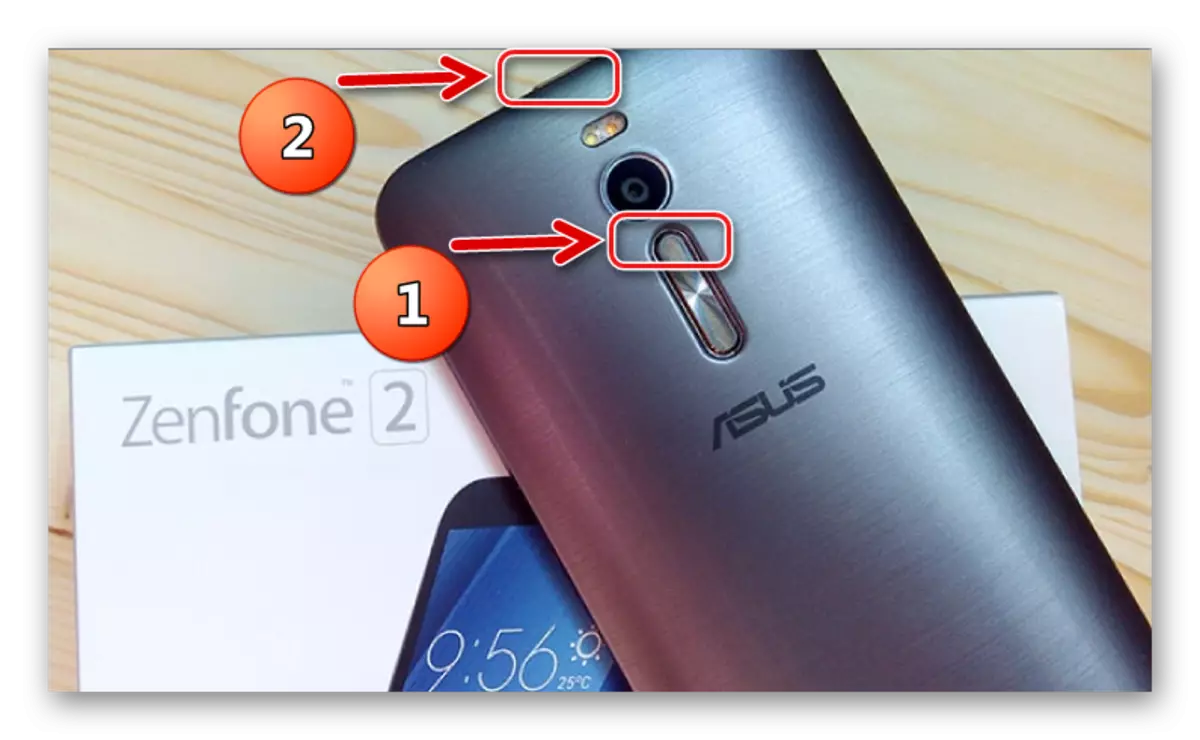
"Volume +" must be kept until the screen appears with the image of the robot and the mode selection menu.
- Install the drivers if not installed earlier. Check the correctness of their installation in the Device Manager, connecting the machine in the FastBoot mode to the USB port. There must be similar picture:
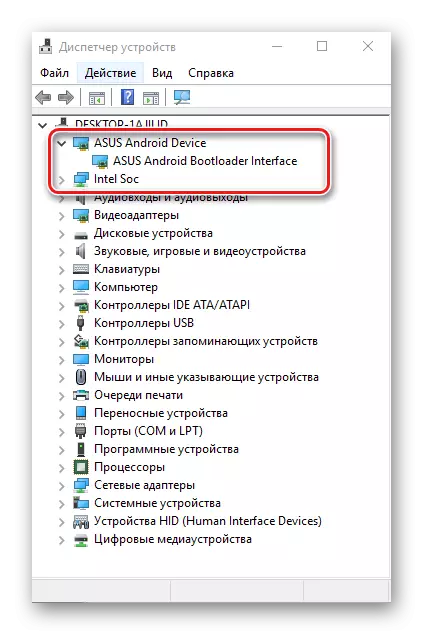
Those. The device "ASUS Android Bootloader Interface" is correctly determined. Making sure that you turn off the smartphone from the PC. From the "Bootloader" mode, we do not leave, all subsequent manipulations are carried out in this state of the device.
- We download, install

And launch ASUS Flash Tool.
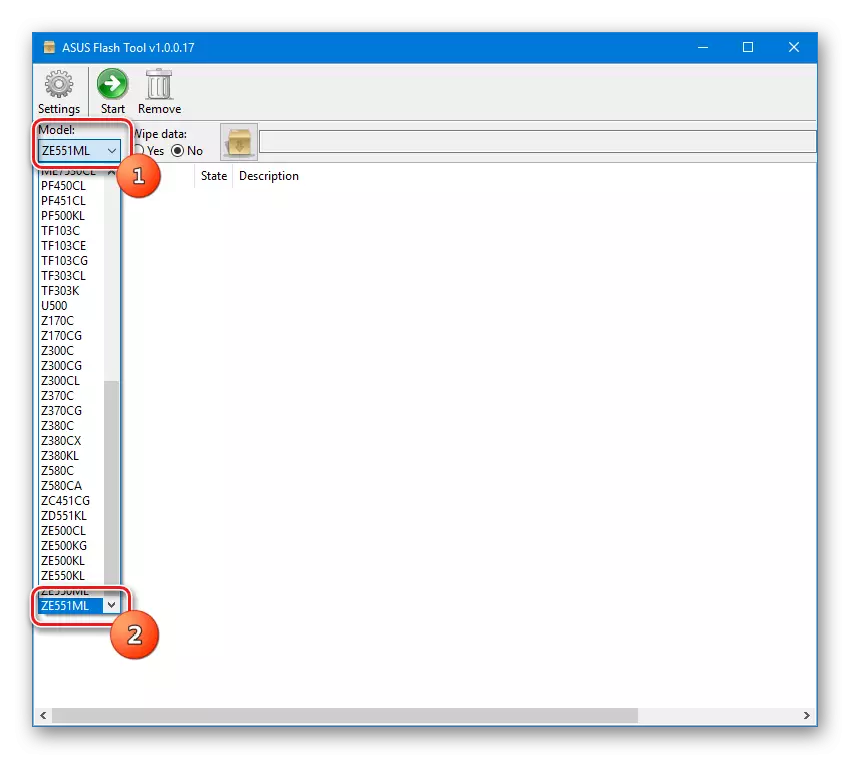
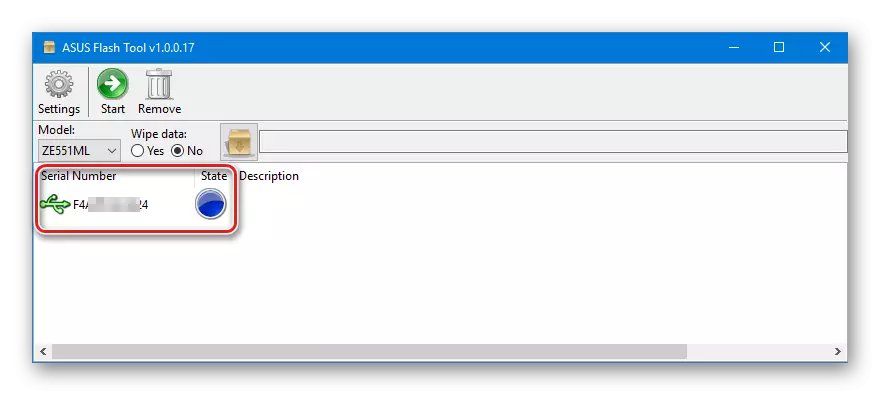
- In AFT, select the ZE551ML model from the drop-down list in the upper left corner of the window.
- We connect the smartphone to the USB port. After connecting to AFT, the serial number of the device must determine.
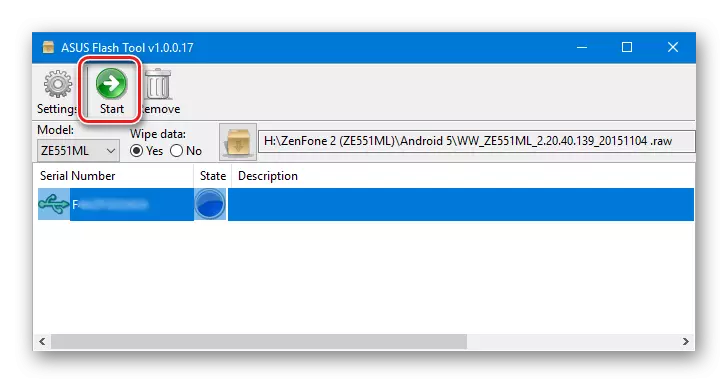
- Specify the path to the previously loaded RAW file. To do this, press the special button (1) in the program, in the operating window that opens, we find the desired file and confirm the selection by pressing the "Open" button.
- Everything is almost ready to start the process of recording information in the Section of the device's memory. It is recommended to clean the "DATA" and "Cache" memory sections before writing the image. To do this, we translate the "WIPE DATA:" switch to the "Yes" position.
- We allocate the serial number of the defined device with the click of the left mouse button along the corresponding string.
- Press the "Start" button at the top of the window.
- Confirm the need to format the "DATA" section by pressing the "Yes" button in the query window.
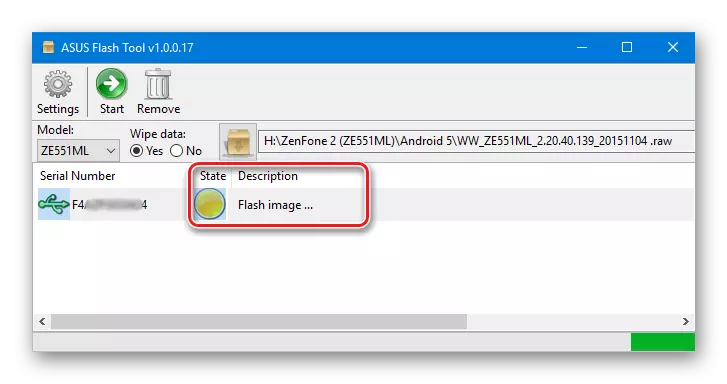
- The firmware process will begin. The circle near the serial number of the device is painted in yellow and "Flash Image ..." will appear in the "Description" field.
- We are waiting for the completion of the procedures. At their end, the circle near the serial number will be green and confirmation will be displayed in the DESRIPTION field: "Flash Image SuccessFully".
- Smartphone will restart automatically. You can turn it off from PC and wait for the appearance of the Android start screen. The first launch of ZE551ML after manipulations through ASUS Flash Tool is quite long.


Method 3: Factory Recovery + ADB
Another effective way to conduct manipulations with the sections of the ZenFone 2 memory is the use of a set of tools such as the factory recovery environment, ADB and FastBoot. This software installation method in a smartphone can be applied to roll back the software version or update. Also in some cases, using the instructions below, you can restore the non-working device.
Difficulties when applying the method may occur due to confusion of versions of the files used. Here you need to adhere to a simple rule. The device should have a recovery that corresponds to the version of the installed firmware. That is, in the case of the example below, if the purpose is to install WW-2.20.40.59. , you need the factory recovery from the same version of the firmware in format * .img. . All the necessary files that were used in the example below are available for download.
Load the software files and image of the recovery for Zenfone 2
- Download everything you need and unpack into a separate folder on a disk from:. File * .zip. containing software components to write to the memory sections of the smartphone are renamed firmware.zip. . Folder with files must have the following form.
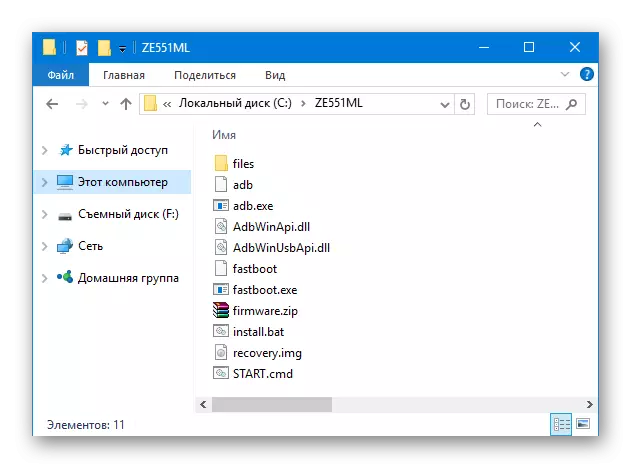
Those. Contain files adb.exe., FastBoot.exe., firmware.zip., recovery.img.
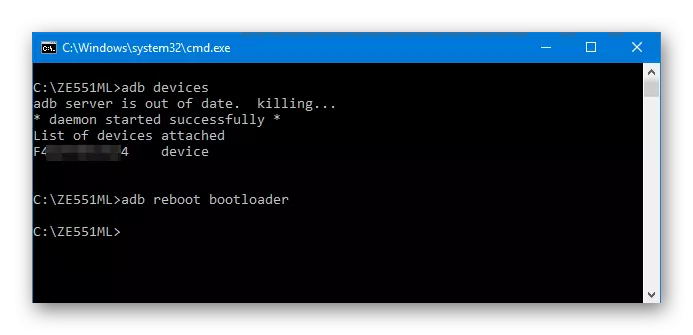
- We translate the phone to the "Bootloader" mode. This can be done by performing steps 1 and 2 from the installation method through the AFT described above. Either send to the device connected to the USB port via ADB - ADB Reboot-Bootloader.
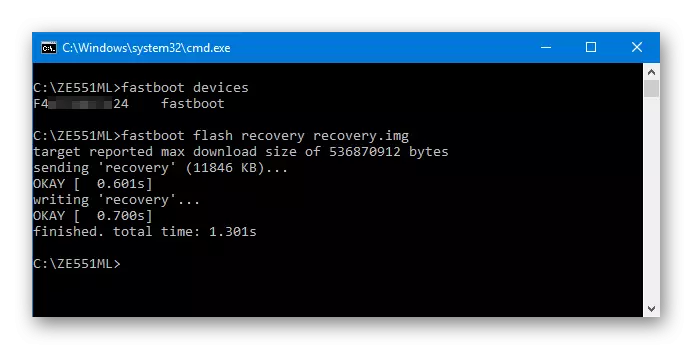
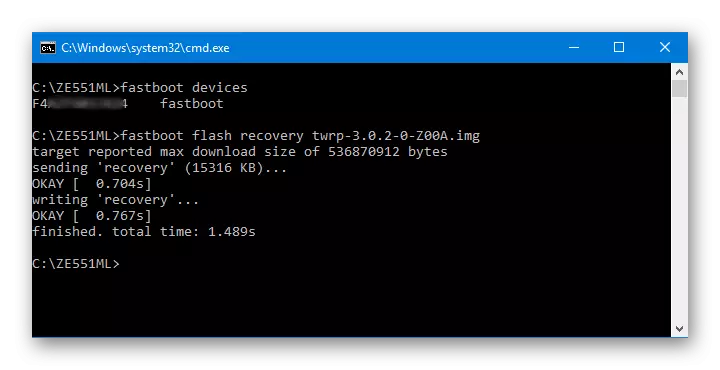
- After loading the machine in "Bootloader", connect the USB port machine and write down the recovery via FastBoot. Team - FastBoot Flash Recovery Recovery.img
- After appearing on the command line "Okay ... finished .." on the device, without turning off it from PC, the volume buttons select "Recovery Mode". By putting a selection briefly press the "Power" key on the smartphone.
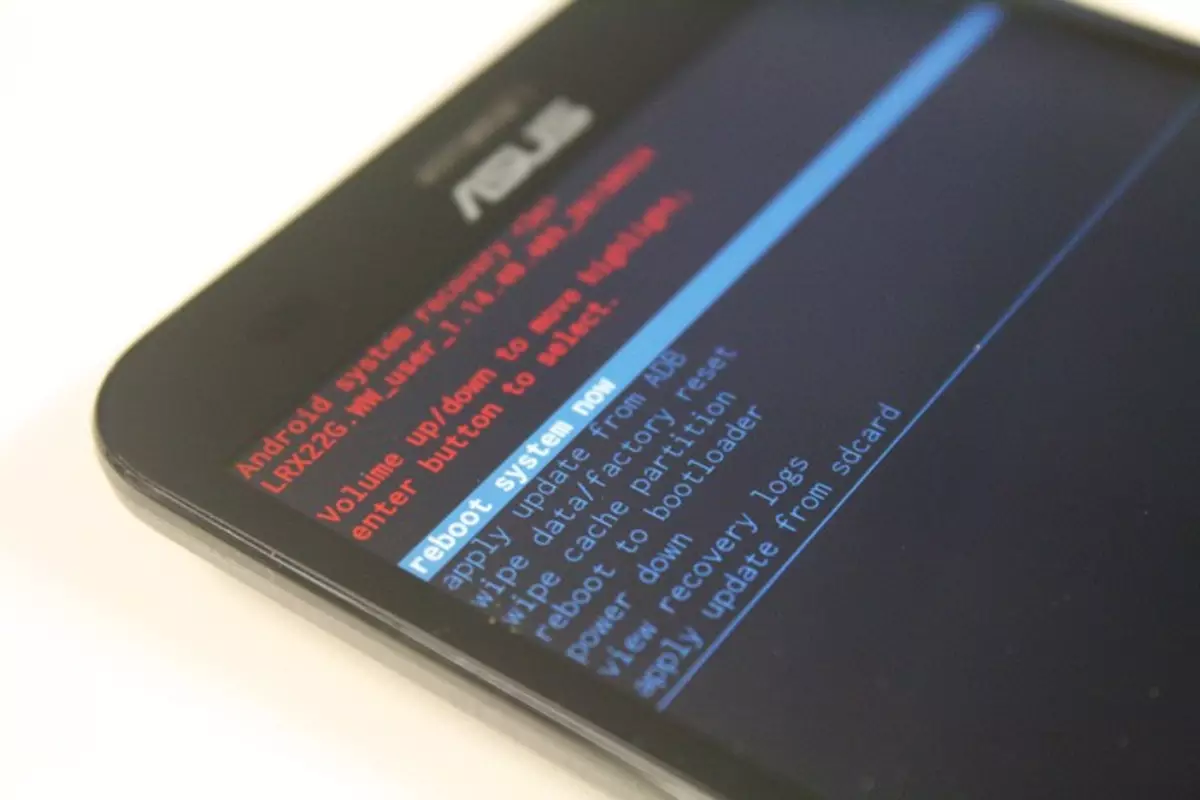
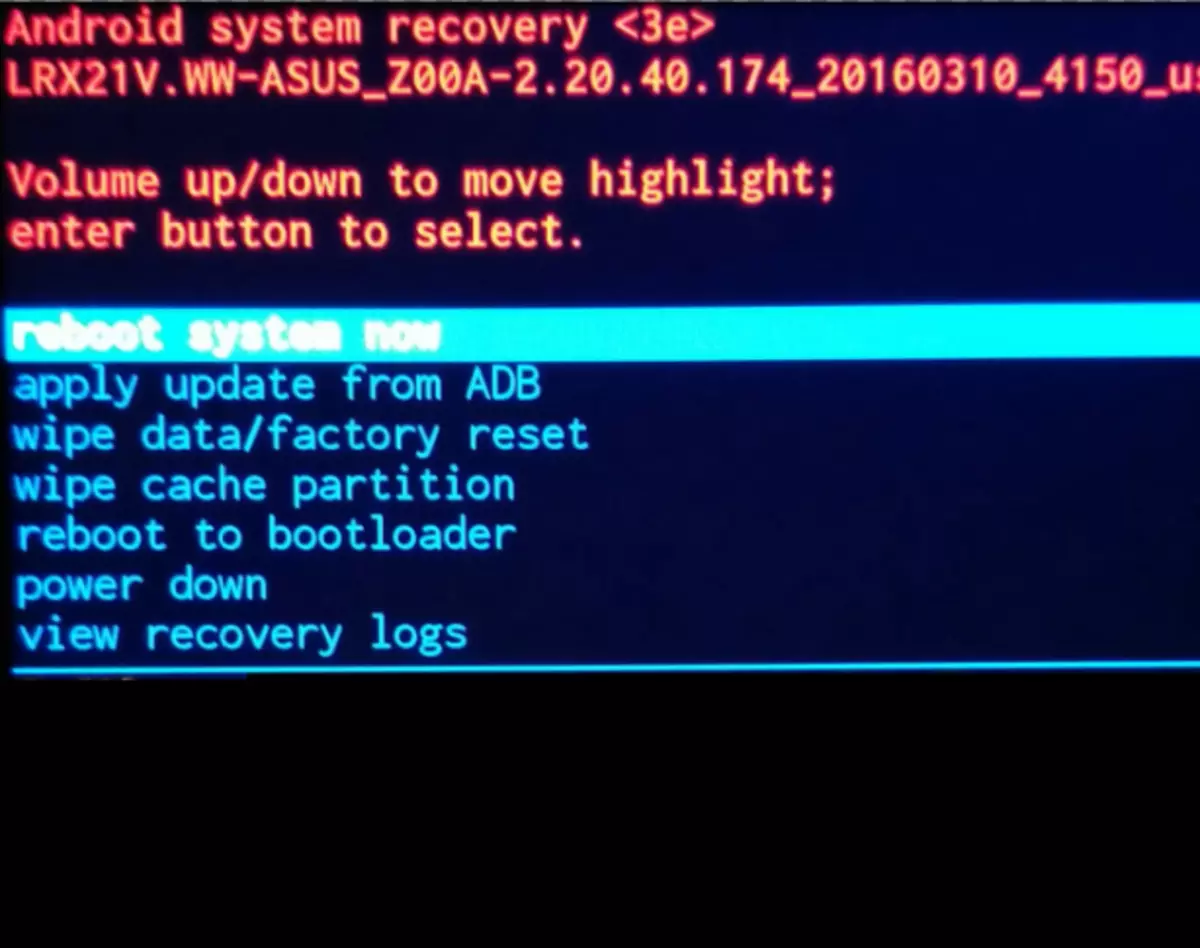
- The device will reboot. We are waiting for the appearance of an image of a small android on the screen with the inscription "Error".
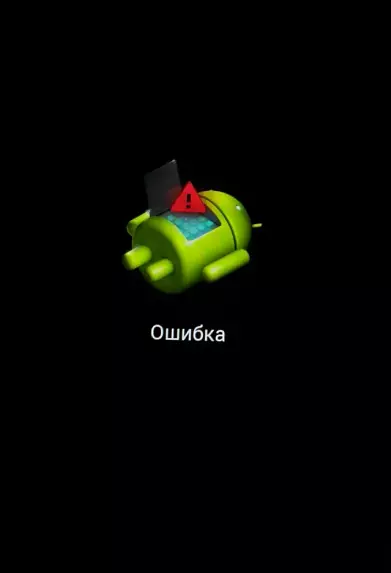
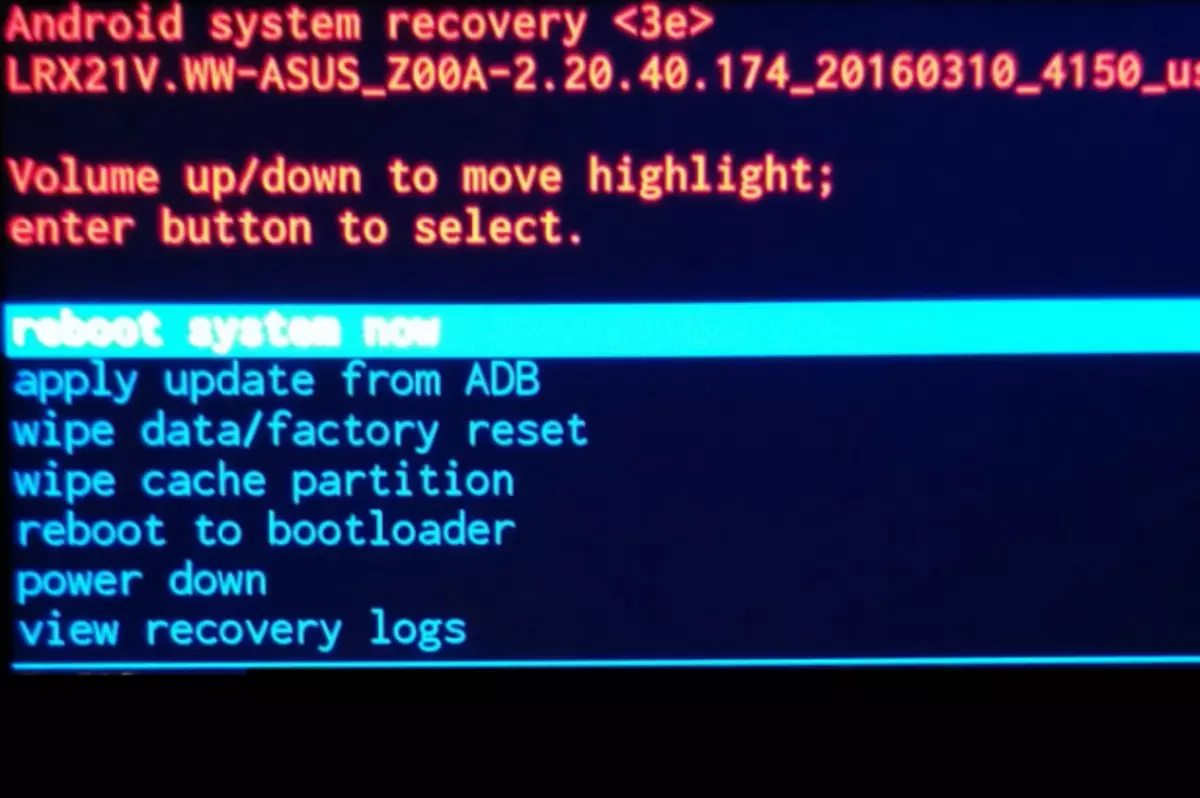
To see the Recovery menu items, hold the "Power" button on the smartphone and briefly press the "Volume +" key.
- Moving on the items of the recovery is carried out using the "Volume +" and "Volume-" keys, confirming the command selection is pressing the "Power" button.
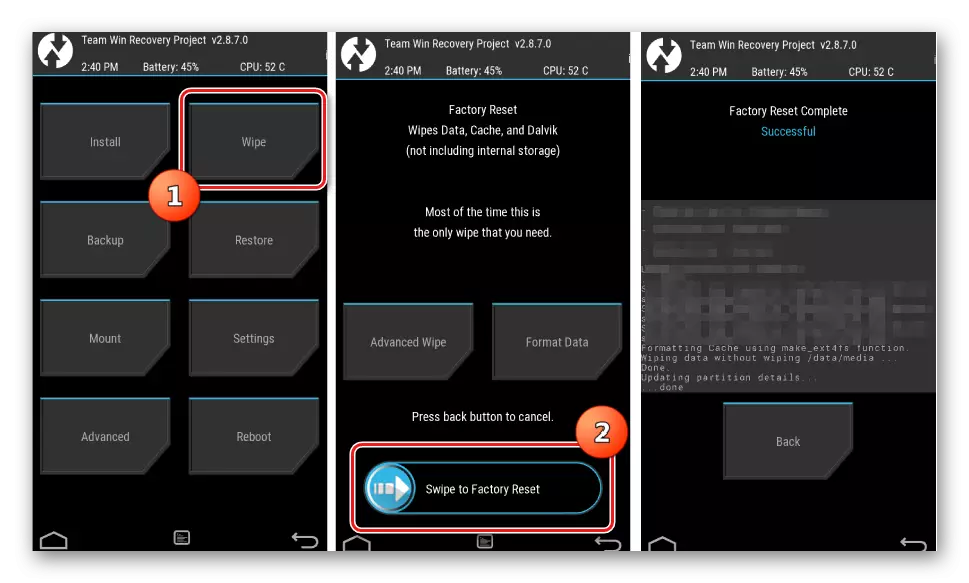
- It is advisable to spend wipe - the procedure for formatting the "DATA" and "Cache" sections. Select the appropriate item in the recovery environment - "WIPE DATA / FACTORY RESET".

And then confirm the start of the procedure - the item "Yes - Delete All User Data".
- We are waiting for the end of the cleaning process and go to write software in memory sections. Select the item "Apply Update From ADB"
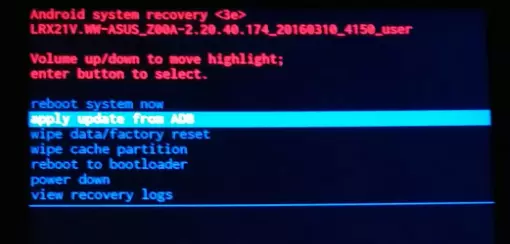
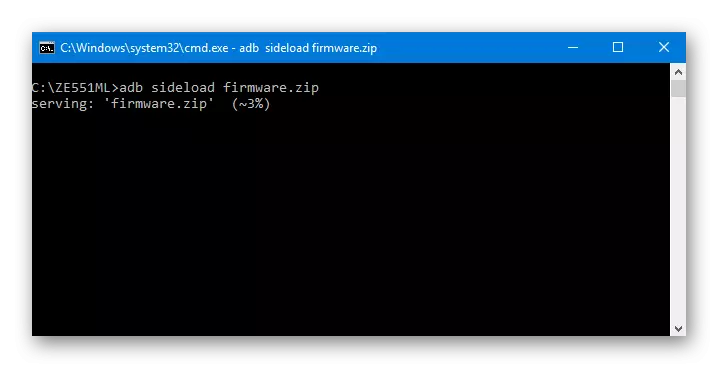
After the transition at the bottom of the phone screen, an inscription invitation will appear to write to the phone the corresponding package with via ADB.
- In the Windows command prompt, enter the ADB Sideload Firmware.zip command and press the Enter key.
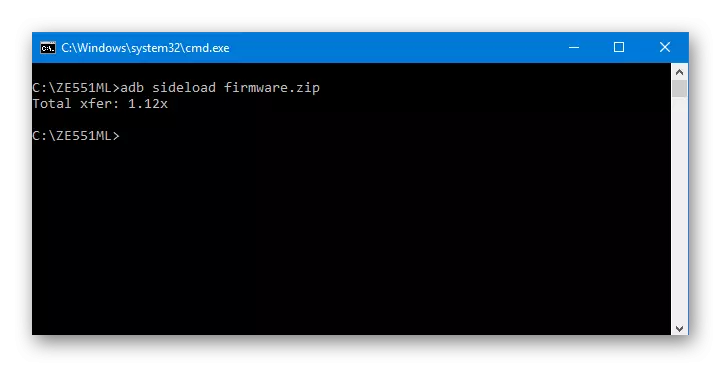
- A rather long process of transferring files to the memory partitions will begin. We wait for its completion. At the end of the procedure, "Total Xfer: 1.12x" will appear on the command prompt
- Installing software completed. You can turn off your PC smartphone and for the reliability to perform "Wipe Data / Factory Reset" again. Then reboot your smartphone by selecting the "Reboot System Now" item.
- The first launch is quite long, waiting for the download in Android the version that was sewn.


Method 4: Custom firmware
Installation of informal versions of Android has become an unusually popular way to fully replace the software of many smartphones. Without deepening in the transfer of advantages and deficiencies of custom, we note, for Zenfone 2, including the ZE551ML version under consideration, a variety of modified and fully modified versions of Android have been released.

The choice of one or another custom depends only on the preferences of the user and its needs. Installing all informal firmware is performed by the implementation of the steps below.
One of the most popular solutions today is selected for the example - the fruit of the work of the Cyanogen team. Unfortunately, not so long ago the developers stopped supporting their project, but at the same time used below Official Cyanogenmod 13 is one of the most stable customs for the apparatus under consideration today. You can download the desired file to install by reference:
Upload the latest version of Official Cyanogenmod 13 for ZE551ML
Step 1: Unlock bootloader
Asus, Zenfone 2 smartphone bootloader is blocked by default. This factor makes it impossible to install various modified recovery environments, and, consequently, custom firmware. At the same time, the popularity of such solutions is certainly realized by the developers and the user, if desired, can unlock the loader, and the official way.
The official way to unlock the ASUS ZE551ML bootloader is available only on Android 5. Therefore, if a newer version is installed, we flash the fifth android via AFT. We perform the steps of the method 2 described above in this article.
- Download you need to unlock on Unlock Device App from the official ASUS website. Tab "Utilities".
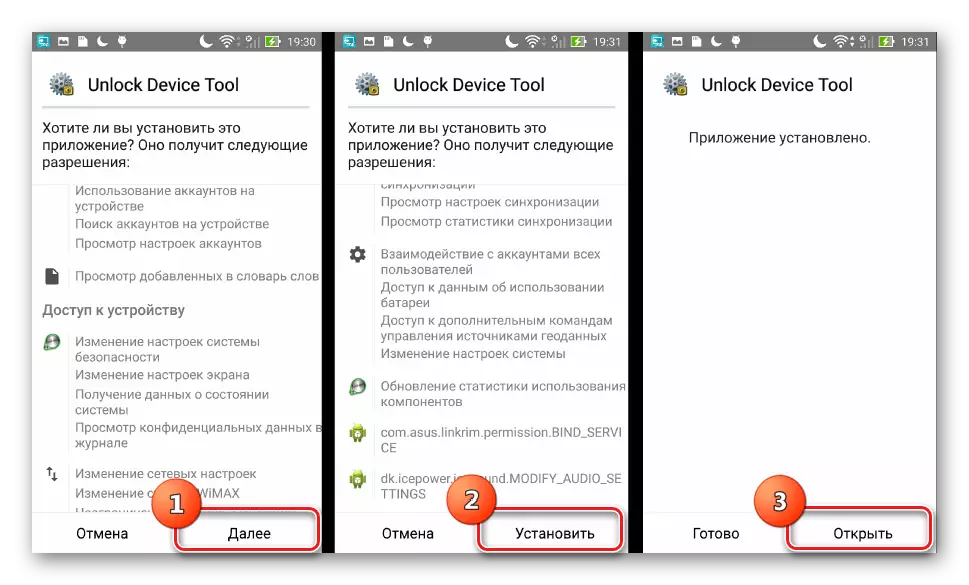
- Let's place the received APK file in the memory of the device.
- Then install. It may be necessary to provide permission to install applications from unknown sources. To do this, go along the path "Settings" - "Security" - "Unknown Sources" and give a system the possibility of carrying out operations with applications received not from the playing market.
- Installing Unlock Device Tool is very fast. Upon completion, run the utility.
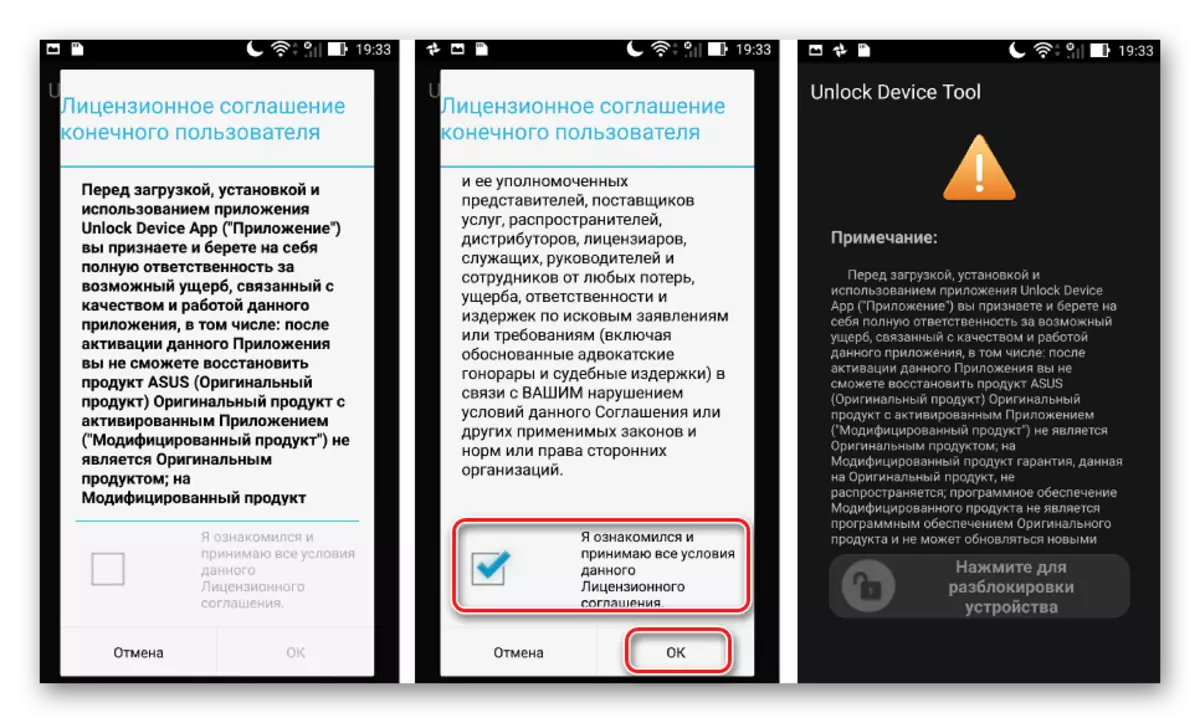
- We read about risks, aware of them, accept the terms of use.
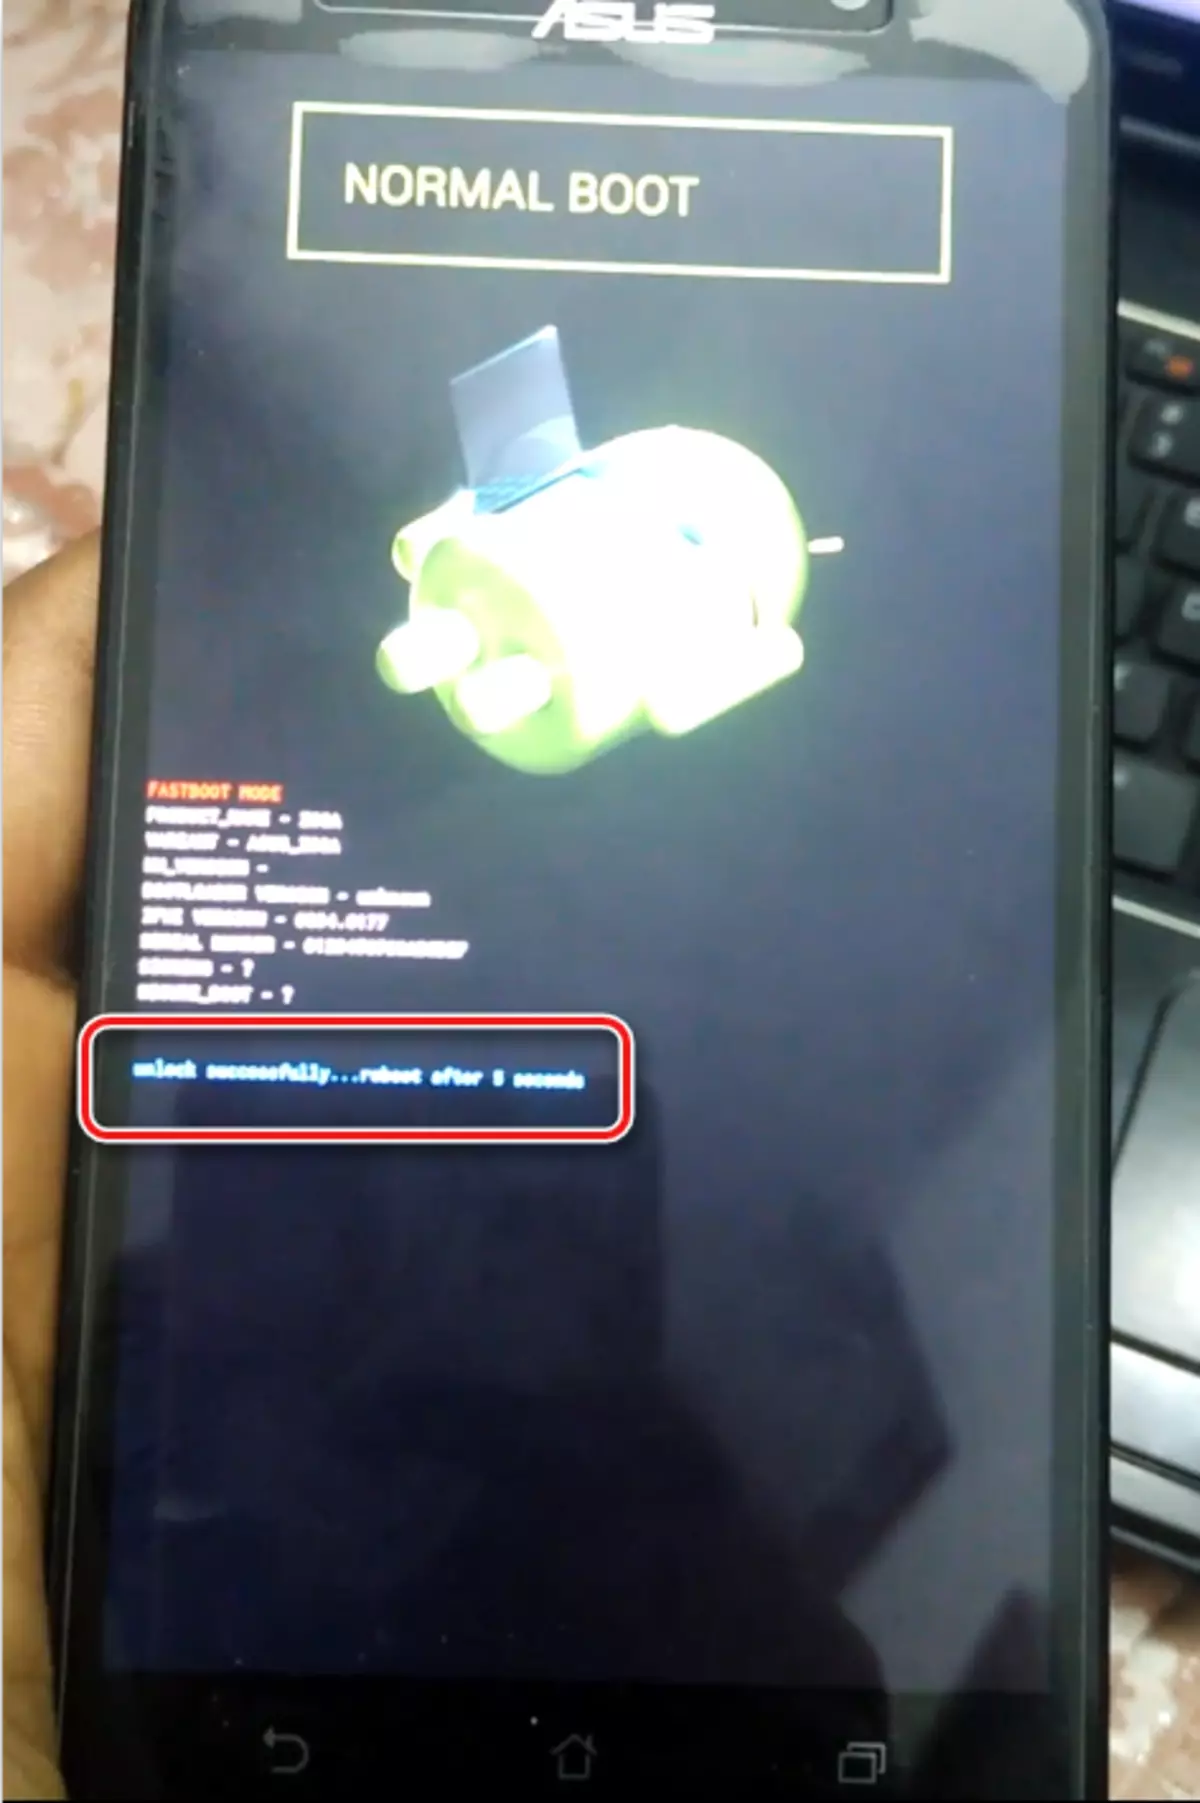
- Before starting the procedure, you must once again confirm the application awareness of your own actions, setting a tick to the appropriate check box, and then click the start button of the unlock procedure "Click to start the unlock procedure". After pressing the "OK" button in the last notification window, the smartphone will reboot to the "bootloader" mode.
- The unlocking process passes automatically. After a short manipulation, the inscription "Unlock SuccessFully ... Reboot After ..." appears.
- Upon completion, the smartphone reboots already with a unlocked loader. Confirmation of unlocking is a change in the color of the loading animation when turned on, with black on white.
Load Unlock Device App for ASUS ZE551ML from the official website


Step 2: Installation TWRP
To record custom firmware in the ZenFone 2 memory sections, you will need a modified recovery. The most suitable solution is Teamwin Recovery. In addition, on the developer's website there is a formal version of the medium for Zenfone 2 Ze551ml.

Upload the TWRP image for ASUS ZE551ML from the official website
- Load the image of the SWRP recovery and save the file to the folder with ADB.
- Install TWRP via FastBoot, performing steps similar to the above-described actions No. 2-3 of the ZE551ML firmware method through the factory recovery + ADB.
- Loading in TWRP. Methods of entrance are similar to the described instructions for the factory recovery.
Step 3: Installing CyanogenMod 13
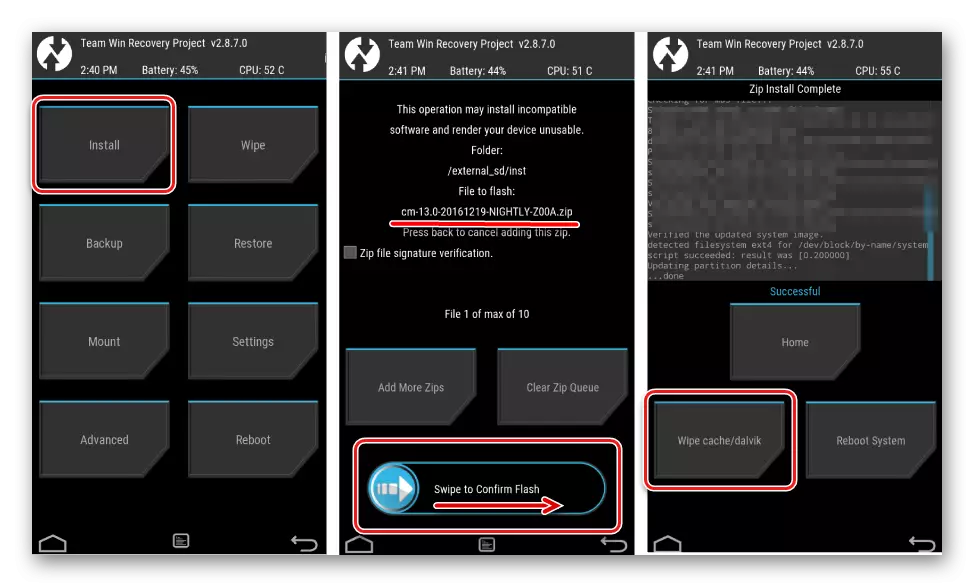
To install any custom firmware in ZenFone 2, it is necessary to fulfill standard actions in a modified recovery environment, i.e. Write information from the ZIP file to device memory sections. Details of the firmware via TWRP are described in the article on the link below. Here we will dwell only on some nuances for ZE551ML.
Lesson: how to flash an Android device via TWRP
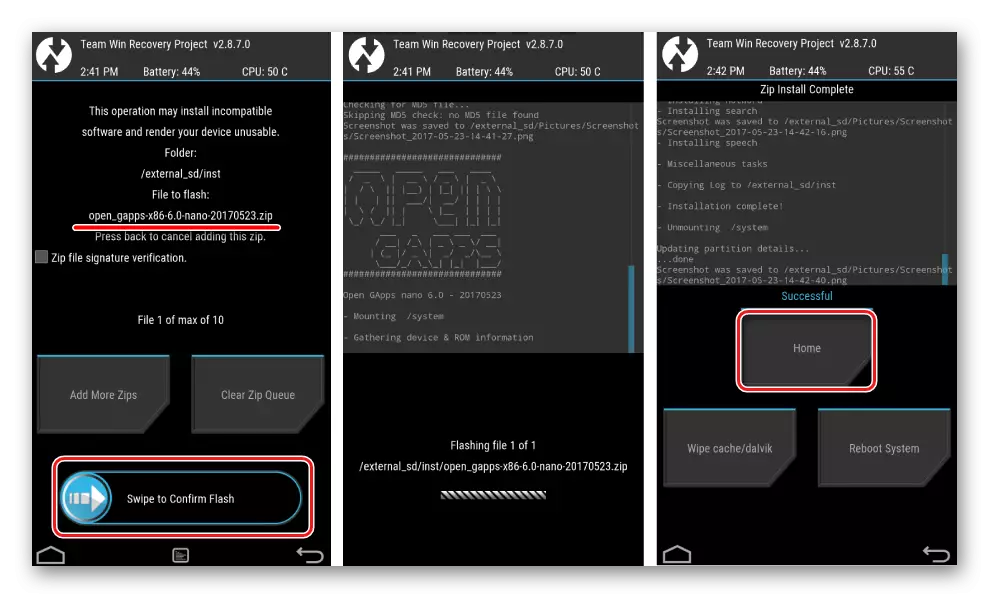
- We download the zip file with the firmware and place it in the internal memory of the device or on the memory card.
- Be sure to go before moving on the custom and, if necessary, return to the official firmware, we format the sections "DATA" and "Cache".
- Install CyanogenMod 13 by selecting "Install" in the recovery.
- CyanogenMod does not contain Google services. If you need to use them, you need to flash a special package of Gapps. You can download the desired file by reference:
Download Gapps for CyanogenMod 13
When using other customs that are based on another version of Android, or if you wish / need to install an extended list of applications from Google, download the desired package from the official site of the OpenGapps project on the link:
Download OpenGapps from the official site
To get the right packet with gapps, in the case of ZenFone 2, you set the switch on the download page:
- In the field "Platform" - "x86";
- "Android" - the version of the OS, on which the caste is based;
- "VARIANT" is the composition of the application package and Google services.
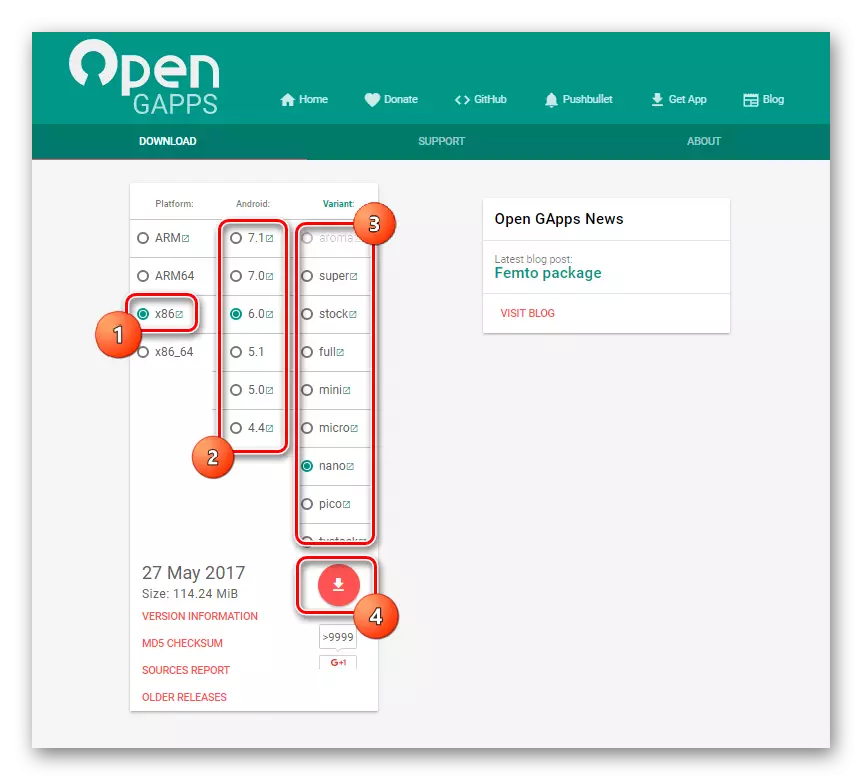
And click the button "Download" (4).
- Actions to install GAPPS package via TWRP are similar to installation of any other components of the system through a modified recovery.
- Upon completion of all manipulations, we clean the sections "Data", "Cache" and "Dalvik" again.
- We reboot into a modified android.
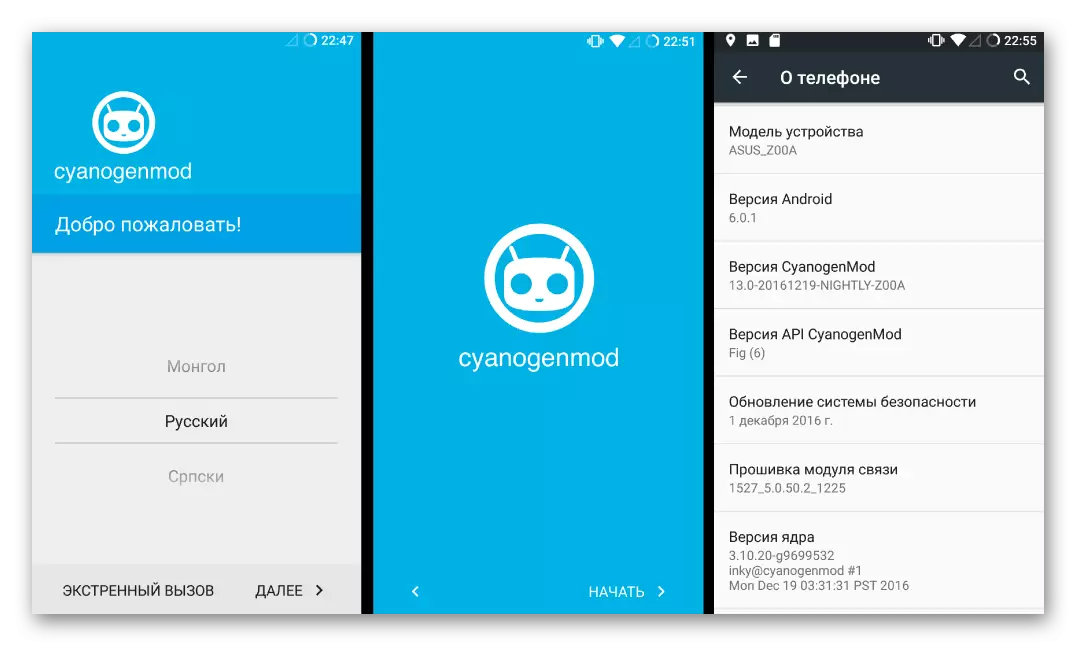
In conclusion, I would like to note, manipulation with the ASUS ZenFone 2 Ze551ml software part are not as complex, as it may seem at first glance. It is important to pay due attention to the preparation of the process and clearly implement recommendations. In this case, the procedure for installing a new software in a smartphone will not take much time and bring the desired results.