
Adobe Illustrator graphic editor is the product of the same developers as Photoshop, but the first is more provided for the needs of artists and illustrators. It has both functions that are not in Photoshop, and does not have those that are in it. Crimping images in this case refers to the latter.
Editable graphic objects can be easily transferred between Adobe software products, that is, you can cut the image in Photoshop, and then transfer it to an illustrator and continue with it. But in many cases faster it will trim the picture in the illustrator itself, let it be more difficult.
Tools for trimming in illustrator
By does not have such a tool as "trimming", but remove the extra elements from the vector figure or from the image using other program tools:- Artboard (change in the size of the workspace);
- Vector figures;
- Special masks.
Method 1: ArtBoard tool
With this tool, you can crop the work area along with all objects there. This method is excellent for simple vector shapes and simple images. The instruction looks like this:
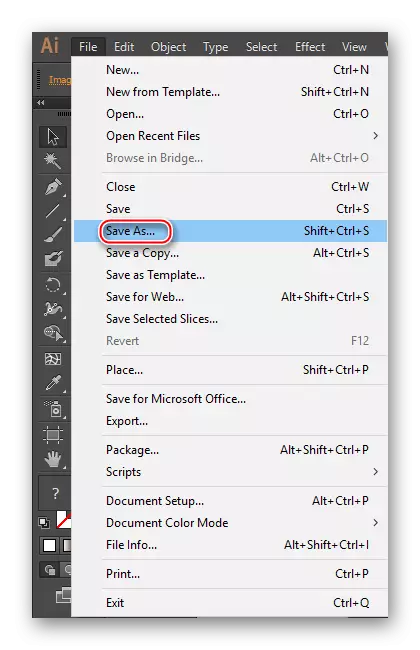
- Before starting to trim the mounting area, it is advisable to keep your work in one of the illustrator formats - EPS, AI. To save, go to the "File" section, located at the top of the window, and select "Save As ..." from the drop-down menu. If you just need to trim any image from a computer, then the save is optional.
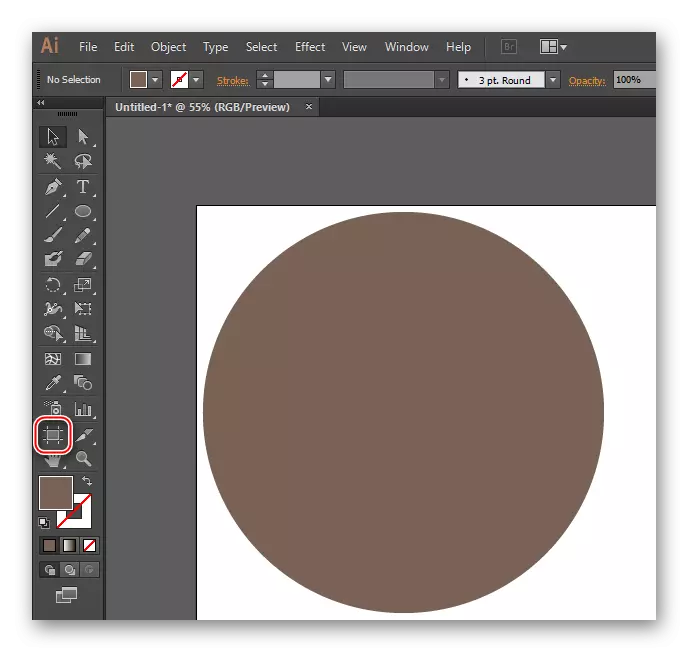
- To delete part of the workspace, select the desired tool in the toolbar. His icon looks like a square with outgoing corners with small lines. You can also use the SHIFT + O key combination, after which the tool will be selected automatically.
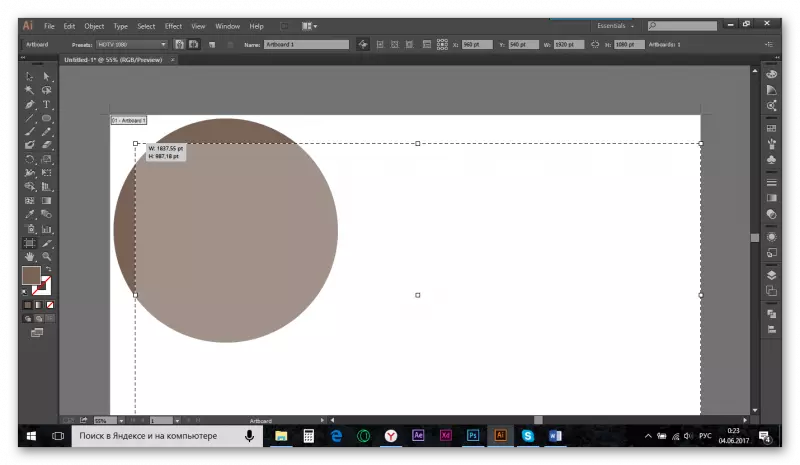
- On the borders of the workspace formed a stroke dotted line. Try for it to change the size of the workspace. See that the part of the figure you want to cut, went beyond the scope of this stroke border. To apply the changes, press ENTER.
- After that, the unnecessary part of the figure or the image will be removed along with the part of the mounting area. If inaccuracy was made somewhere, you can return everything back using the Ctrl + Z key combination. Then repeat item 3 so that the figure is trimmed as you need.
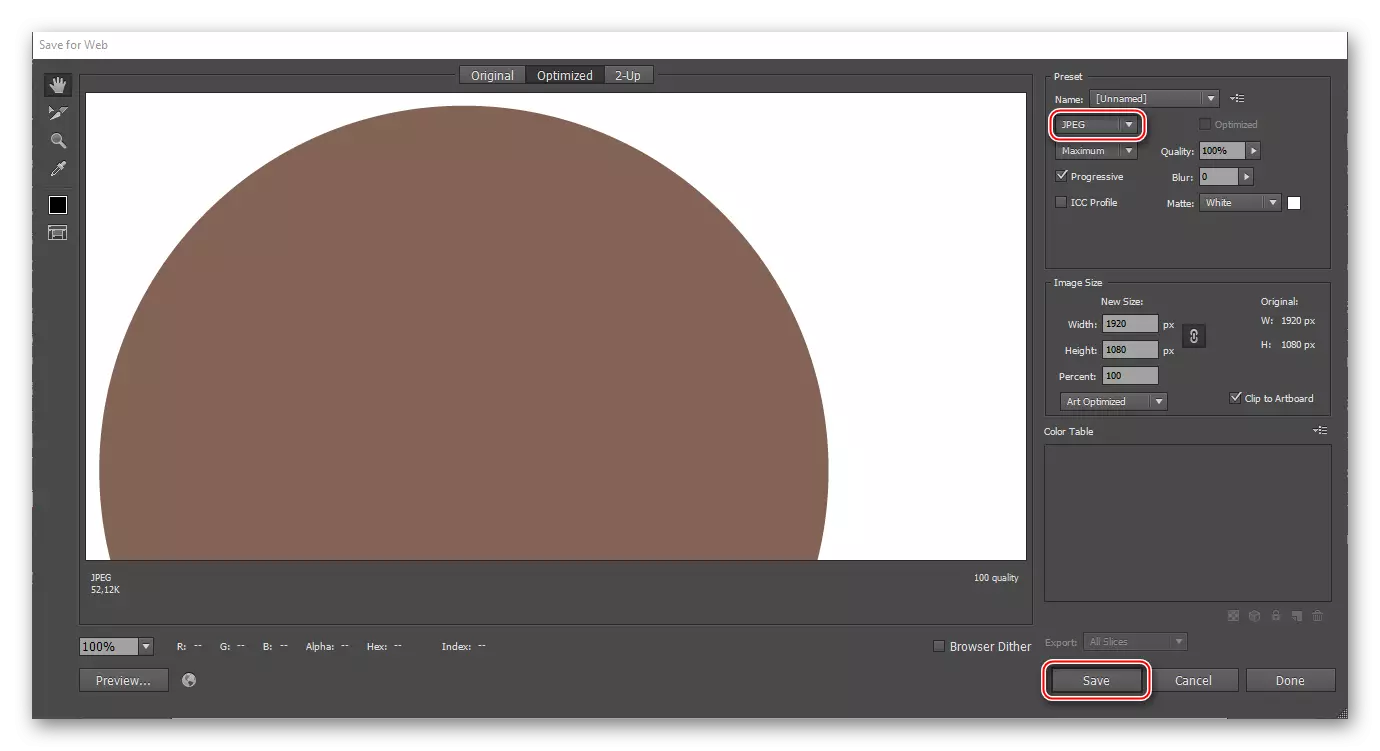
- The file can be saved in an illustrator format if you will continue to edit it. If you are going to place it somewhere, you will have to save in JPG or PNG format. To do this, click "File", select "Save for Web" or "Export" (there are practically no differences between them). When saving, select the desired format, PNG is the original quality and transparent background, and the JPG / JPEG is not.
It should be understood that this method is only suitable for the most primitive work. Users who often work with an illustrator prefer to use other ways.
Method 2: Other figures for trimming
This method is somewhat more complicated by the previous one, so it should be considered on a specific example. Suppose, from the square you need to cut off one angle so that the location of the cut is rounded. Step-by-step instructions will look like this:
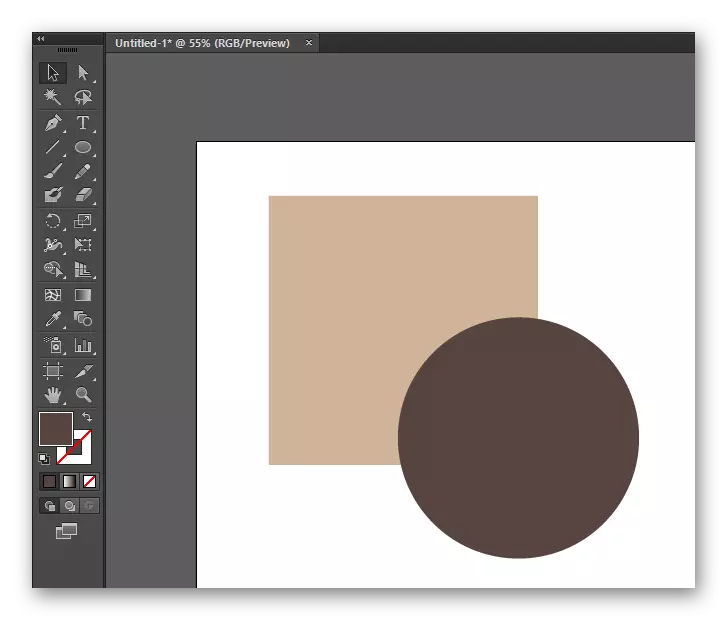
- To begin with, draw a square using the appropriate tool (instead of a square there may be any figure, even which is done using the "pencil" or "pen").
- On top of the square, place the circle (instead you can also place any shape you need). Circle must be placed on the angle that you plan to remove. The border of the circle can be adjusted straight to the center of the square (the illustrator will mark the square of the square when contacting the circle of the circle).
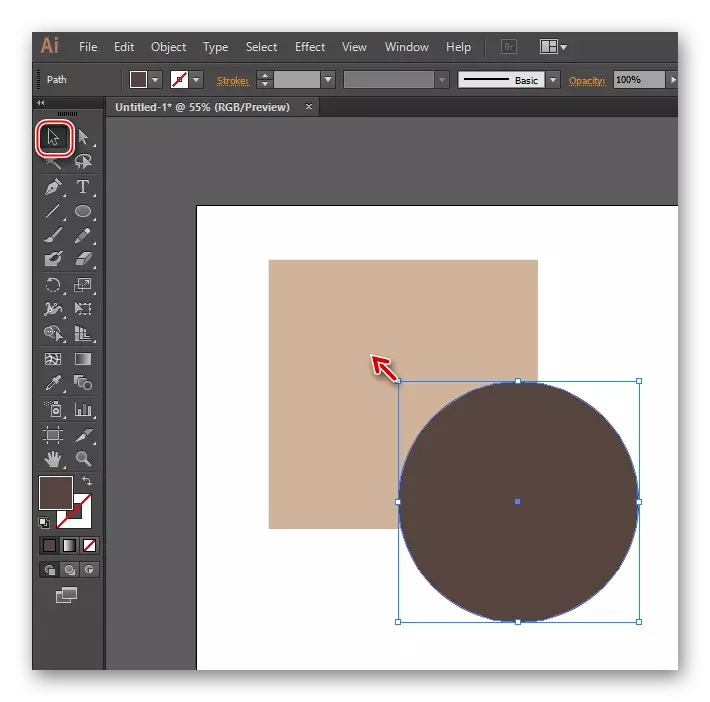
- If necessary, both a circle and square can be transformed freely. To do this, in the "Toolbar" panel, select a black cursor pointer and click on the desired figure or holding SHIFT, both in this case will be either. Then pull the shape / figures for the contours. So that the transformation occurs in proportion to when you stretch the shapes, clamp shift.
- In our case, you need to make sure that the circle overlaps the square. If you did everything in accordance with the first and second items, it will be over the square. If it is under it, then right-click in a circle, bring the cursor to the "Arrange" point from the drop-down menu, and then "Bring to Front".
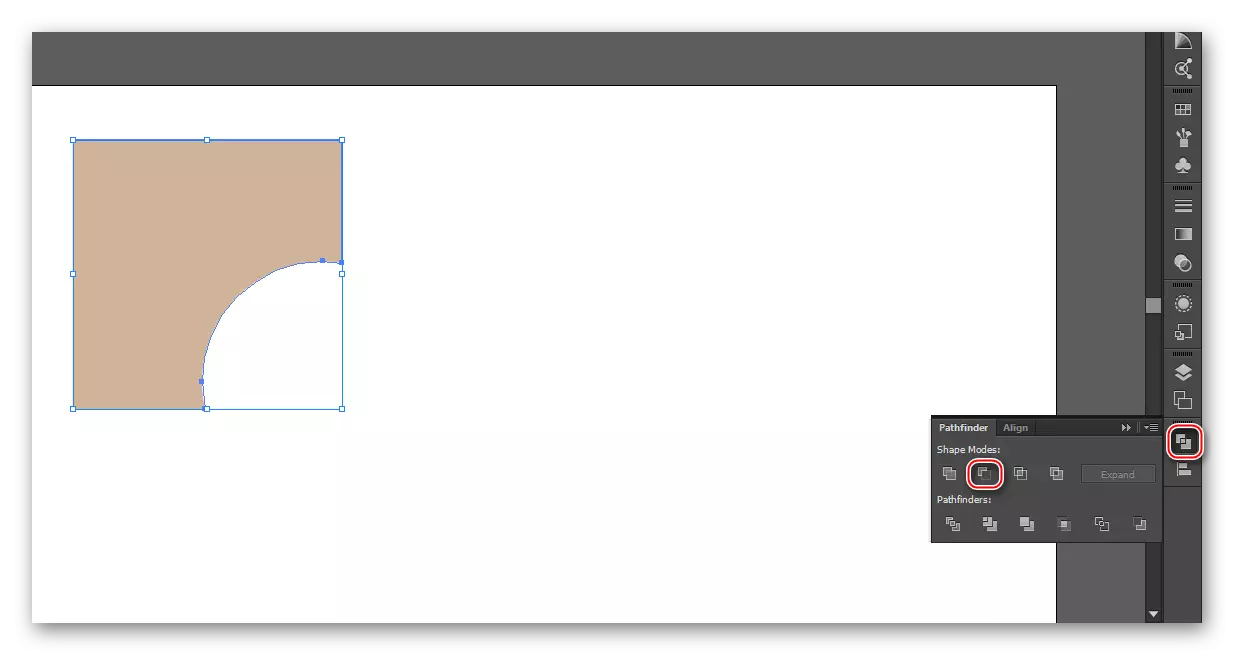
- Now select both figures and go to the "Pathfinder" tool. You can be in the right pane. If it is not there, then click on the "Windows" point at the top of the window and select from the entire list "Pathfinder". You can also use the search for the program, which is in the upper right side of the window.
- In "Pathfinder", click on the MINUS FRONT item. His icon looks like two squares, where the dark square overlaps light.

With this method, you can handle the figures of the average difficulty. At the same time, the workspace does not decrease, and after trimming, you can continue to work with an object further without restrictions.
Method 3: clipping mask
This method will also consider on the example of a circle and square, only now it will be necessary to cut it from the area of the circle. So the instruction looks like for this method:
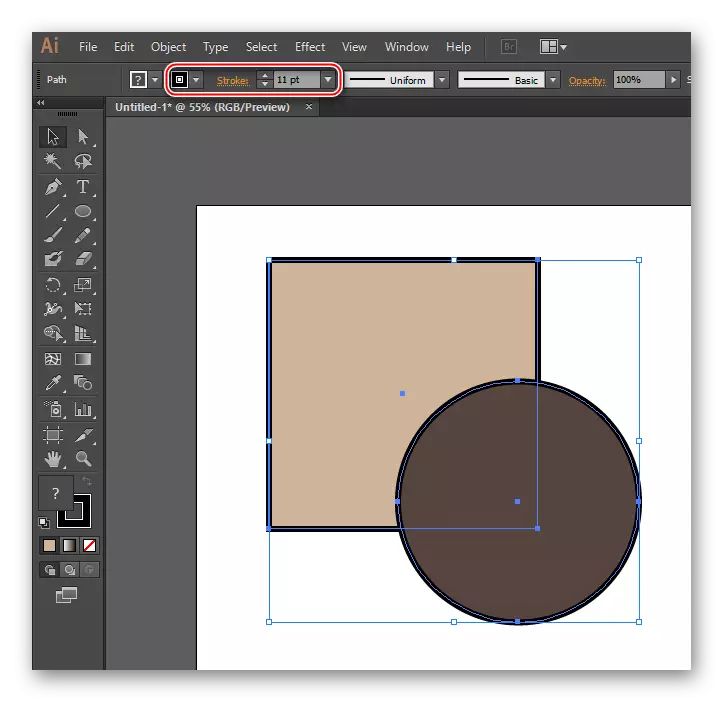
- Draw a square, and on top of it a circle. Both should have any fill and preferably stroke (needed for convenience with further work, it can be removed if necessary). You can make the stroke in two ways - in the top or at the bottom of the left toolbar, selecting the second color. To do this, click on the gray square, which will be located either over a square with the basic color or to the right of it. At the top panel in the Stroke point, set the stroke thickness in pixels.
- Edit the size and location of the figures so that the cropped area is maximally suitable for your expectations. To do this, use the tool that looks like a black cursor. Stretching or narrowing figures, clamp SHIFT - thus you will provide proportional transformation of objects.
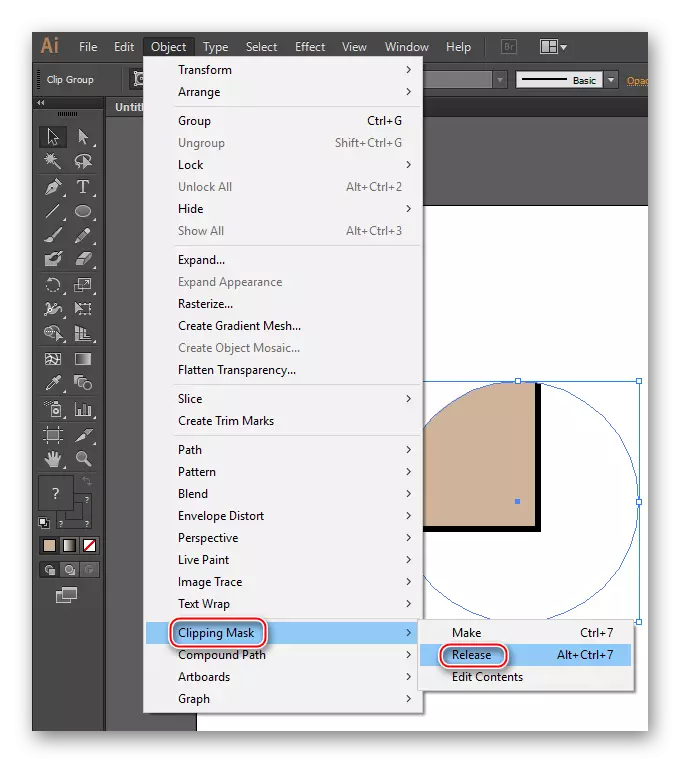
- Select both figures and go to the Object tab in the top menu. Find there "Clipping Mask" there, in the submenu, click on Make. To simplify the entire procedure, it is enough to simply select both figures and use the Ctrl + 7 key combination.
- After applying a clipping mask, the image remains untouched, and the stroke disappears. The object is trimmed as needed, the rest of the image becomes invisible, but it is not deleted.
- The mask can be adjusted. For example, move to any side, increase or decrease. At the same time, the images that remain under it are not deformed.
- To remove the mask, you can use the CTRL + Z keys combination. But if you have already done any manipulation with a ready-made mask, then this is not the fastest method, since it will initially be canceled all the last actions in turn. To quickly and painlessly remove the mask, go to Object. There again expand the "Clipping Mask" submenu, and then "Release".

With this method, you can cut more complex figures. Just those who professionally work with an illustrator prefer to use masks to trim images inside the program.
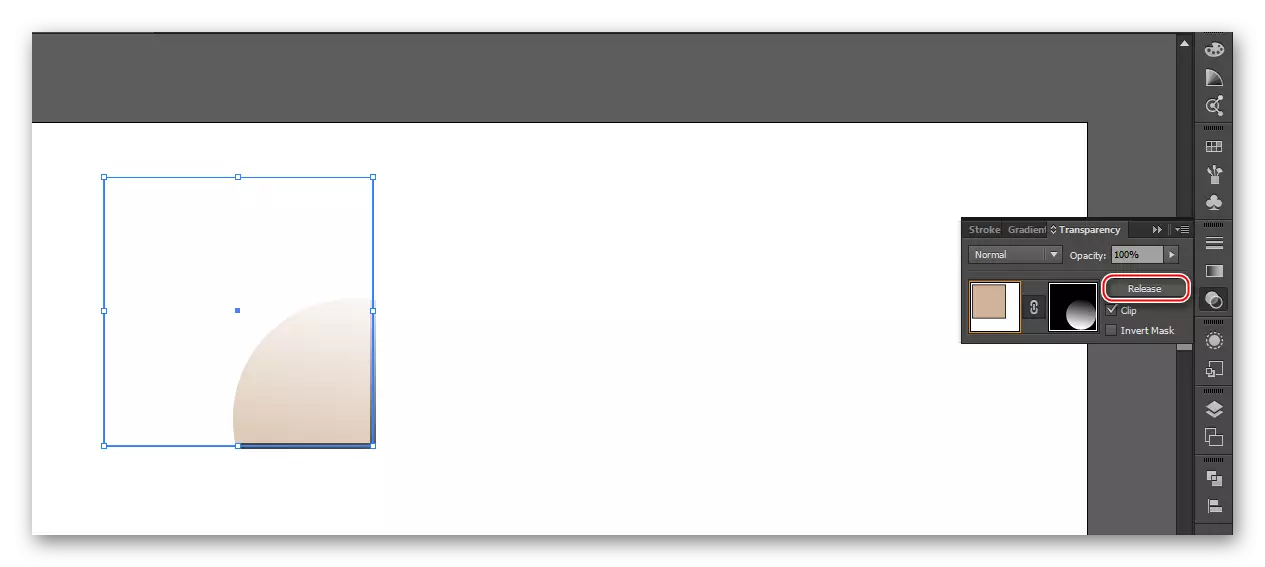
Method 4: Transparency Mask
This method also implies the imposition of a mask on the images and in some moments it looks like the previous one, but is more work. Step-by-step instruction looks like this:
- By analogy with the first steps from the previous way, you need to draw a square and a circle (in your case, it can be other figures, simply is considered on their example). Draw data figures so that the circle overlap the square. If you did not succeed, then right-click in a circle, from the drop-down menu, select "Arrange", and then "Bring to Front". Adjust the size and location of the figures as you need to avoid problems in subsequent steps. The stroke is specified optional.
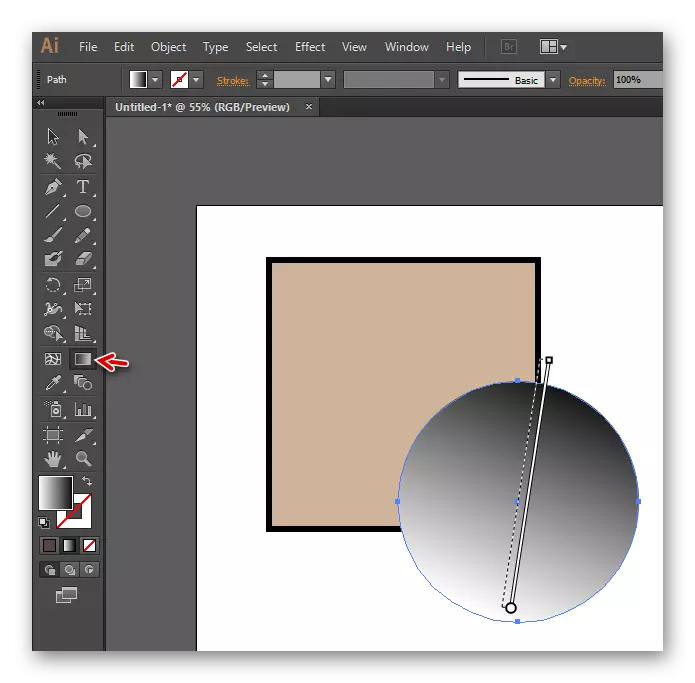
- Fill the circle with a black and white gradient by choosing it in the colors palette.
- The direction of the gradient can be changed using the "gradient line" tool in the toolbar. This mask considers white color as opaque, and black as transparent, so on the part of the figure where the transparent pouring should be, you need to prevail the dark shades. Also, instead of a gradient, there may be just white color or black and white photo if you would like to create a collage.
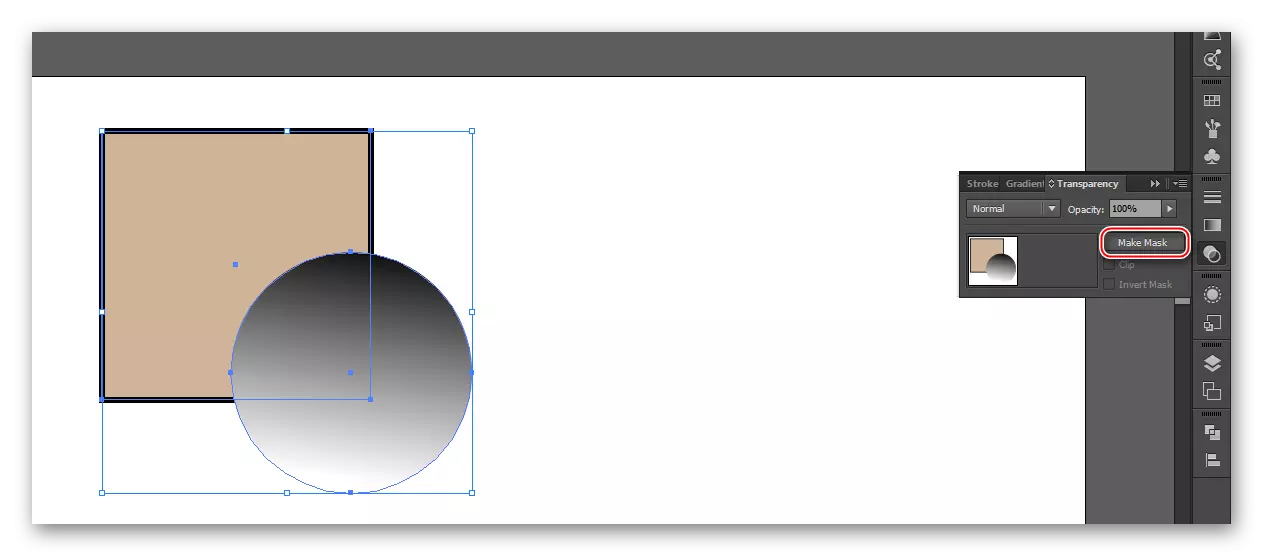
- Highlight two figures and create a transparency mask. To do this, in the "Windows" tab, find "Transparency". A small window will open, where you need to click on the "Make Mask" button, which is located on the right side of the screen. If there is no button, then open a special menu using the button in the upper right corner of the window. This menu requires you to select "Make Opacity Mask".
- After applying the mask, it is advisable to put a tick opposite the "Clip" function. It is necessary that the pruning is made as correct as possible.
- "Play" with overlay modes (this is a drop-down menu, which is signed by default as "Normal", is at the top of the window). In different modes of overlaying the mask can be displayed differently. It is especially interesting to change the imposition modes, if you made a mask based on some black and white photography, not a monotonous color or gradient.
- You can also adjust the transparency of the figure in the Opacity paragraph.
- To mark the mask, it is enough in the same window to click on the "Release" button, which should appear after you apply the mask. If this button is not, then just go to the menu by analogy with the 4th point and select "Release Opacity Mask" there.

Crop any image or figure in an illustrator makes sense only if you are already working with it in this program. To crop the usual image in JPG / PNG format, it is better to use other graphic editors, such as MS Paint, set by default in Windows.