

Sometimes users have to leave at the time of the computer to complete the implementation of certain tasks on their own. After task your PC will continue to run idle. To avoid this, set the sleep timer. Let's see how this can be done in different ways Windows 7 operating system.
Setting the sleep timer
There are a number of methods that allow you to set the sleep timer in Windows 7. All of them can be divided into two large groups: the native operating system tools and third-party programs.Method 1: other utilities
There are a number of third-party utilities that specialize in installing a timer to turn off the PC. One of those is SM Timer.
SM Timer download from the official site
- Once downloaded from the Internet running the installation file, open the window select the language. Hit it «OK» button without additional manipulation, as the default installation language to match the language of the operating system.
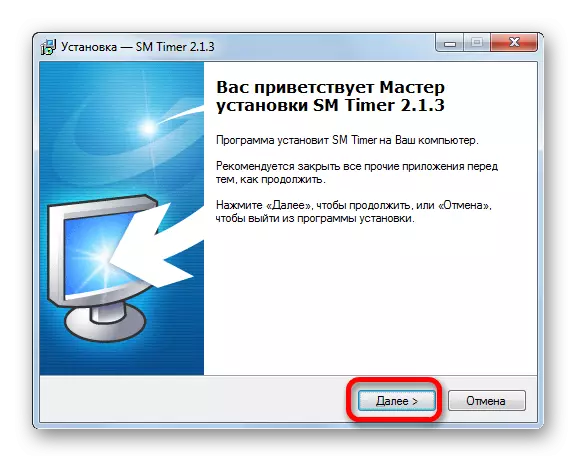
- Next, open the installation wizard. Then click on the "Next" button.
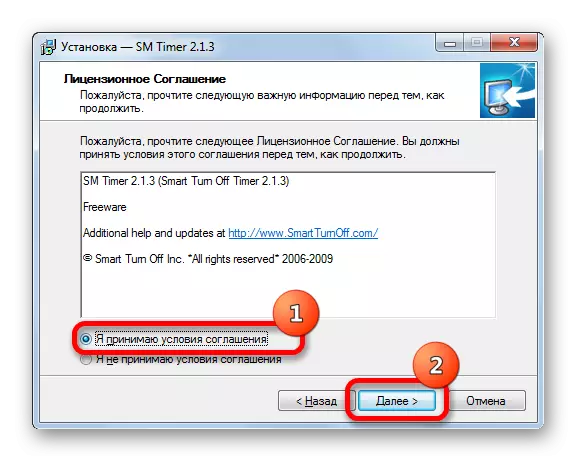
- After this, a window of the license agreement. Is required to rearrange the switch to the "I accept the agreement" and click "Next".
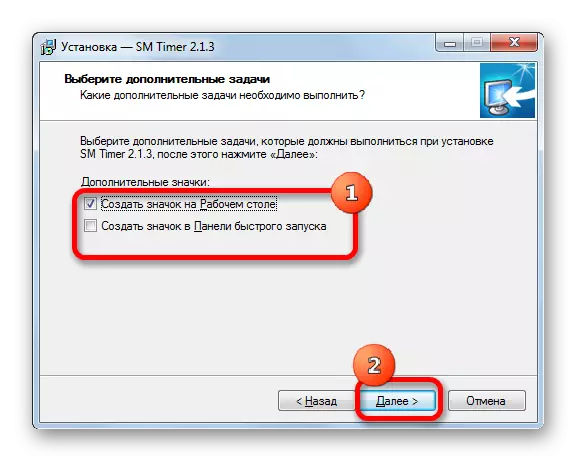
- Runs window additional tasks. Here, if the user wishes to establish a program shortcut on the desktop and in the Quick Launch toolbar, you must tick the box beside the appropriate parameters.
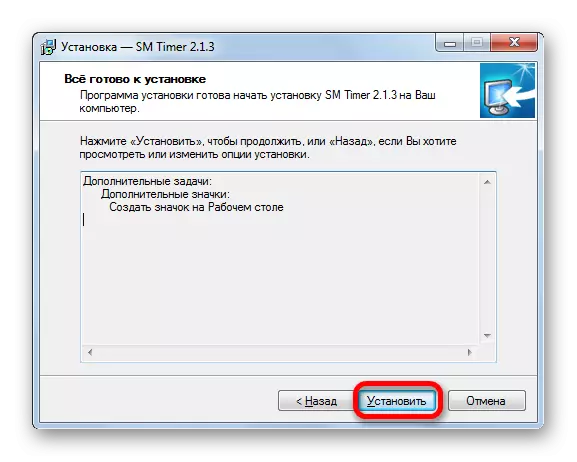
- This opens a window where you provide information regarding the installation settings that have been made previously by the user. Click on the "Install" button.
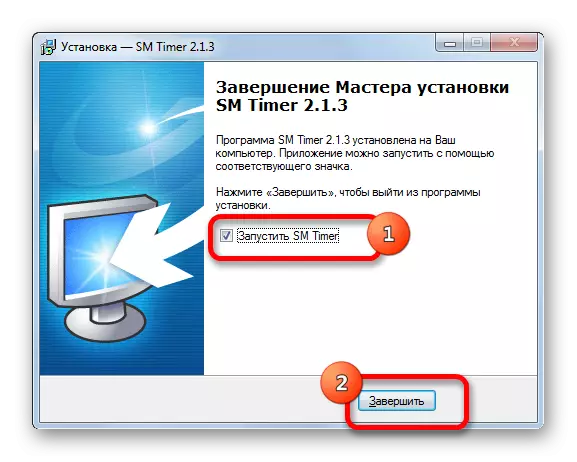
- After the installation is complete, the installation wizard will tell about it in a separate window. If you wish to SM Timer immediately opened, it is required to select the check box beside the point "Run SM Timer». Then click "Finish".
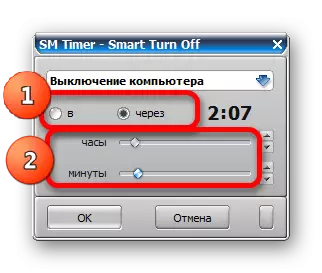
- SM Timer starts a small window applications. First of all, in the upper field of the drop-down list to select one of two modes of operation of utilities, "Turning Off Your Computer" and "Logout". Since the task is to turn off your PC, then choose the first option before us.
- Next, select the timing option: absolute or relative. With absolute, the exact shutdown time is set. It will occur when the specified timer time and computer system hours are coincided. In order to set this reference option, the switch is rearranged to the "B" position. Next, using two sliders or "Up" and "down" icons, located to the right of them, the shutdown time is set.
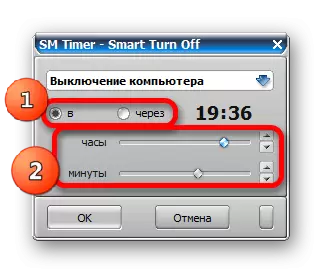
Relative time shows after how many hours and minutes after activating the PC timer will be disconnected. In order to set it, set the switch to the position "through". After that, in the same way, as in the previous case, we set the number of hours and minutes, after which the shutdown procedure occurs.
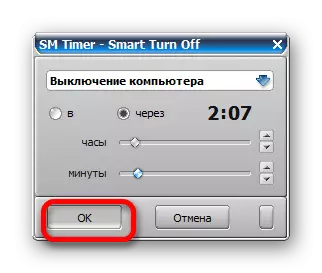
- After the settings are above are manufactured, click on the "OK" button.


The computer will be turned off, after the set amount of time or at the occurrence of the specified time, depending on which the reference version was selected.
Method 2: Use of peripheral tools of third-party applications
In addition, in some programs, the main task of which does not have a relationship under consideration, there are secondary tools to turn off the computer. Especially often such an opportunity can be found from torrent customers and various file loaders. Let's see how to schedule a PC shutdown on the example of the download Master files.
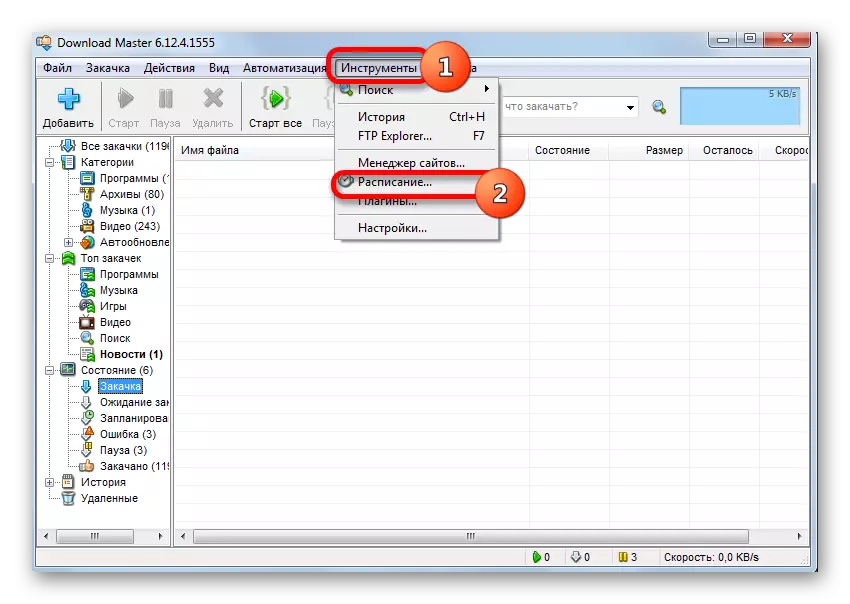
- Run the Download Master program and put in it download files in normal mode. Then click in the upper horizontal menu by the "Tools" position. From the drop-down list, choose the item "Schedule ...".
- The DOWNLOAD MASTER program is open. In the "Schedule" tab, we set a tick about the "Complete Scheduled" item. In the "Time" field, we specify the exact time in the clock format, minutes and seconds, with the coincidence of which the PC with the PC system clock will be completed. In the "When completing the schedule completion", you set a tick about the "Turn off the computer" parameter. Click on the "OK" or "Apply" button.
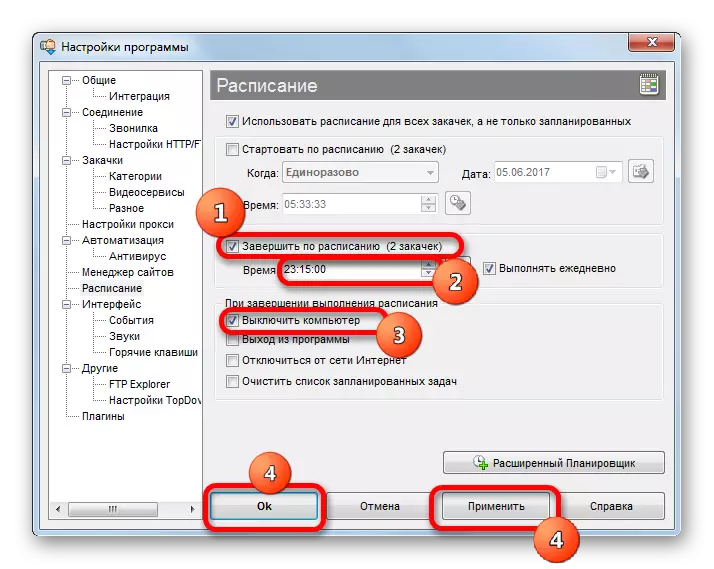
Now, when you reach the specified time, the download in the Download Master program will be completed, immediately after which the PC will turn off.
Lesson: How to use Download Master
Method 3: "Run" window
The most common option for running the computer auto-discontinuity timer built-in Windows tools is the use of command expression in the "Run" window.
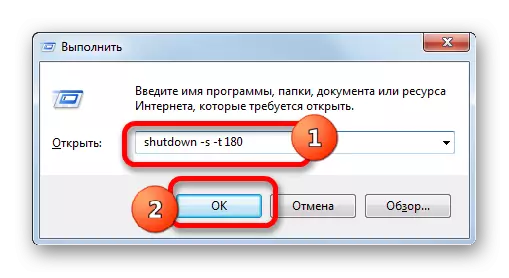
- To open it, type the combination of Win + R on the keyboard. Run the "Run" tool. In its field you need to drive the following code:
shutdown -s -t.
Then, in the same field, you should put the space and specify the time in seconds through which the PC should turn off. That is, if you need to turn off the computer in a minute, you should put a number 60, if three minutes - 180, if two hours - 7200, etc. The maximum limit is 315360000 seconds, which is 10 years. Thus, the full code that you want to enter in the "Run" field when installing a timer for 3 minutes will look like:
shutdown -s -t 180
Then click on the "OK" button.
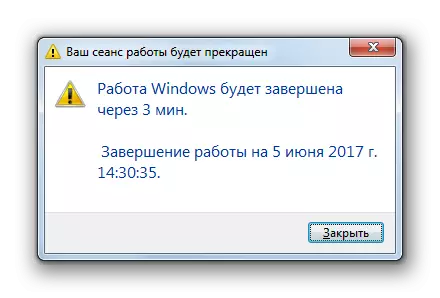
- After that, the system is processed by the entered command expression, and a message appears in which it is reported that the computer will be turned off at a certain time. This information message will appear every minute. After the specified time, the PC will be disconnected.
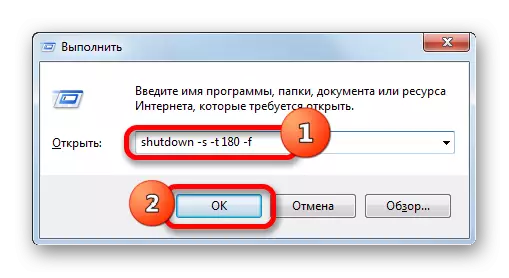
If the user wants, when the computer is turned off, it has completed the operation of the programs, even if the documents are not saved, then you should install the "Run" window after specifying the time through which it will turn off, the "-F" parameter. Thus, if you wish, the forced shutdown occurred after 3 minutes, then enter the following entry:
Shutdown -s -t 180 -f
Click on the "OK" button. After that, even if programs will work with unsaved documents, they will be forcibly completed, and the computer is turned off. When you enter the same expression without the "-F" parameter, the computer will not even turn off the installed timer until manually saves documents if programs are running with unsaved contents.
But there are situations that the user's plans may change and he will change his mind to disconnect the computer after the timer is already running. From this position there is a way out.
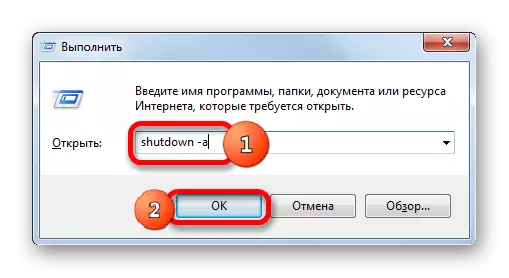
- Call the "Run" window by clicking on the Win + R keys. In its field, enter the following expression:
Shutdown -a.
Click on "OK".
- After that, a message appears from the third, which states that the scheduled disconnection of the computer is canceled. Now it will not automatically turn off.

Method 4: Creating a shutdown button
But constantly resorting to the command input through the "Run" window, entering the code there, is not very convenient. If you regularly resort to the shutdown timer, installing it at the same time, then in this case it is possible to create a special timer start button.
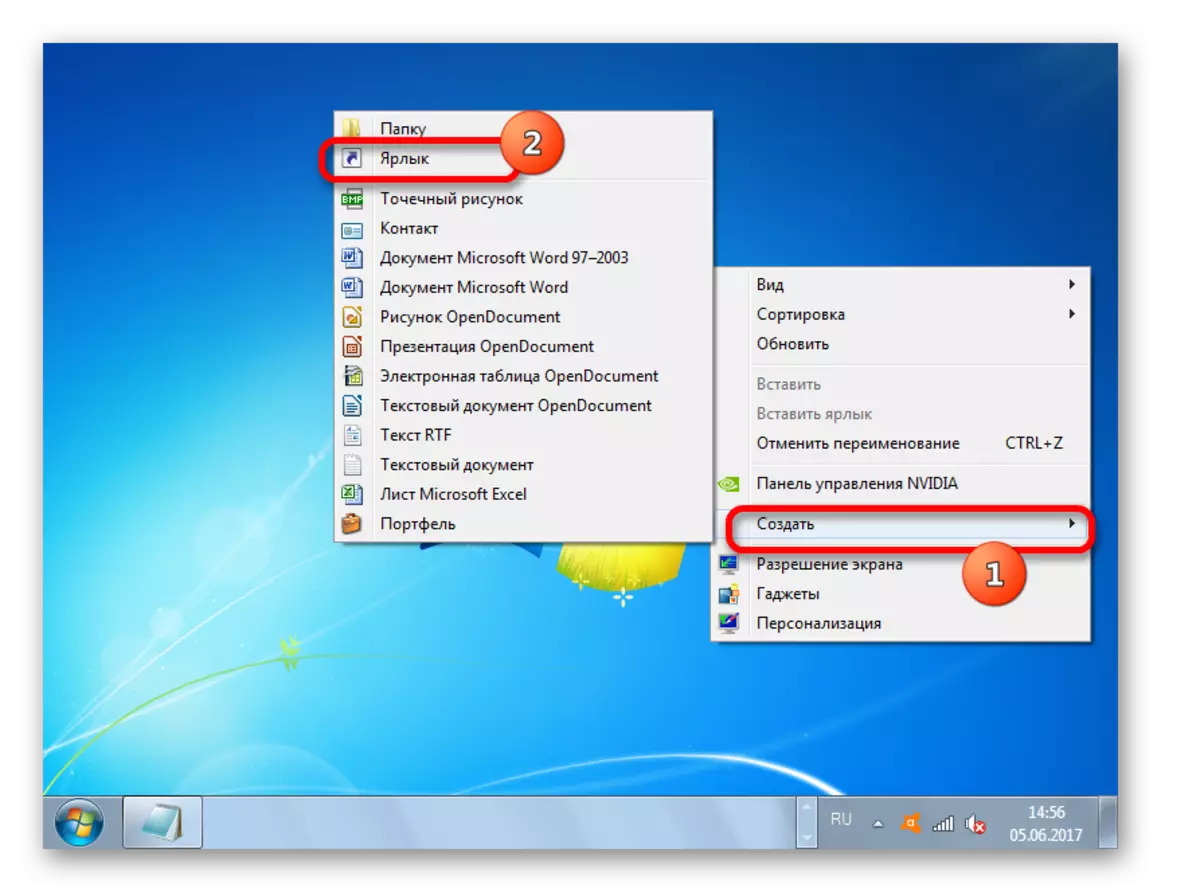
- Click on the desktop right key mouse. In the open context menu, you will bring the cursor to the "Create" position. In the list that appears, select the option "Label".
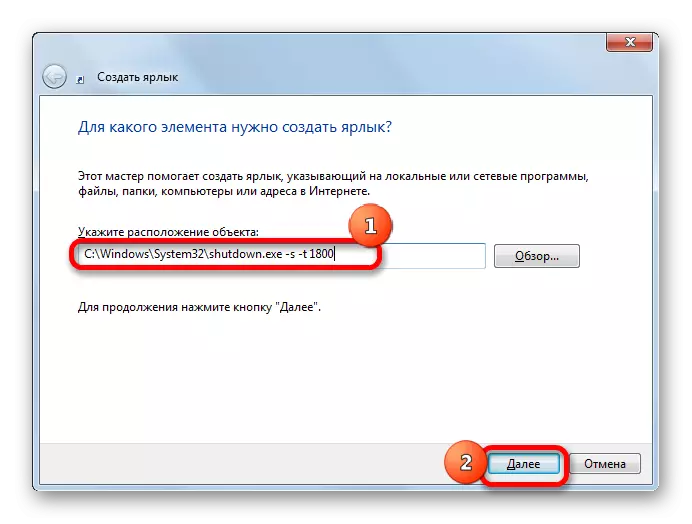
- The Wizard is launched. If we want to turn off the PC after half an hour after starting the timer, that is, after 1800 seconds, we enter the following expression to the "Location" area:
C: \ Windows \ System32 \ shutdown.exe -s -t 1800
Naturally, if you wish to put a timer at a different time, then at the end of the expression, you should specify another number. After that, we click on the "Next" button.
- At the next step, you need to assign a label name. By default, it will be "shutdown.exe", but we can add a more understandable name. Therefore, in the "Enter the name of the shortcut" area, you enter the name, looking at which it will immediately be clear that when it is pressed, it will happen, for example: "Running off timer". We click on the inscription "Ready".
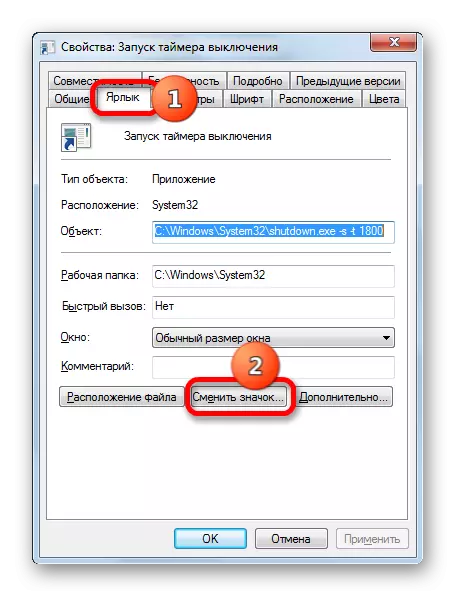
- After the specified actions, the timer activation label appears on the desktop. So that it is not a faceless, the standard label icon is possible to replace to a more informative icon. To do this, click on it right mouse button and stop the selection in the Properties paragraph.
- The properties window starts. We move to the section "Label". We click on the inscription "Change icon ...".
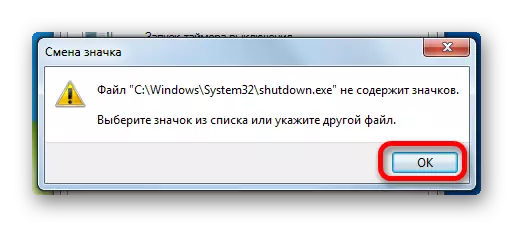
- The information alert is displayed that the ShutDown object has no icons. To close it, click on the inscription "OK".
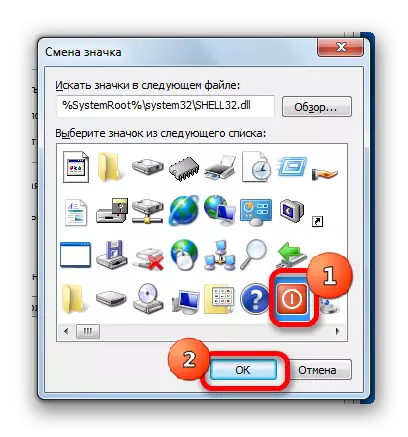
- The icon selection window opens. Here you can choose an icon for every taste. In the form of such an icon, for example, you can use the same icon as when Windows is turned off, as in the image below. Although the user can choose anything other. So, choose the icon and click on the "OK" button.
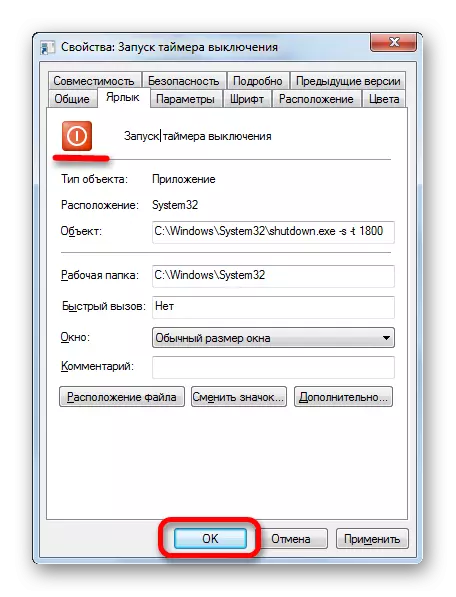
- After the icon appears in the properties window, we also click on the inscription "OK".
- After that, the visual display of the auto-discontinuity of the PC on the desktop will be changed.
- If in the future you need to change the disabling time of the computer from the moment of starting the timer, for example, from half an hour, then in this case again go to the label properties through the context menu in the same way that it was discussed above. In the window that opens in the "Object" field, we change the number at the end of expression from "1800" to "3600". Click on the inscription "OK".


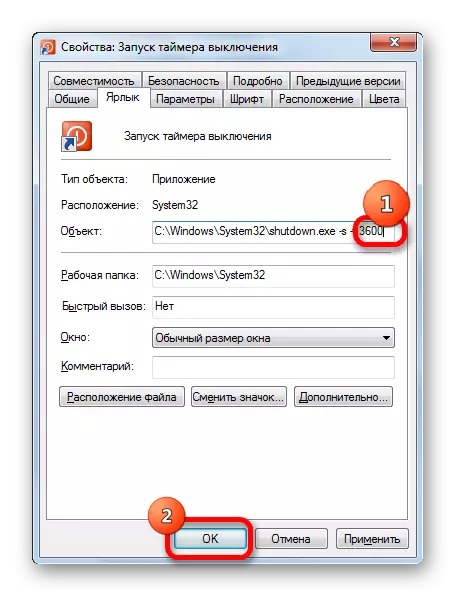
Now, after clicking on the label, the computer will be disconnected after 1 hour. In the same way, you can change the disconnection period at any other time.
Now let's see how to create a computer disconnect button. After all, the situation when the actions should be canceled, also not rare.
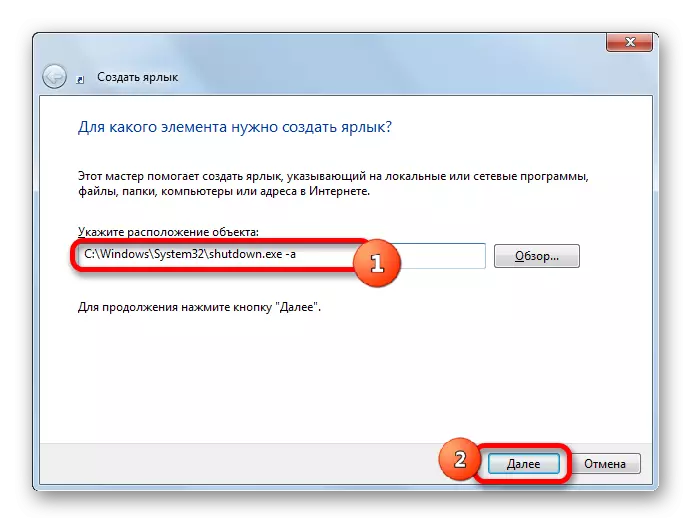
- Run the label creation wizard. In the "Specify the location of the object" we introduce such an expression:
C: \ Windows \ System32 \ shutdown.exe -a
Click on the "Next" button.
- Going to the next step, we assign the name. In the "Enter the Name of the Label" field, enter the name "Cancellation of PC disconnection" or any other suitable. Click on the inscription "Ready".
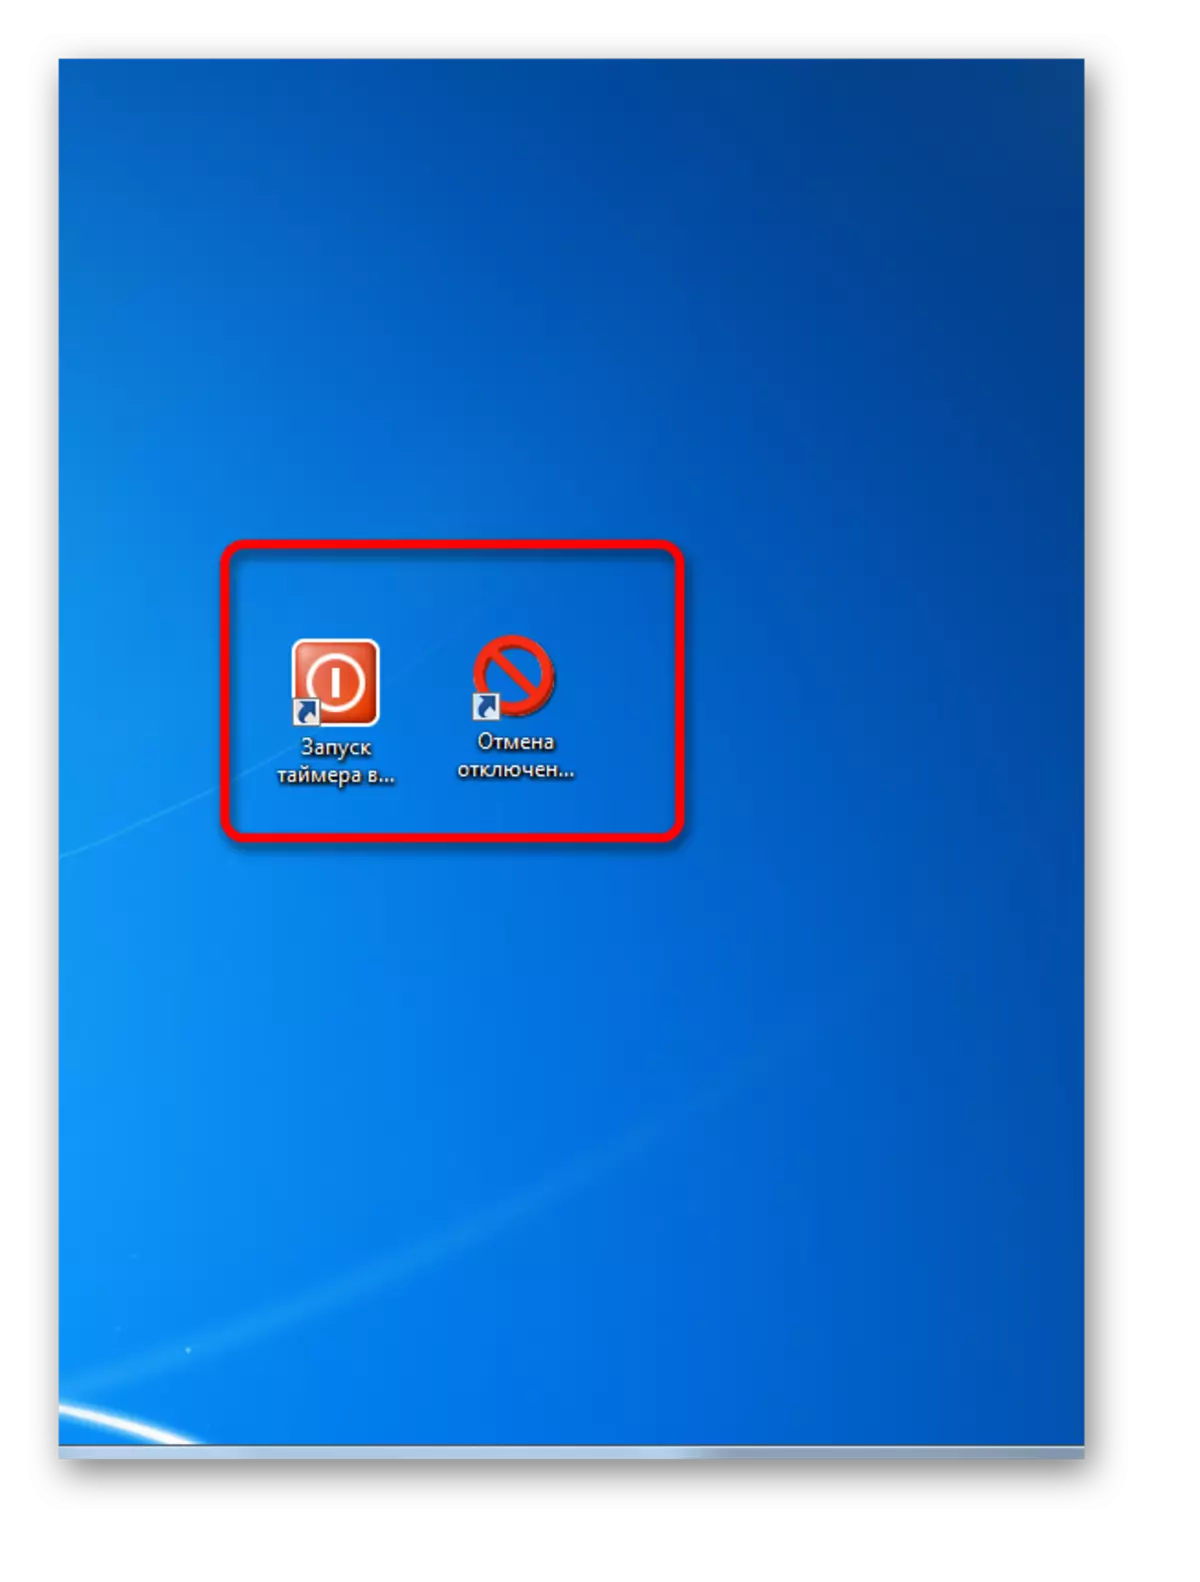
- Then, on the same, the algorithm discussed above, you can pick up the icon for the label. After that, we will have two buttons on our desktop: one to activate the auto-discontinuity of the computer through the specified period of time, and the other is to cancel the previous action. When performing appropriate manipulations with them, a message will appear about the current task status.

Method 5: Using task scheduler
Also, schedule a PC disconnection through the specified period of time, you can using the built-in Windows job scheduler.
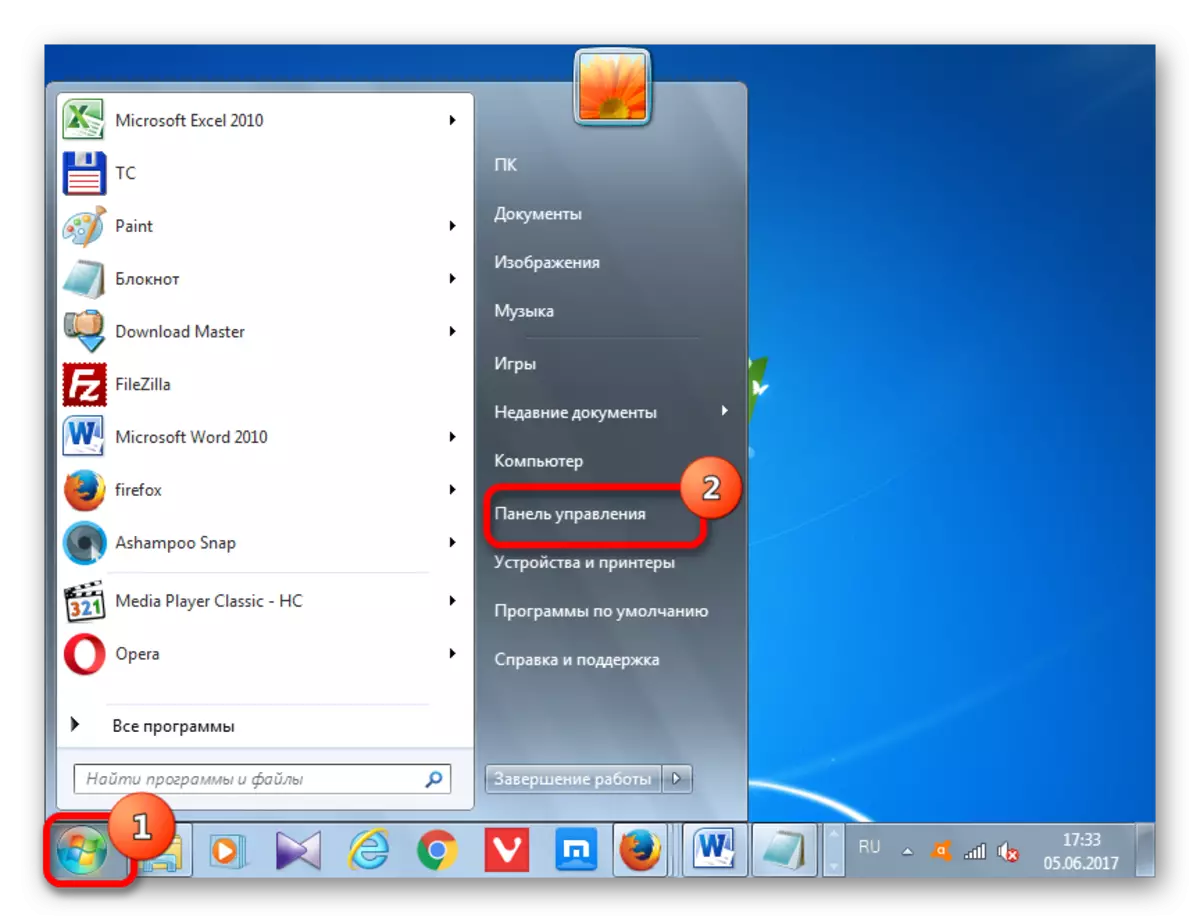
- To go to the task scheduler, click the "Start" button in the lower left corner of the screen. After that, in the list, select the "Control Panel" position.
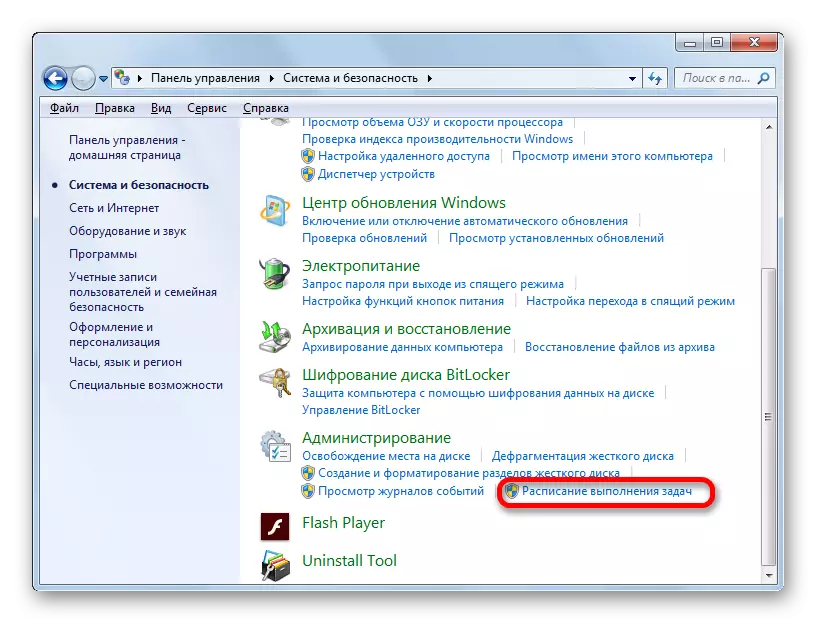
- In the opened area, go to the "System and Security" section.
- Next, in the "Administration" block, select the "Task Schedule" position.
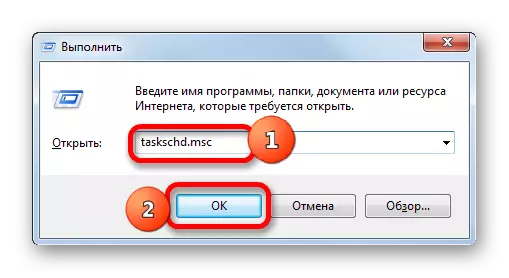
There is a faster option to go to the schedule of task execution. But it will suit those users who are used to memorize command syntax. In this case, we have to call the already familiar window "Run" by pressing the combination of Win + R. Then it is required to enter the command expression "taskschd.msc" without quotes and click on the inscription "OK".
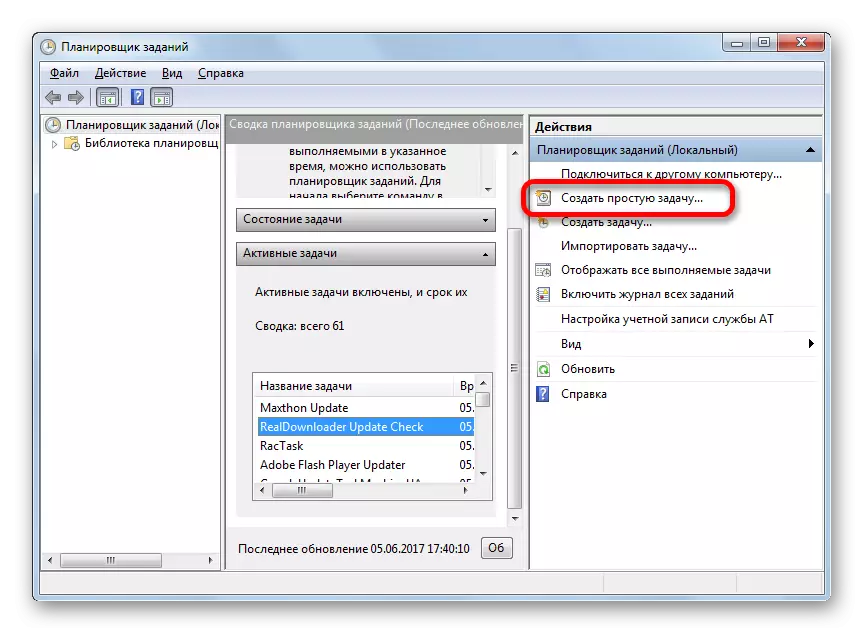
- The task scheduler is launched. In its right area, choose the position "Create a simple task".
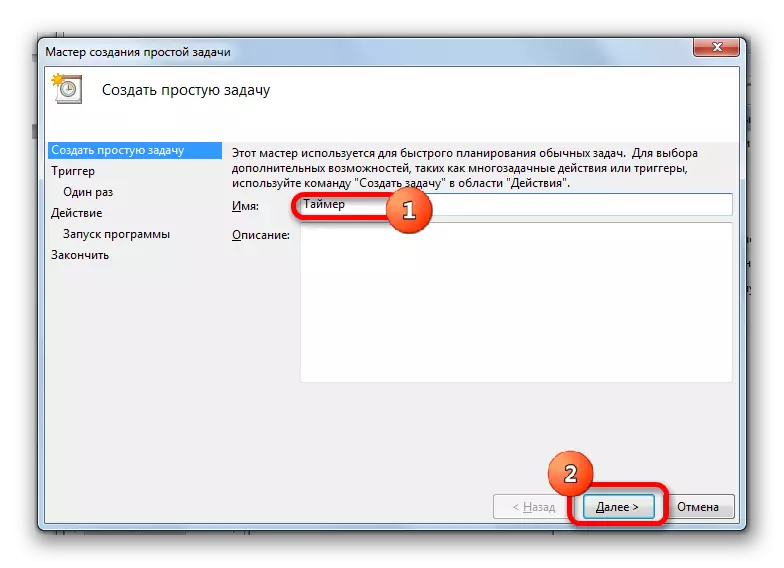
- The task creation wizard opens. At the first stage in the "Name" field, the task should give name. It can be absolutely arbitrary. The main thing is that the user himself understood what it is about. We assign the name "Timer". Click on the "Next" button.
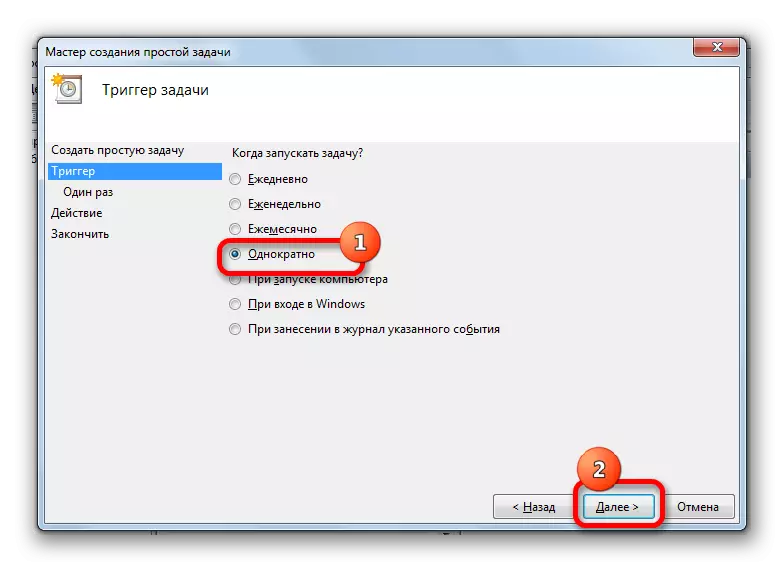
- In the next step, you will need to set the task trigger, that is, specify the frequency of its execution. We rearrange the switch to the position "once". Click on the "Next" button.
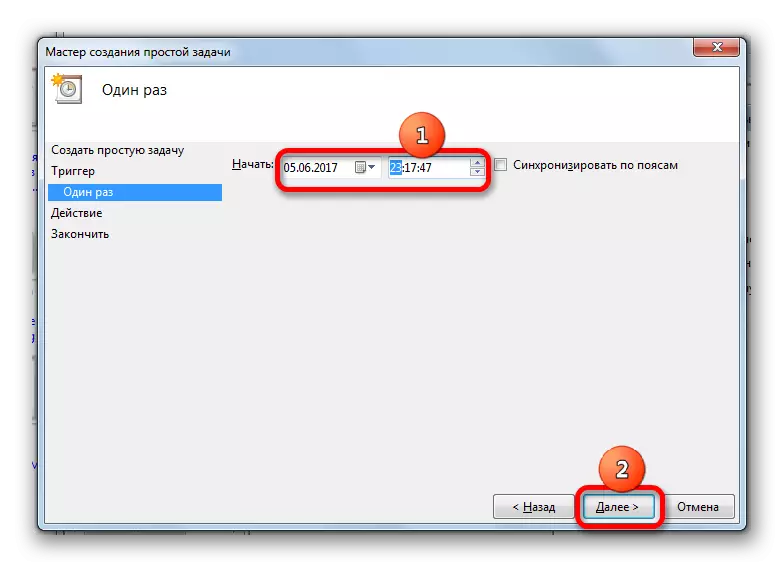
- After that, a window opens in which you want to set the date and time when the auto power off will be activated. Thus, it is set in time in absolute dimension, and not in relative, as it was before. In the corresponding "start" fields, set the date and exact time when the PC must be disabled. Click on the inscription "Next".
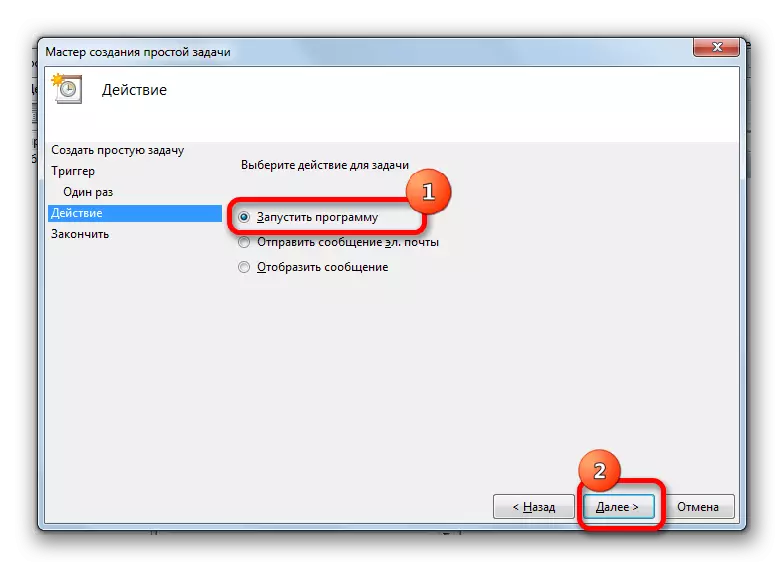
- In the next window, you need to select an action that will be made upon the occurrence of the above time. We should enable the shutdown.exe program, which we previously started using the "Run" and label window. Therefore, set the switch to the "Run the program" position. Click on "Next".
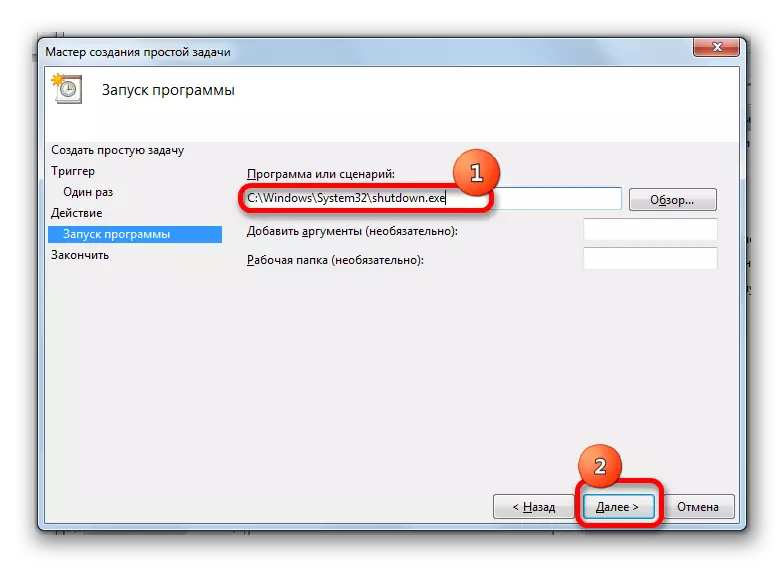
- A window starts where you want to specify the name of the program you want to activate. In the Program or Scenario area, we enter the full path to the program:
C: \ Windows \ System32 \ shutdown.exe
Click "Next".
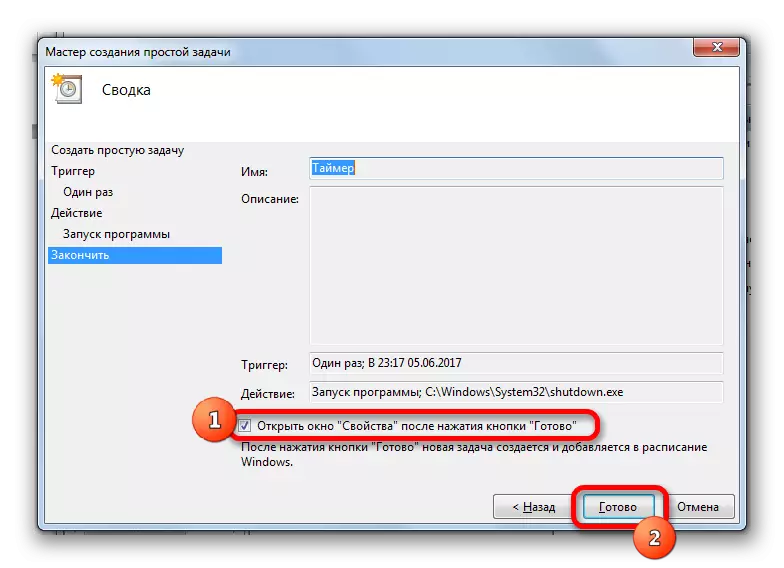
- A window opens, which presents general information about the task based on the previously entered data. If the user does not suit something, then you should click on the inscription "Back" for editing. If everything is in order, put the checkbox near the "Open Properties window" after clicking the "Finish" button. And we click on the inscription "ready."
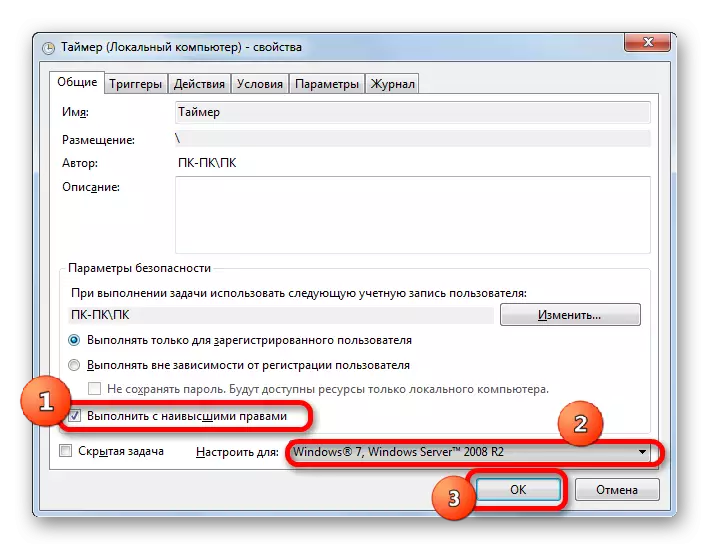
- The task properties window opens. About the "Perform Higher Rights" parameter set a tick. Switch in the "Configure for" field set to the "Windows 7, Windows Server 2008 R2" position. Click "OK".

After that, the task will be queued and disabling the computer will automatically be automatically in the time specified using the scheduler.
If you have a question, how to disable the computer shutdown timer in Windows 7, if the user has changed his mind to disconnect the computer, do the following.
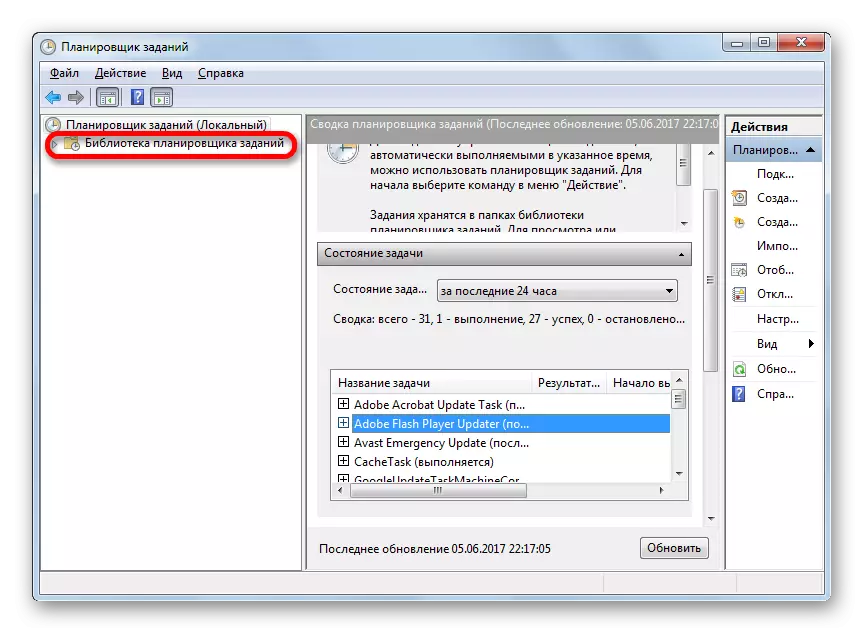
- We launch the task scheduler by any of those methods that were discussed above. In the left region of its windows, click on the name "Library of Jobs Planner".
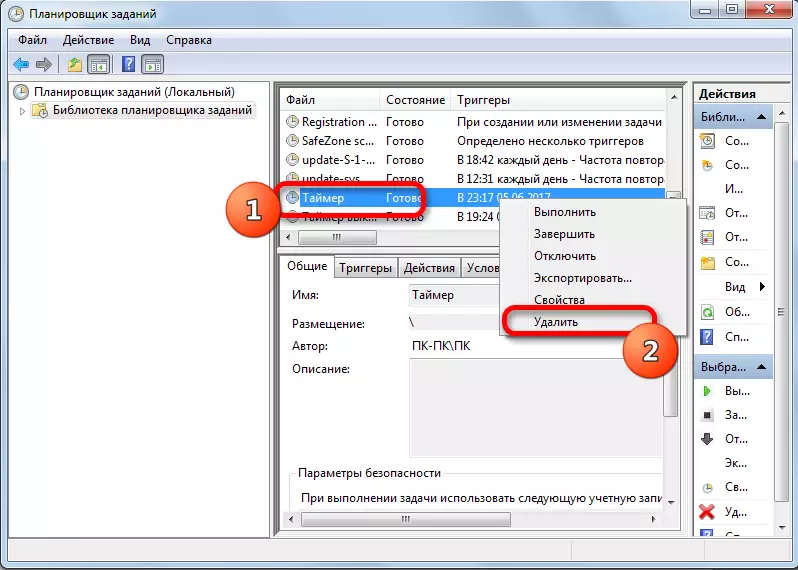
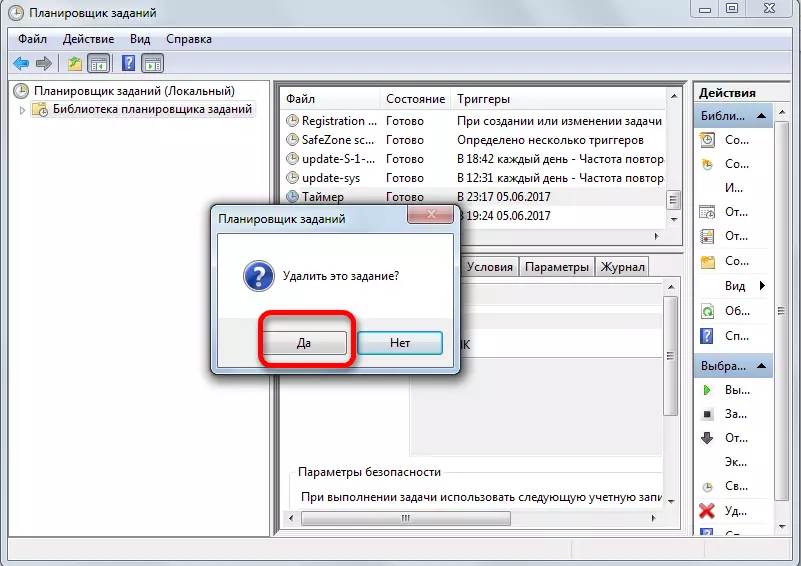
- After that, at the top of the central area of the window, we are looking for the name of the previously created task. Click on it right mouse button. In the context list, select "Delete".
- Then the dialog box opens in which you need to confirm the desire to delete the task by clicking the "Yes" button.
After the specified action, the task for auto-power PC will be canceled.
As you can see, there are a number of ways to run the computer auto-disconnecting timer at the specified time in Windows 7. Moreover, the user can choose solutions to this task, both built-in operating system tools and using third-party programs, but even within these two directions between specific methods. There are significant differences, so that the relevance of the selected option must be substantiated by the nuances of the application situation, as well as the personal convenience of the user.