

In this manual, several ways to carry out such blocking will be considered, while some of them are less efficient and allow you to block access to sites only on one specific computer or laptop, one of the described features provides much more features: For example, you can block certain sites For all devices connected to your Wi-Fi router, be it phone, tablet or something else. The described methods allow you to make it so that the selected sites are not opened in Windows 10, 8 and Windows 7.
Note: One of the easiest ways to block sites, requiring, however, creating a separate account on a computer (for the user-controlled) - built-in parental control functions. They not only allow you to block sites so that they do not open, but also launch programs, as well as limit the time to use the computer. Read more: Parental Control of Windows 10, Parental Control Windows 8
Simple site lock in all browsers by editing Hosts file
When you are blocked and classmates do not open or in contact, most likely the case in the virus makes changes to the HOSTS system file. We can manually make changes to this file to prohibit the opening of certain sites. That's how it can be done.
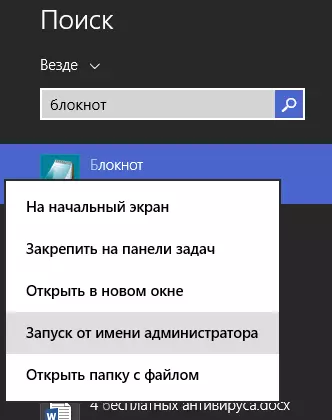
- Run the Notepad program on behalf of the administrator. In Windows 10, this can be done through the search (in search of the taskbar) notepad and subsequent right click on it. In Windows 7, find it in the Start menu, click on it with the right mouse button and select "Run on behalf of the administrator". In Windows 8 on the initial screen, start typing the word "Notepad" (just start the set, in any field, it will appear). When you see a list in which the desired program will be found, click on it right-click and select "Run from the administrator name".
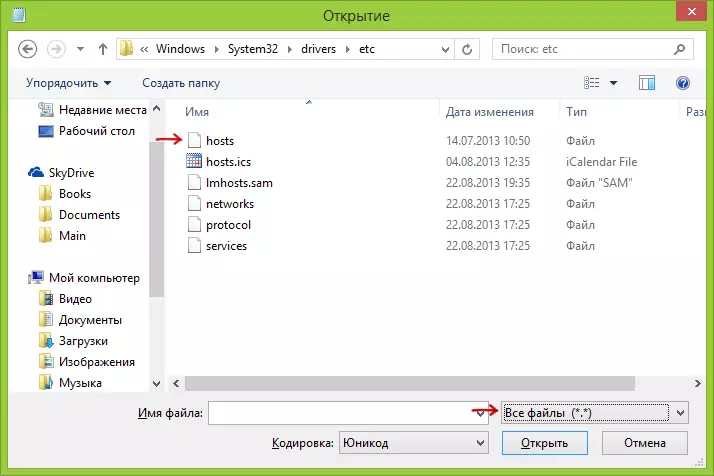
- In the notebook, in the menu, select File - Open, go to the C: \ Windows \ System32 \ Drivers \ ETC folder, place all files in notepad and open the HOSTS file (one that without expansion).
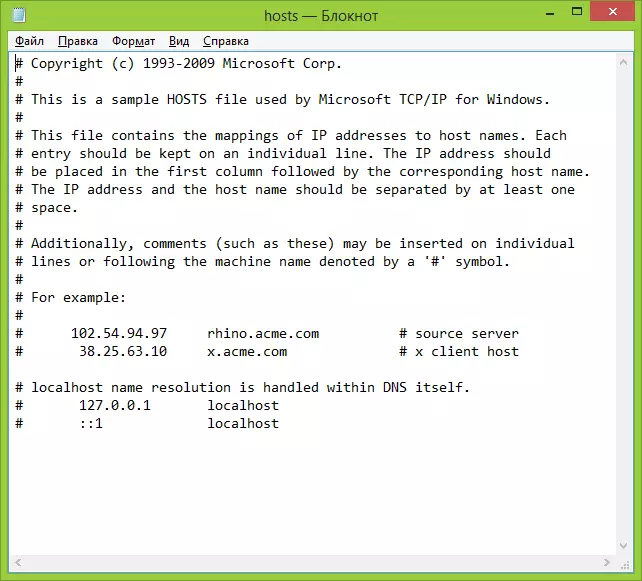
- The contents of the file will look something like that shown in the image below.
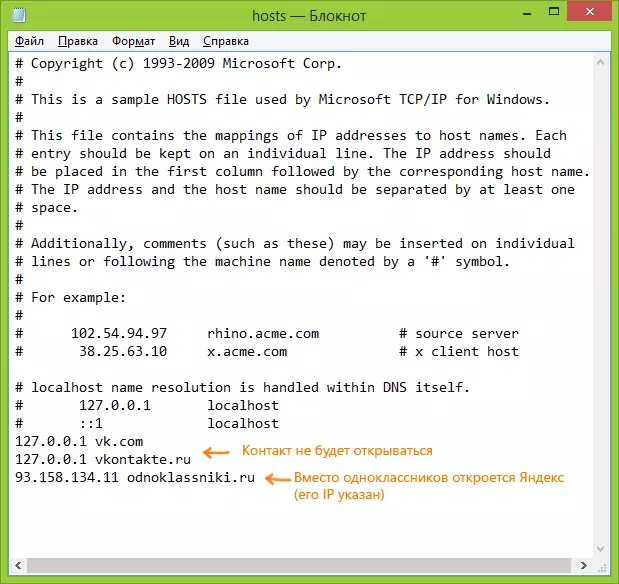
- Add rows for sites that you want to locate with the address 127.0.0.1 and the usual letter address of the site without HTTP. In this case, after saving the HOSTS file, this site will not open. Instead of 127.0.0.1, you can use the IP addresses of other sites known to you (between the IP address and the letter URL there must be at least one space). See picture with explanations and examples. Update 2016: It is better to create two lines for each site - with www and without.
- Save the file and restart the computer.
Thus, you managed to block access to certain sites. But this method has some minuses: first, a person who at least once came across such blocking, the first thing will begin to check the HOSTS file, even on my site there are several instructions on how to solve this problem. Secondly, this method works only for computers with Windows (in fact, the Hosts analog is in Mac OS X and Linux, but I will not touch this in this instruction). For more information: the Hosts file in Windows 10 (suitable for previous versions of OS).
How to block a site in Windows Firewall
Built-in firewall "Windows Firewall" in Windows 10, 8 and Windows 7 also allows you to block individual sites, it really does it on an IP address (which may vary for the site with time).
The blocking process will look like this:
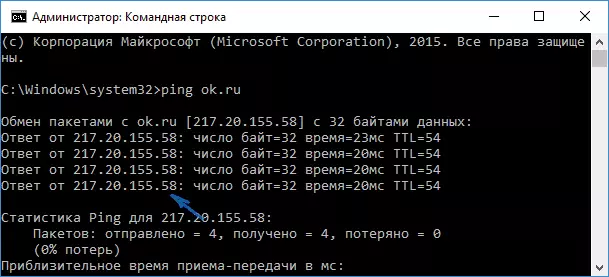
- Open the command prompt and enter the Ping address_name then press ENTER. Record the IP address with which the exchange of packages is conducted.
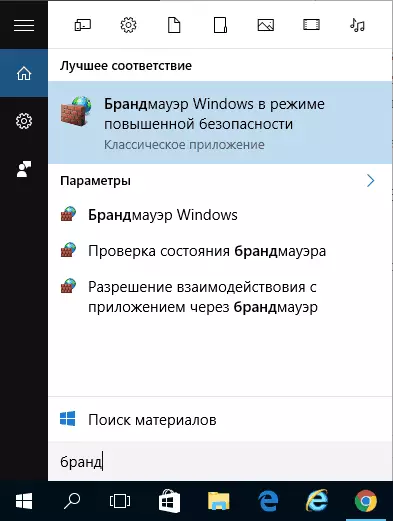
- Run the Windows Firewall in advanced security mode (you can use the search for Windows 10 and 8 to start, and in the 7-ke in the Control Panel - Windows Firewall - Additional Parameters).
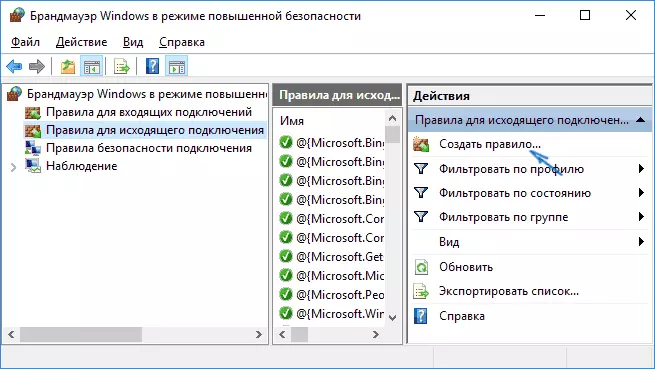
- Select "Rules for Outboard Connection" and click "Create Rule".
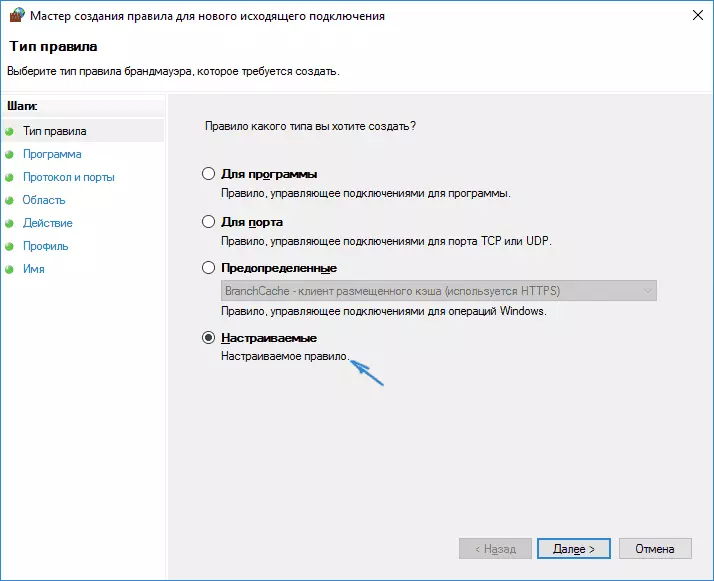
- Specify "customizable"
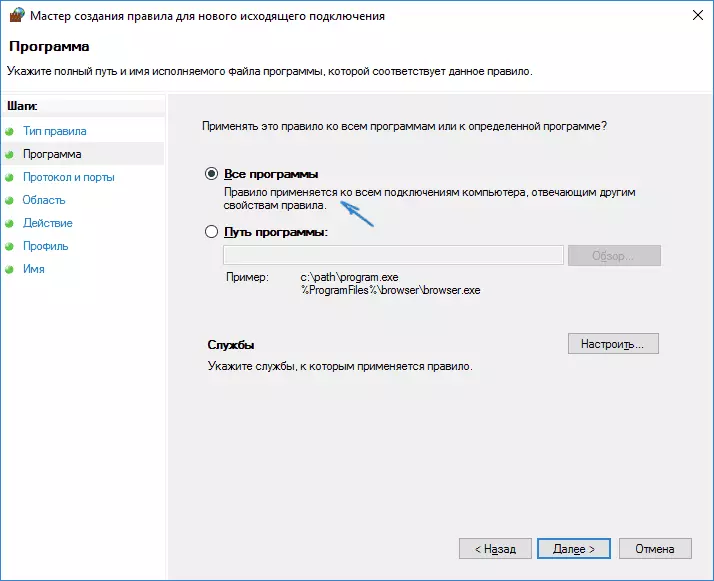
- In the next window, select "All Programs".
- In the "Protocol and Ports and Ports do not change the settings.
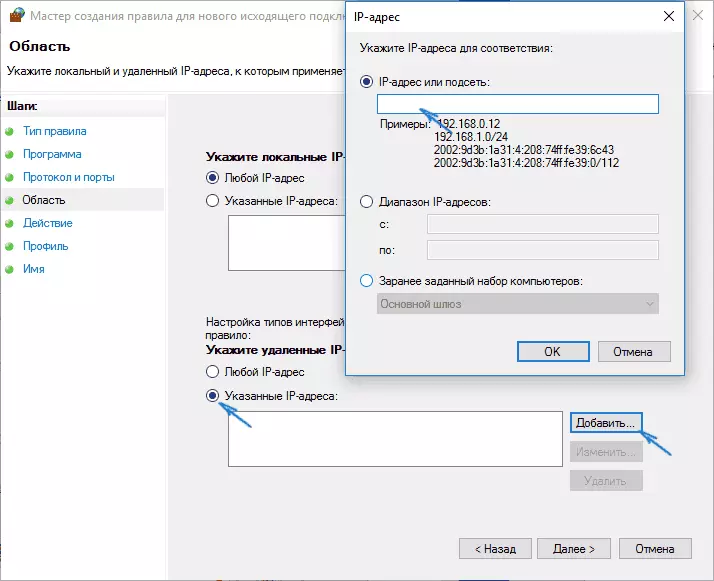
- In the "Region" window, in the "Specify deleted IP addresses, to which the rule applies, check the" Specified IP Addresses "item, then click" Add "and add the IP address of the site to be blocked.
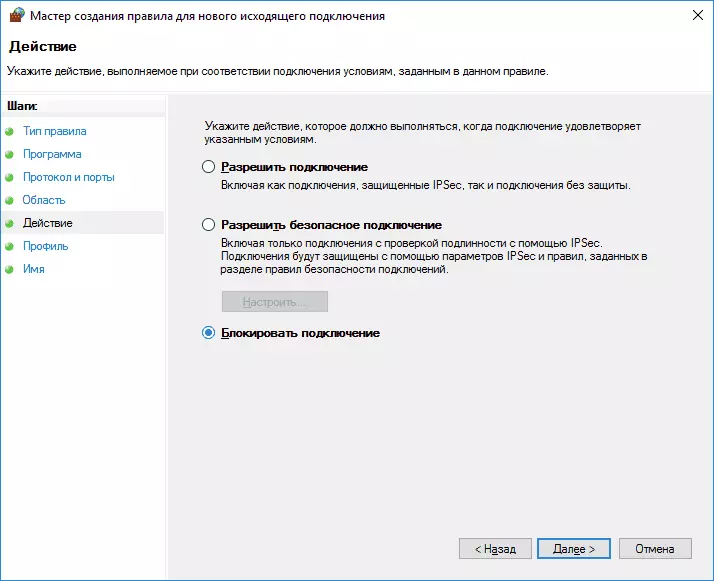
- In the Action window, specify "Block the Connection".
- In the "Profile" window, leave all items marked.
- In the "Name" window, name the rule (name at your discretion).
On this, everything: Save the rule and now the Windows firewall will block the site by the IP address, while trying to open it.
Lock site in Google Chrome
Here, let's look at how to block the site in Google Chrome, although this method is suitable for other browsers with extension support. The Chrome store has a special BLOCK SITE extension.
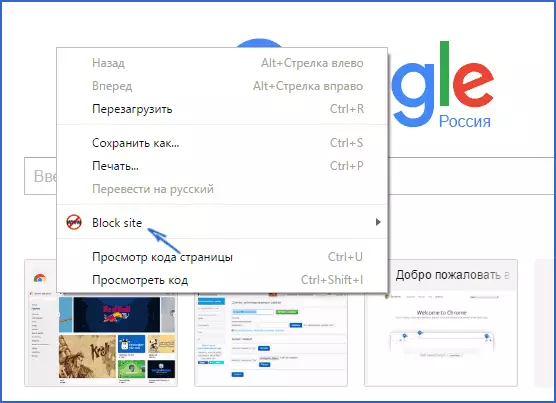
After installing the extension, you can access it to the settings through the right click anywhere in the open page in Google Chrome, all settings in Russian and contain the following options:
- Locking the site at the address (and redirect to any other site when you try to enter the specified one.
- Locking words (if the word is found in the address of the site, it will be blocked).
- Lock in time and days of the week.
- Installing the password to change the blocking parameters (in the "Remove Protection" section).
- Ability to enable site lock in incognito mode.
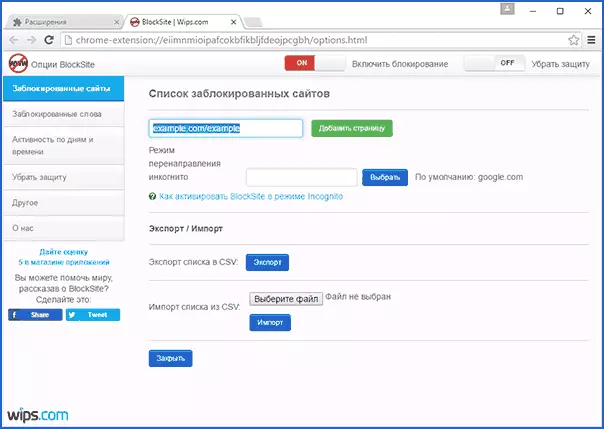
All these options are available for free. From what is offered in premium account - protection against extension removal.
Download Block Site to block sites in Chrome you can on the official expansion page
Locking unwanted sites using Yandex.dns
Yandex provides free Yandex.dns service, which allows you to protect children from unwanted sites, automatically blocking all sites that may be undesirable for a child, as well as fraudulent sites and resources with viruses.
Setting up Yandex.dns is simple.
- Go to the site https://dns.yandex.ru
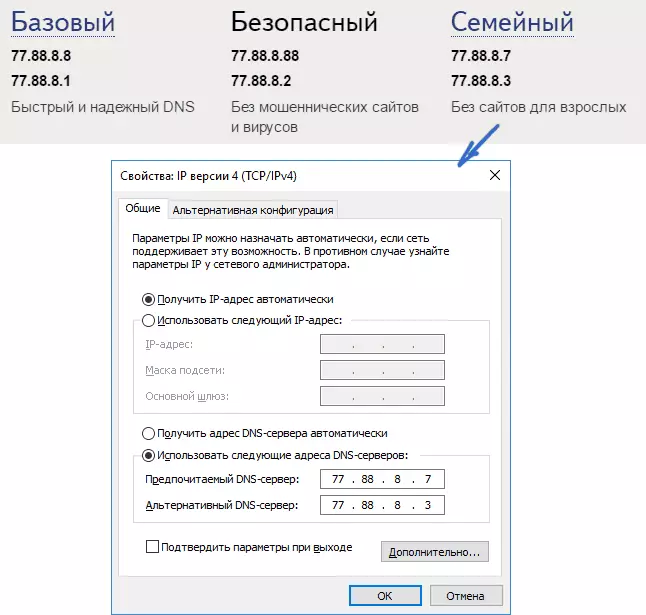
- Select the mode (for example, family), do not close the browser window (you need addresses from it).
- Press the Win + R keys on the keyboard (where the WIN is a key with the Windows emblem), enter NCPA.CPL and press ENTER.
- In a window with a list of network connections, right-click on your Internet connection and select Properties.
- In the next window, with a list of network protocols, select IP version 4 (TCP / IPv4) and click "Properties".
- In the fields for entering the DNS server address, enter Yandex.dns values for the mode you selected.
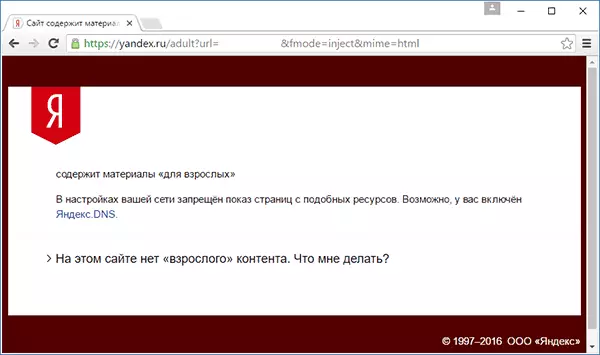
Save the settings. Now unwanted sites will be blocked automatically in all browsers, and you will receive a notification about the cause of the blocking. There are similar paid service - Skydns.ru, which also allows you to configure which sites you want to block and monitor access to various resources.
How to block access to the site using OpenDns
Free for personal use OpenDNS service allows not only to block sites, but much more. But we will touch it exactly blocking access using OpenDns. The instruction below requires some experience, as well as an understanding of exactly how it works and does not quite fit beginners, so if you doubt, do not know how to configure the simple Internet on your computer, it is better not to be over.
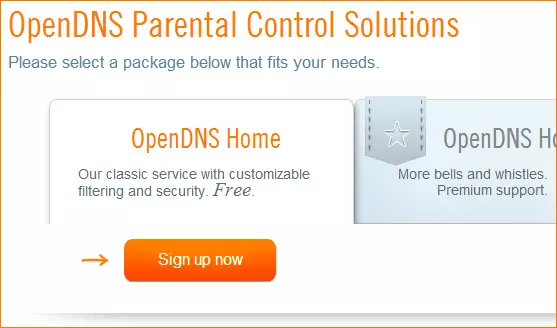
To begin with, you will need to be registered with the OpenDNS HOME for free use of unwanted sites. You can do this on the page https://www.opendns.com/home-internet-security/
After entering data for registration, such as the email address and password, you will be taken to the page of this type:
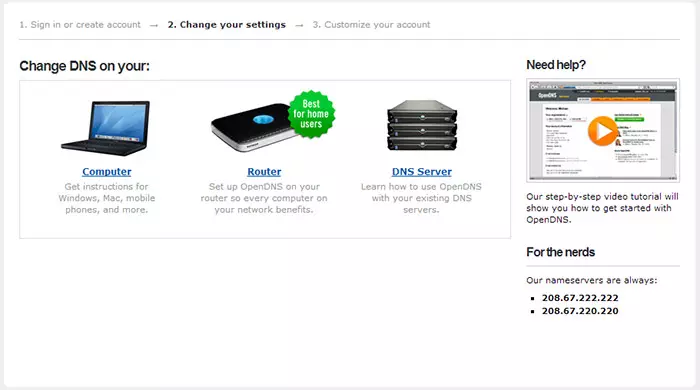
It has links to English-speaking instructions for changing the DNS (namely, it will be necessary to block sites) on your computer, Wi-Fi router or DNS server (the last is more suitable for organizations). You can familiarize yourself with the instructions on the site, but briefly and in Russian this information I will give here. (Instructions on the site still need to open, without it you will not be able to go to the next item).
For change DNS on one computer , Windows 7 and Windows 8, go to the Network Management Center and Sharing, in the list on the left, select "Change Adapter Settings". Right click on the connection used to access the Internet and select "Properties". Then, in the list of components of the Connection, select TCP / IPv4, click "Properties" and specify the DNS specified on the OpenDNS website: 208.67.222.222 and 208.67.220.220, then click "OK".
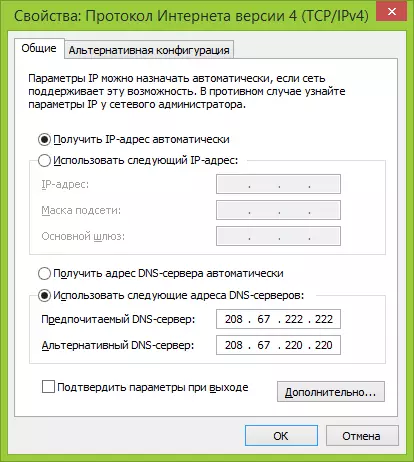
Indicate the provided DNS in the connection parameters
In addition, it is desirable to clear the DNS cache, for this, start the command line on behalf of the administrator and enter the IPConfig / Flushdns command.
For change DNS in router and then blocking sites on all devices connected to the Internet using it, push the specified DNS servers in the WAN connection settings and, if your provider uses a dynamic IP address, install the OpenDNS Updater program on the computer, which is most often It is enabled and always connected to the Internet through this router.
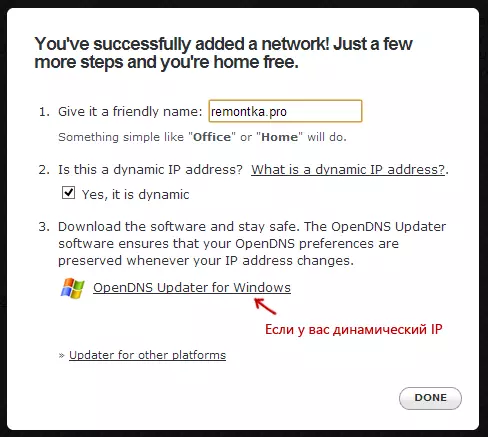
Specify the network name at your discretion and load OpenDNS Updater if you need
This is ready. On the OpenDNS website you can go to the Test Your New Settings item to check whether everything was done correctly. If everything is in order, you will see a message about success and link to go to the OpenDNS Dashboard Administration Panel.
First of all, in the console, you will need to specify the IP address to which further settings will be applied. If your provider uses a dynamic IP address, you will need to install a program available at the Client-Side Software link, as well as the following when assigned to the network name (next step), it will send data about the current IP address of your computer or network, If a Wi-Fi router is used. At the next stage, you will need to set the name of the "controlled" network - any, at your discretion (the screenshot was higher).
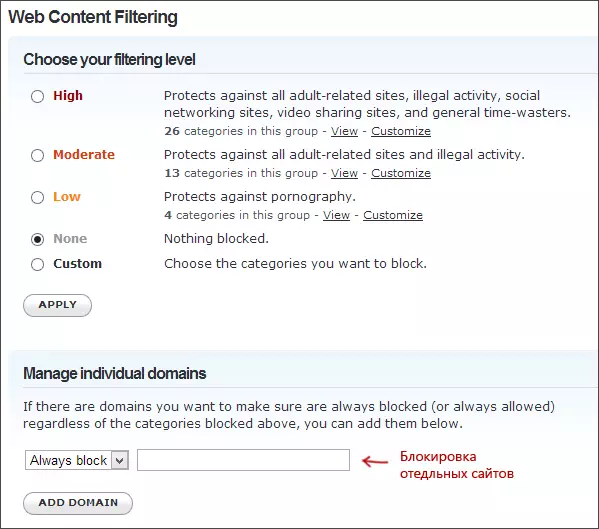
Specify which sites to block in OpenDns
After the network is added, it will appear in the list - click on the IP Network Address to open the lock settings. You can install pre-prepared filtering levels, as well as block any sites in the Manage Individual Domains section. Just enter the domain address, set Always Block and click the Add Domain button (you will also be prompted to block not only, for example, odnoklassniki.ru, but also all social networks).

Site blocked
After adding a domain to the lock list, you also need to press the Apply button and wait a few minutes until the changes take effect on all OpenDS servers. Well, after the entry of all changes in force, when you try to go to the locked site, you will see a message that the site is locked in this network and offer to contact the system administrator.
Web content filter in antivirus and third-party programs
Many well-known antivirus products have built-in parental control functions, with which you can block unwanted sites. In most of them, the inclusion of these functions and the management of them is intuitive and does not cause difficulties. Also, the possibility of blocking individual IP addresses is in the settings of most Wi-Fi routers.
In addition, there are separate software products such as paid and free, with which you can install the appropriate limitations, including Norton Family, Net Nanny and many others. As a rule, they provide lock on a particular computer and remove it by entering the password, although there are other implementations.
Somehow I will write about such programs, and it's time to complete this guide. I hope it will be useful.