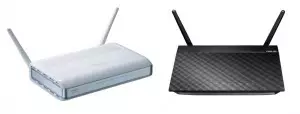
Wi-Fi routers ASUS RT-N12 and RT-N12 C1 (click to enlarge)
How difficult it is to guess before you Instructions for setting up Wi-Fi router ASUS RT-N12 or ASUS RT-N12 C1 to work in the Beeline network. Frankly, the basic configuration of the connection of almost all wireless routers from ASUS is performed almost the same - whether it is N10, N12 or N13. The differences will be only if the user needs some additional functions available in a specific model. But just in case, for this device I will write a separate instruction, because A quick search on the Internet showed that for some reason they do not write for some reason, and users are usually looking for instructions to a specific model, which is the one that we bought and may not guess that you can use other guidance to the router of the same manufacturer's router.
UPD 2014: Instructions for setting up ASUS RT-N12 for Beeline with new firmware plus video instruction.
ASUS RT-N12 Connection

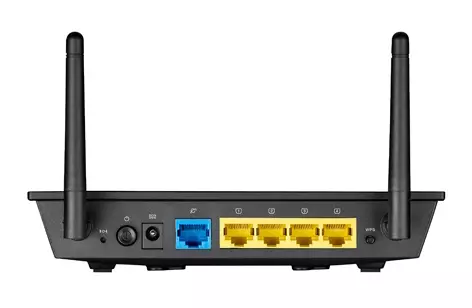
Rear side of the ASUS RT-N12 router
The rear side of the RT-N12 router is 4 LAN ports and one port for connecting the provider cable. You should connect the Beeline Wire to connect to the appropriate port on the router, and another cable that is included in the package, connect one of the LAN ports on the router with a network card connector from which the setting will be made. After that, if you have not yet done this, you can fasten the antennas and turn on the power of the router.
Also, before proceeding directly to setting up the Internet connection, I recommend to make sure that in the IPv4 properties of the LAN connections on your computer: to receive the IP address automatically and receive DNS servers addresses automatically. I especially recommend paying attention to the last item, since sometimes this parameter can change third-party programs aimed at optimizing the work of the Internet.
In order to do this, go to Windows 8 and Windows 7 to the Network and Shared Access Center, then the adapter options, click the right mouse button on the LAN icon, properties, select IPv4, once again right key and properties . Set automatic receiving parameters.
Setting up L2TP connections for Beeline Internet
Important moment: While setting up the router and after it is configured, do not use (if any) Beeline connection on your computer - i.e. The connection you used earlier before purchasing the router. Those. It must be disabled when switching to the following points of instructions and subsequently, when everything is configured - only so the Internet will work exactly in such a way as required.
To configure, start any browser and enter the following address in the address bar: 192.168.1.1 and press ENTER. As a result, you should see an offer to enter a password where you need to enter standard login and password for Wi-Fi router ASUS RT-N12: Admin / Admin.
If you did everything right, the next thing you see is the ASUS RT-N12 wireless router settings page. Unfortunately, I do not have this router, and I could not find the necessary screenshots (photos of the screen), so in the instructions I will use images from another version of ASUS and please do not be afraid if some points will slightly differ from What you see on your screen. In any case, after performing all the actions described here, you will get a working wired and wireless Internet through the router.

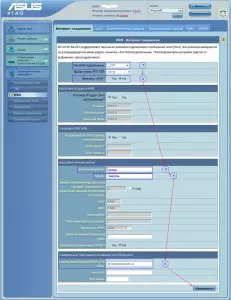
Configuring Beeline Connection on ASUS RT-N12 (Click to Enlarge)
So, let's go. On the left menu, select WAN item, which can also be called the Internet, and fall on the connection settings page. In the "Connection Type" field, select L2TP (or, if available - L2TP + dynamic IP), also if you use TV from Beeline, then in the IPTV port field, select the LAN port (one of the four rear of the router) to which it will be Connect the TV Prefix, given that the Internet will not work through this port after that. In the "Username" and "Password" fields, we enter, respectively, the data received from biline.
Next, in the graph, the PPTP / L2TP server address must be entered: tp.internet.beeline.ru and click the Apply button. In case ASUS RT-N12 starts swearing that the host name is not filled, you can enter the same thing that was entered into the previous field. In general, setting up L2TP connections for Beeline on the ASUS RT-N12 wireless router is completed. If you are all done correctly, you can try to enter in the browser any address of the site and should be safely discovering.
Setting the Wi-Fi parameters

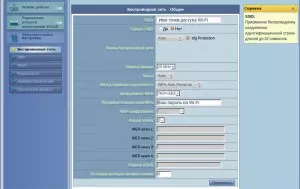
Setting the Wi-Fi parameters on ASUS RT-N12
In the menu on the right, select the "Wireless Network" item and find ourselves on the page of its settings. Here in the SSID you need to enter the desired name of the Wi-Fi access point. Any, at your discretion, preferably in Latin letters and Arabic numbers, otherwise problems can occur when connecting from some devices. In the "Authentication method" field, it is recommended to select WPA-Personal, and in the WPA Preview field, the desired password on Wi-Fi, consisting at least eight Latin characters and numbers. After that, save the settings. Try to connect from any wireless device if everything was done correctly, you will get a fully running Internet.
If any problems arose when configured, please read this article on the possible problems that often arise when setting up Wi-Fi routers.
