
Immediately, I note that despite the fact that I mentioned external USB hard drives, you should not hurry to hurry them - even if it is "getting started" (the phone can simply not see it), the lack of nutrition can spoil the disk. With a mobile device, you can only use external USB discs with your own power source. The flash drive connections does not concern, but still take into account the accelerated discharge of the device's battery. By the way, you can use the drive not only for data transfer, but also in order to create a bootable flash drive for a computer on the phone.
What you need for a full-fledged USB connection on Android
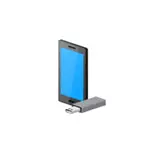
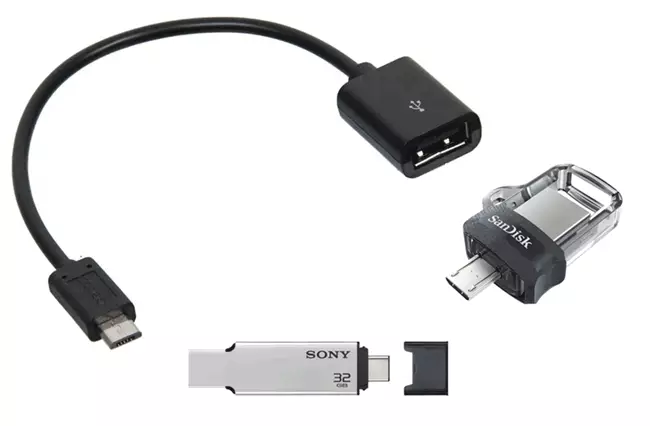
In order to connect a flash drive to a tablet or telephone, first of all, you will need a USB HOST support for the device. It is almost all at all today, before, somewhere before Android 4-5, it was not the case, but now I admit that some cheap phones may not support. Also to physically connect a USB drive, either the OTG cable (at one end - the microUSB, miniUSB connector or USB Type-C connector, on the other - the port for connecting USB devices) or the flash drive that has two connectivity at once (on sale There are "On the two ends" drives - the usual USB on one side and microUSB or USB-C on the other).
It is also desirable that the flash drive has FAT32 file system, although it is sometimes possible to work with NTFS. If everything you need is available, you can go directly to connecting and working with a USB flash drive on the Android device.
The process of connecting a flash drive to the phone or Android tablet and some nuances of work
Earlier (approximately before the version of Android 5) To connect a USB flash drive to the phone or tablet, root access was needed and had to resort to third-party programs, as the system tools did not always allow this. Today, for most devices with Android 6, 7, 8 and 9, everything that needs to be built into the system and usually USB flash drive is "visible" immediately after connection.
At the current time, the procedure for connecting a flash drive to Android looks like this:
- We connect the drive through the OTG cable or directly if you have a USB flash drive with USB-C or Micro USB.
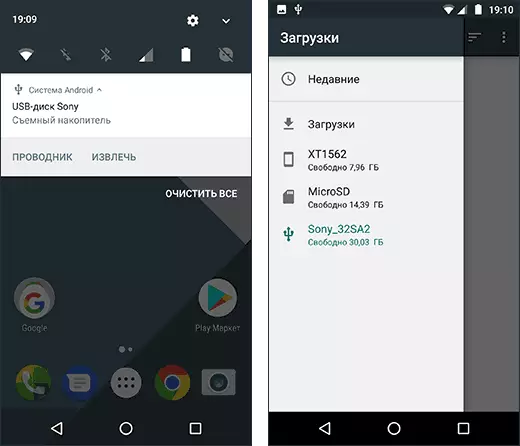
- In general, it is not always, as in paragraphs 3-5) of the notification area, we see the Android notification that a removable "USB disk" drive was connected. And offer to open a built-in file manager.
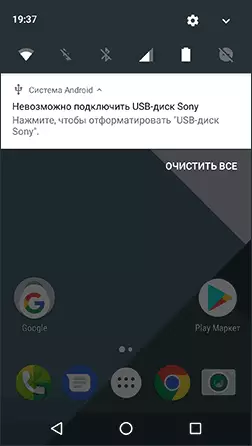
- If you saw the notification "Unable to connect a USB disk", this usually suggests that a flash drive in an unsupported file system (for example, NTFS) or contains several sections. About reading and writing NTFS flash drives on Android further in the article.
- If a third-party file manager is installed on your phone or tablet, some of them can "intercept" USB flash drives and display your own connection notification.
- If no notifications appear and the phone does not see a USB drive, it can say that: there is no USB-Host support on the phone (although I have not met anyone lately, but theoretically possible on the cheapest Android-ah) or you connect Not a flash drive, but an external hard disk for which there is not enough nutrition.
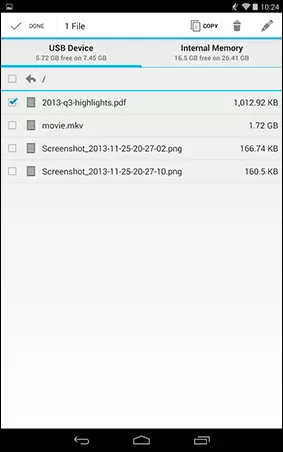
If everything went successfully and the flash drive connected, it will be more convenient to use it not in the embedded file manager, but in third part, see the best file managers for Android.
Not all file managers work with flash drives. From those I use, I can recommend:
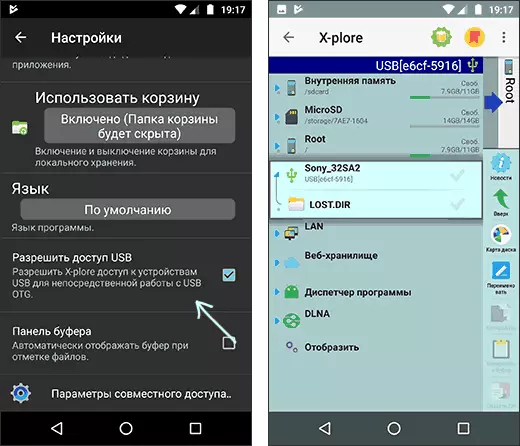
- X-Plore File Manager is a comfortable, free, without excess garbage, multifunctional, in Russian. In order for it to show the USB flash drive, go to "Settings" and enable "Allow access via USB".
- Total Commander for Android.
- ES Explorer - In it, there is a lot of superfluous and directly recommending it to him, but, unlike the previous ones, it supports reading from NTFS flash drives to Android.
In Total Commander and X-Plore, you can also enable work (and reading and writing) with NTFS, but only with the Microsoft Exfat / NTFS for USB Paragon Software paid plugin by Paragon Software (available in Play Market, you can check the job for free. Also, most Samsung devices support work with NTFS by default.
Also consider that with a debt of non-use (a few minutes), the connected flash drive is turned off android device to save the battery earyad (in the file manager it will look as if it disappeared).
Connecting a USB drive to old Android smartphones
The first thing, in addition to the USB OTG cable or a suitable flash drive, which is usually necessary when connecting not new android devices (with the exception of Nexus devices and some Samsung) is root access on your phone. For each phone model, you can find individual instructions for receiving root access, except for this, there are universal programs for these purposes, for example - Kingo root (here it should be borne in mind that the procedure for obtaining access root is potentially dangerous for the device and for some manufacturers deprives you Tablet or telephone warranty).Access (truth is not quite complete, but for most use scenarios is sufficient) Android to the flash drive can be without root, but both really working applications for these purposes that I know, support only Nexus and are paid. I will start with the way if you have root access.
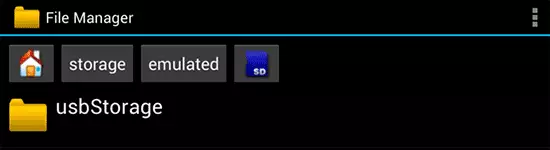
Using StickMount to connect flash drive to Android
So, if you have root access to the device, then to quickly automatically mount a flash drive with subsequent access from any file manager, you can use the free StickMount application (there is also a paid Pro version), affordable on Google Play https://play.google .com / store / apps / details? ID = EU.CHAINFIRE.STICKMOUNT
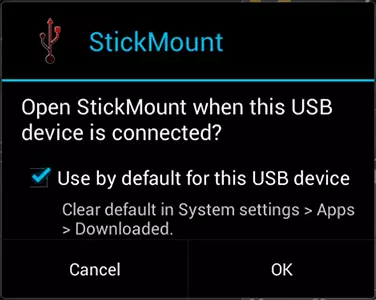
After connecting, mark the default StickMount Opening for this USB device and provide the superuser to the application. Ready, now you have access to files on a flash drive, which in your file manager will be located in the SDCard / USBSTORAGE folder.
Support for various file systems depends on your device and its firmware. As a rule, it is FAT and FAT32, as well as EXT2, EXT3 and EXT4 (Linux File Systems). Consider this when you connect the NTFS USB flash drive.
Reading files from a flash drive without root
Two more applications that allow you to read files from USB flash drives on Android - Nexus Media Importer and Nexus USB OTG FileManager and both do not require root rights on the device. But both paid on Google Play.

Applications are applied to support not only FAT, but also NTFS sections, but from devices, unfortunately, only Nexus (True, you can check whether the Nexus Media Importer will work on your device not from this line, downloading a free application to view the photo on Flashke - Nexus Photo Viewer from the same developer).
I did not test any of them, but judging by the reviews, they generally work as it should be on Nexus phones and tablets, so the information will not be superfluous.