

What is it for? The most common application is to access the films library stored on a computer from the SMART TV TV connected to the same network. However, all the same applies to other types of content (music, photos) and other types of devices supporting the DLNA standard.
Streaming video playback without setting
In Windows 10, you can use the DLNA functions to play content without configuring the DLNA server. The only requirement is that the computer (laptop) and the device on which playback is planned were in one local network (connected to one router or Wi-Fi Direct).
At the same time, the "Public Network" may be enabled in the network parameters on the computer (respectively, the network detection is disabled) and the sharing files will be turned off, the playback will still work.
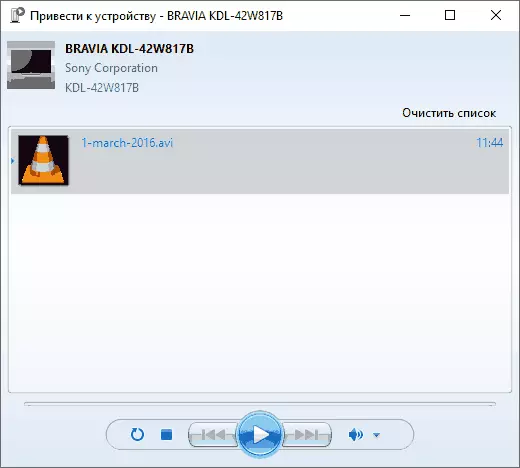
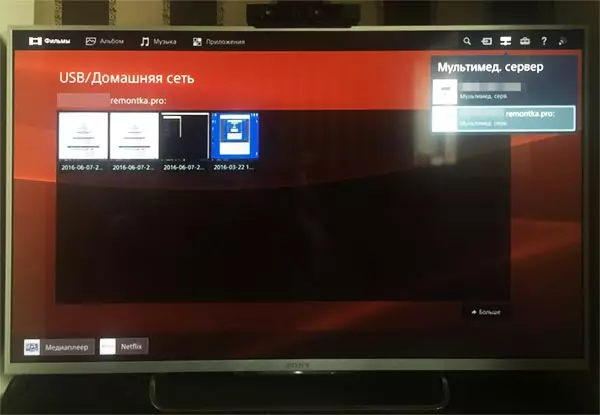
All that you want to do is to click on the right mouse button, for example, a video file (or folder with multiple media files) and select "Transfer to the device ..." ("Lower the device ..."), then select the desired list (at the same time So that it is displayed in the list, it is required that it is turned on and was on the network, also if you see two items with the same name, choose the one that has an icon as in the screenshot below).

After that, streaming playback of the selected file or files will begin in the Windows Media Player window to "lead to the device".
Creating a DLNA server built-in Windows 10
In order for Windows 10 to act as a DLNA server for supporting devices technology, it is enough to perform the following simple steps:
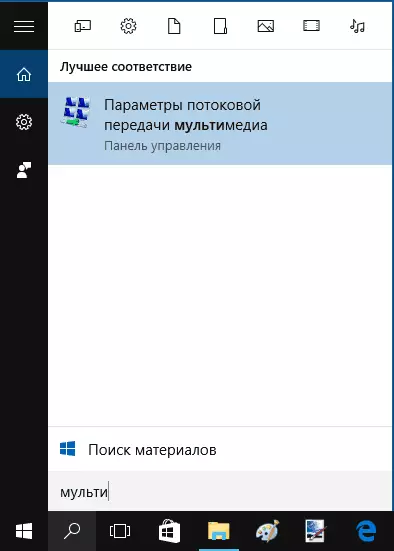
- Open "Multimedia streaming parameters" (using the taskbar or in the control panel).
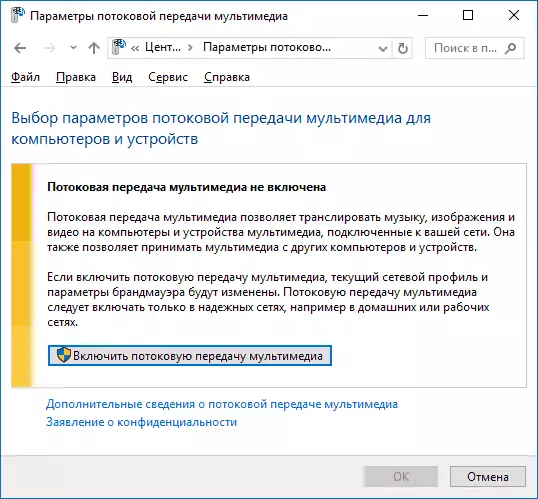
- Click "Enable Multimedia Stream Transfer" (the same action can be made from Windows Media Player at the Stream menu item).
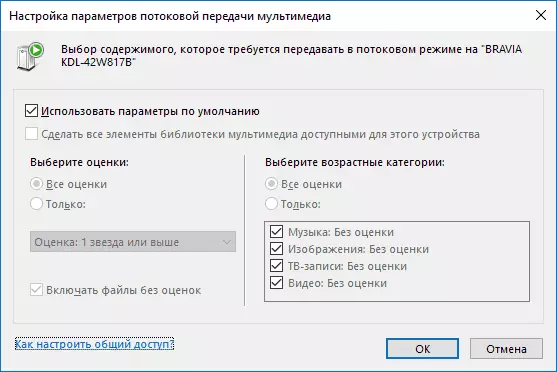
- Give the name to your DLNA server and, if required, eliminate any devices from allowed (by default the ability to receive content will be all devices on the local network).
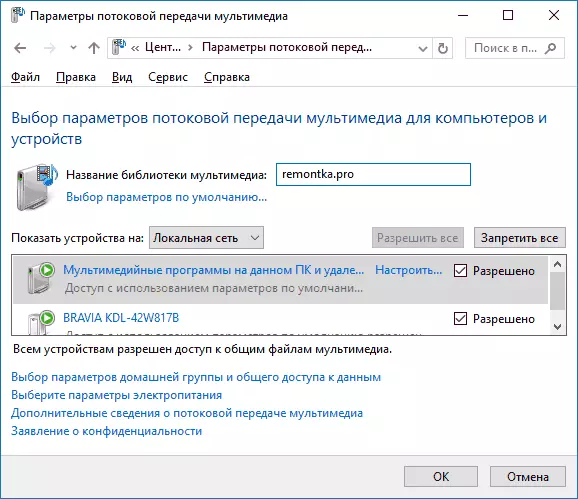
- Also, by selecting the device and clicking "Configure", you can specify which types of media should be provided.
Those. Create a home group or connect to it not necessarily (also in Windows 10 1803, home groups disappeared). Immediately after the settings made, from your TV or other devices (including other computers on the network) you can access the contents from the video folders, "Music", "Images" on a computer or laptop and play them (below in the instructions also have Information about adding other folders).
Note: With the specified actions, the network type (if it was established "publicly available") changes to the "Private Network" (home) and turns on Network detection (in my test for some reason, the network detection remains disabled to "Advanced Sharing Options", but turns on in Additional connection options in the new Windows 10 settings interface).
Adding folders for DLNA server
One of the unlike things when you turn on the DLNA server with built-in Windows 10 tools, as described above, - how to add your folders (because not everyone stores movies and music in the system folders for this) so that they can be seen from the TV, player, console etc.
This can be done as follows:
- Run the Windows Media player (for example, through the search in the taskbar).

- Right-click on the section "Music", "Video" or "Images". Suppose we want to add a video folder with the right mouse button on the relevant section, select "video control" ("Control of phonomethek" and "Gallery Management" - for music and photos, respectively).
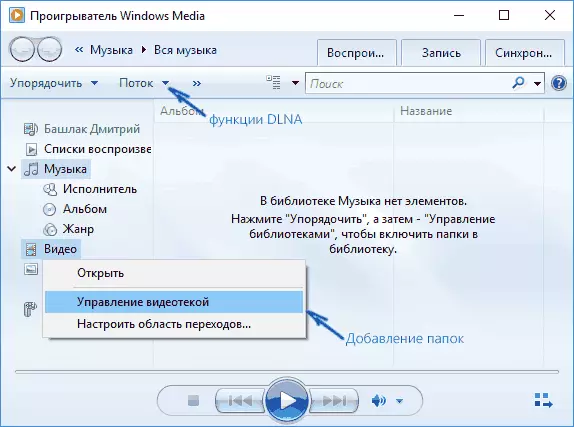
- Add the desired folder to the list.
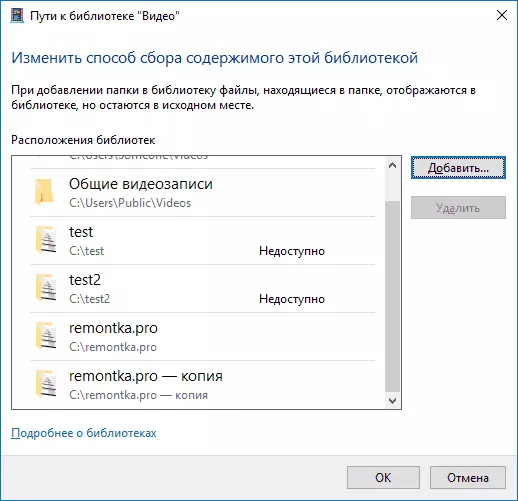
Ready. Now this folder is also available from DLNA support devices. Single Nuance: Some TVs and other devices cache list available via DLNA files and to "see" them may need to restart (on-off) TV, in some cases - disconnect and re-connect to the network.
Note: Enable and disable the multimedia server in the Windows Media player itself, in the Flow menu.
Setting up a DLNA server using third-party programs
In the previous manual on the same topic: Creating a DLNA server in Windows 7 and 8 was (in addition to the method with the creation of a "home group", which is also applicable to 10-KE), several examples of third-party programs are considered to create a media server on a Windows computer. In essence, the then the utilities are relevant and now. Here I would like to add only another such program that I found lately, and which left the most positive impression - SERVIIO.
The program is already in its free version (there is also a paid Pro version) provides the user with the widest opportunities for creating a server DLNA in Windows 10, and among additional functions, you can note:
- Using online broadcast sources (some of them require plugins).
- Transcoding support (transcoding to supported format) of almost all modern TVs, consoles, players and mobile devices.
- Support for subtitle broadcast, work with playlists and all common audio, video and photo formats (including RAW-formats).
- Automatic content sorting by types, authors, date of addition (i.e., on the end device, when viewing, you get a convenient navigation, taking into account the various categories of media content).
You can download the SERVIIO media server for free from the official site http://serviio.org
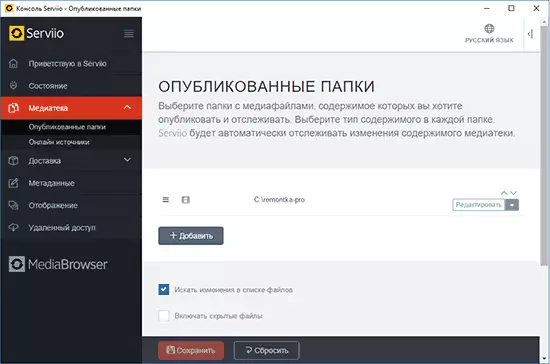
After installation, run the Serviio Console from the list of installed programs, switch the interface into Russian (on the right above), add the desired folders from video and other content in the "Mediamatka" settings point and, in fact, everything is ready - your server works and is available.
Within this article, I will not delve detail in the SERVIIO settings, except that I will note that at any time you can disable the DLNA server in the state settings item.
Here, perhaps, that's all. I calculate that the material will be useful, and if you suddenly have questions, boldly ask them in the comments.