

In this manual, it is detailed how to change the DNS server in Windows 10, 8.1 and Windows 7 is one universal method for all specified systems and one optional, only for Windows 10. Also in the article presents popular fast and secure DNS servers.
- Change DNS server in Windows
- Additional way to change the DNS server in Windows 10
- Addresses of popular DNS servers
- Video instruction
Change DNS server in Windows
If you need to change the DNS server in Windows 10, 8.1 or Windows 7, use the following steps that are suitable for all specified versions of OS:
- Press Win + R keys on the keyboard, enter NCPA.cpl In the "Run" window and press ENTER.
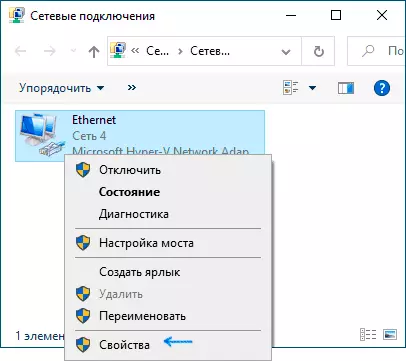
- In the window that opens, right-click on the connection used to access the Internet and select "Properties" in the context menu.
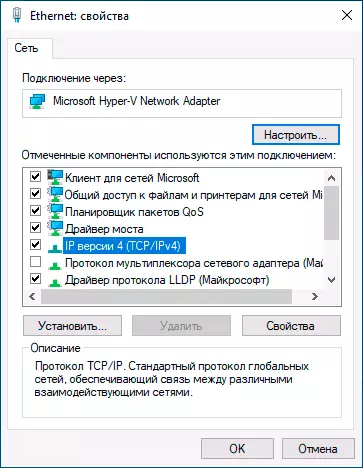
- In the list of connection components, select "IP version 4" or "TCP / IPv4" and click the "Properties" button.
- Set the "Use the following DNS servers addresses" and specify the desired addresses.
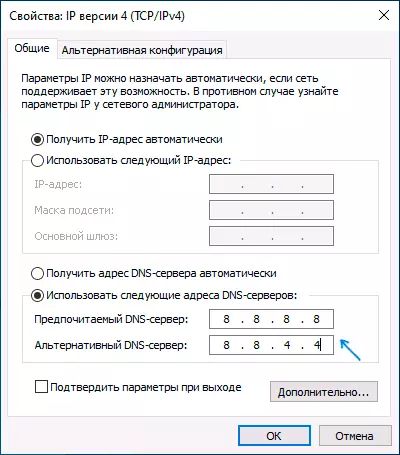
- Apply the settings with the OK button.
- If necessary (usual is usual), change the same DNS for IP version 6.
After changing the DNS parameters, it is not necessary, but it is desirable to reset the DNS cache.
This process will be completed on this, and when opening sites on the Internet you will be used to use the address of the DNS server.
Another way to change the DNS server in Windows 10
In Windows 10 there is an additional method for changing the DNS server for the Internet connection:
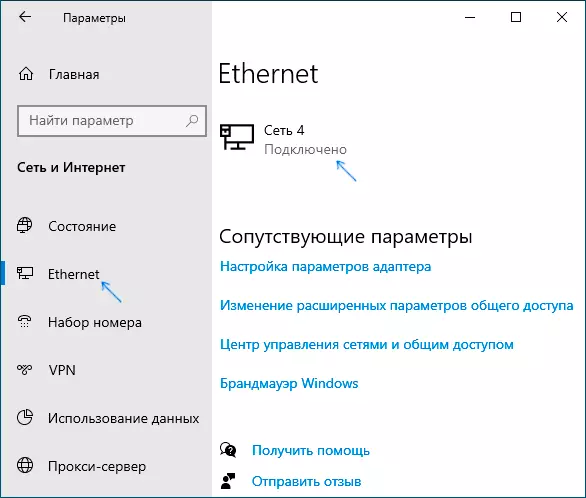
- Go to the parameters - Network and the Internet, on the left, select the connection type (Ethernet, Wi-Fi) for which you want to perform a change.
- Click on the name of the active network.
- Scroll down the next page down to the "IP Parameters" section and click the Edit button.
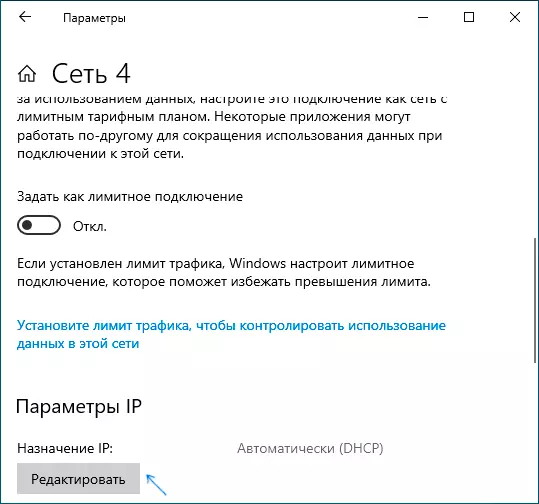
- Instead of "automatically", install "manually".
- Turn on IPv4, scroll down and install the desired parameters of the preferred and optional DNS server, save the settings.
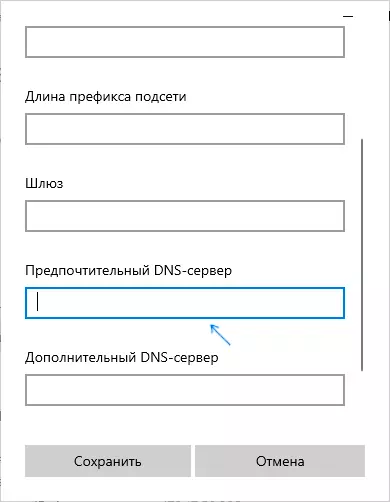
- If necessary, set the DNS for IPv6 (usually not required).
Also, as in the previous case, it is desirable to clean the DNS cache after applying the settings.
Addresses of popular DNS servers
Many well-known online companies provide access to their DNS servers: you can enter them in parameters, and they will be used by your connection. Among popular DNS servers:- Google — 8.8.8.8. and 8.8.4.4. (for IP version 4), 2001: 4860: 4860 :: 8888 and 2001: 4860: 4860 :: 8844 (IP version 6).
- Yandex. — 77.88.8.8. and 77.88.8.1 (Yandex also provides additional opportunities for its DNS, one can read more on the DNS.yandex.ru page).
- CloudFlare. — 1.1.1.1 and 1.0.0.1 (IPv4), 2606: 4700: 4700 :: 1111 and 2606: 4700: 4700 :: 1001 (IPv6).
Video instruction
I hope in your case everything worked. If you decide to change the DNS server because of any errors when opening sites, I recommend trying to enter the text of the error in the search on this site: maybe I have a solution for your problem.