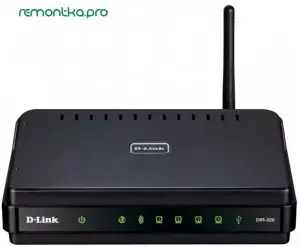
Wi-Fi Router D-Link DIR-320
D-Link DIR-320, perhaps, is the third most popular Wi-Fi router in Russia after the DIR-300 and DIR-615, and almost also often new owners of this router are interested in how to set up DIR-320 for one or another provider. Given the fact that there are many diverse firmware for this router, characterized by both design and functionality, then at the first stage of the configuration will be updated the firmware of the router to the last official version, after which the configuration process itself will be described directly. The D-Link DIR-320 firmware should not scare you - in the manual I will describe in detail what to do, and the process itself is unlikely to take more than 10 minutes. See also: Video Instructions for setting up the router
Connect Wi-Fi Router D-Link DIR-320

Rear side D-Link DIR-320 NRU
On the back of the router there are 4 connector for connecting devices over the LAN interface, as well as one connector of the Internet where the provider cable is connected. In our case, it is Beeline. Connecting a 3G modem to the DIR-320 router in this manual is not considered.
So, connect one of the LAN DIR-320JN ports cable with a network card connector of your computer. Do not connect Beeline Cable - do it immediately after the firmware is successfully updated.
After that, we turn on the power of the router. Also, if you are not sure, I recommend checking the settings of the local network connection on your computer used to configure the router. To do this, go to the Network and Shared Access Control Center, the adapter parameters, select the connection over the local network and click on it right mouse button - properties. In the window that appears, see the properties of the IPv4 protocol, in which it should be set: to receive an IP address automatically and connect to DNS servers automatically. In Windows XP, the same can be done in the control panel - network connections. If everything is configured in this way, then we turn to the next stage.
Loading the latest firmware version from D-Link

Firmware 1.4.1 for D-Link DIR-320 NRU
Go to the address http://ftp.dlink.ru/pub/router/dir--320_nru/firmware/ and download the file with the .bin extension to anywhere on your computer. This is the latest official firmware file for Wi-Fi router D-Link DIR-320 NRU. At the time of this writing, the latest version of the firmware is 1.4.1.
D-Link DIR-320 firmware
If you have purchased a used router, I recommend resetting it before starting it to the factory settings - for this, press and hold the reset button from behind for 5-10 seconds. Updating the firmware only on the LAN wire, not via Wi-Fi. If any devices are connected via a wireless network to a router, it is desirable to disable them.We run your favorite browser - Mozilla Firefox, Google Chrome, Yandex Browser, Internet Explorer or any other to choose from and entering the following address in the address bar: 192.168.0.1 After that, press ENTER.
As a result, you will be taken to the login and password request page in order to get into the D-Link DIR-320 NRU settings. This page for different versions of the router may look different, but, in any case, the standard login and password used by default will be Admin / Admin. We enter them and fall on the main page of the settings of your device, which may also differ outwardly. We go into the system - update software (Firmware Update), or to "configure manually" - System - Update software.
In the Updated Firmware Location field, specify the path to the file previously downloaded from the D-Link site. Click "Update" and wait for the successful completion of the router firmware.
Setting up DIR-320 with firmware 1.4.1 for Beeline
Upon completion of the firmware update, go to the address 192.168.0.1, where you will be asked either about changing the standard password or simply asked the username and password. They are all the same - admin / admin.
Yes, by the way, do not forget to connect the Beeline cable to the Internet port of your router before going to the next setting. Also, do not turn on the previously used internet connection on your computer (Beeline icon on the desktop or similar). The screenshots use the DIR-300 router firmware, but there is no difference when setting up, unless you need to configure the DIR-320 via USB 3G modem. And if you suddenly need - send me the appropriate screenshots and I will definitely lay out the instructions, how to configure D-Link DIR-320 through a 3G modem.
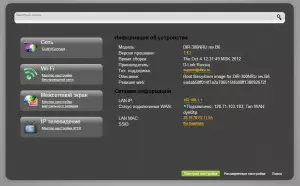
The page for setting the D-Link DIR-320 router with a new firmware is as follows:

New firmware D-Link DIR-320
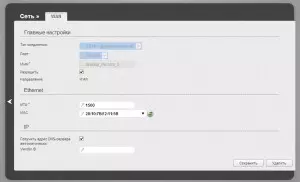
To create a L2TP connection for Beeline, we need to select the "Advanced Settings" item below, then in the Network section, select WAN and in the connection list appeared click "Add".

Configuring Beeline Connection

Connection Setup - Page 2
After that, configure the L2TP connection Beeline: In the Connection Type field, select L2TP + Dynamic IP, in the "Connection Name" field we write what we want - for example, Beeline. In the field name, password and password confirmation, enter the credentials provided to you with an Internet provider. Server VPN address specify TP.internet.beeline.ru. Click "Save". After that, when another button "Save" appears in the upper right corner, press it too. If all Beeline connection operations are performed correctly, the Internet should already work. Go to configuring wireless Wi-Fi network settings.
Setting up Wi-Fi on D-Link DIR-320 NRU
On the Advanced Settings page, go to Wi-Fi - basic settings. Here you can set any name for your wireless access point.

Setting the name of the access point on the DIR-320
Next, you must specify a password for a wireless network, which will protect it from unauthorized access of neighbors around the house. To do this, go to Wi-Fi security settings, select WPA2-PSK encryption type and enter the desired password to the Wi-Fi access point, consisting at least 8 characters. Save the settings.

Wi-Fi password setup
Now you can connect to the created wireless network from any of your device that supports such connections. If some problems arose, such as a laptop does not see Wi-Fi, then look this article.
Setting up IPTV Beeline
To configure television from Beeline on the D-Link DIR-320 router with a firmware 1.4.1, you have enough from the main page of the router settings to select the appropriate menu item and specify to which LAN ports you will connect the television console.
