

Data recovery, remote photos and video, documents and other elements from the internal memory of modern Android phones and tablets has become a challenging task, since the internal storage is connected via the MTP protocol, and not the Mass Storage (as a flash drive) and the usual data recovery programs cannot find and Restore files in this mode.
Existing popular programs to restore data on Android (see Data Restore on Android) try to get around this: in automatic mode to get root access (or giving it to the user), and then direct access to the device's repository, but it does not work for everyone devices.
However, there is a way to manually mount (connect) internal Android storage as a flash drive (Mass Storage Device) using the ADB commands, and then use any data recovery program running the EXT4 file system used on this storage, such as PhotoRec or R-Studio . On the connection of the internal storage in Mass Storage mode and the subsequent recovery of data from the internal Android memory, including after resetting the factory settings (hard reset) and will be discussed in this manual.
A warning: The described method is not for beginners. If you consider yourself to them, then some items may be incomprehensible, and the result of actions will not necessarily be expected (theoretically, it can be done worse). Use the above only under your responsibility and readily the fact that something goes wrong, and your Android device will no longer turn on (but, if you do everything, understanding the process and without errors, this should not happen).
Preparation for connecting internal storage
All the actions described below can be performed in Windows, Mac OS and Linux. In my case, Windows 10 was used with the Windows subsystem installed in it for Linux and Ubuntu Shell from the Application Store. Installing Linux components is not required, all actions can be carried out on the command line (and they will not differ), but I preferred this option, since when using ADB Shell, problems have problems with the display of special symbols that do not affect the operation of the method, but represent inconvenience.
Before you start connecting the internal memory of Android as a flash drive in Windows, follow these steps:
- Download and unpack Android SDK Platform Tools to the folder on your computer. Loading available on the official website https://developer.android.com/studio/releases/platform-Tools.html
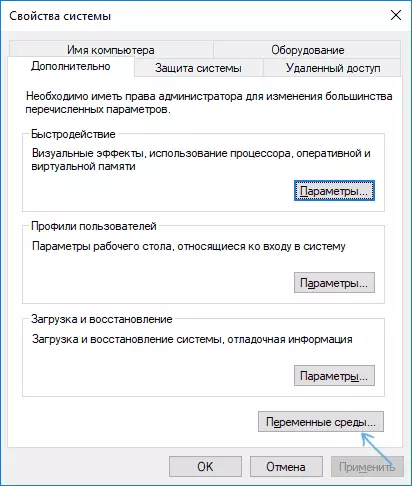
- Open the system variables of the environment (for example, starting to search for Windows to enter "variables", and then in the system properties window that opens, by pressing the "environment variables". Second method: Open Control Panel - System - Advanced System Settings - "Environment Variables" on the "Wednesday tab" Additionally").
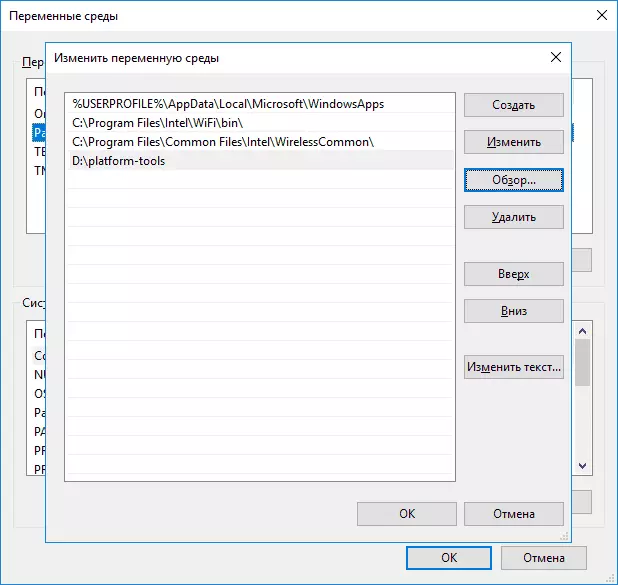
- Select the PATH variable (no matter, system or user) and click Edit.
- In the next window, click "Create" and specify the path to the folder with Platform Tools from the 1st step and apply the changes made.
If you do the specified actions in Linux or MacOS, then look at the Internet as in these OS add a folder with Android Platform Tools in Path.
Connecting Android internal memory as Mass Storage Device
Now proceed to the main part of this manual - directly connecting the internal memory of Android as a flash drive to a computer.
- Restart your phone or tablet in Recovery mode. Usually, you need to turn off the phone, then clamp and hold the power button and the "volume down" for some time (5-6) seconds, and after the FastBoot screen appears, select Recovery Mode using the volume buttons and boot into it, confirming the selection by a short press Power buttons. For some devices, the method may differ, but easily on the Internet on request: "Decovery Mode" model
- Connect the device to the USB computer and wait a while until it is configured. If, at the end of the setting in Windows Device Manager, the device will be displayed with an error, find and install the ADB Driver for your device model.

- Start Ubuntu Shell (in my example it is the Ubuntu shell under Windows 10), a command line or MAC terminal and enter ADB.exe Devices (Note: From under Ubuntu in Windows 10, I use ADB for Windows. You could install ADB for Linux But then he would not have "seen" connected devices - restricting the Windows subsystem functions for Linux).

- If, as a result of the execution of the command, you see the connected device in the list - can be continued. If NO - Enter the FastBoot.exe Devices command
- If in this case the device is displayed, it means everything is connected correctly, but the recovery does not allow the use of ADB commands. Probably you have to install custom recovery (I recommend finding TWRP for your phone model). Read more: Installing custom recovery on Android.
- After installing custom recovery, go to it and repeat the ADB.exe Devices command - if the device has become visible, you can continue.
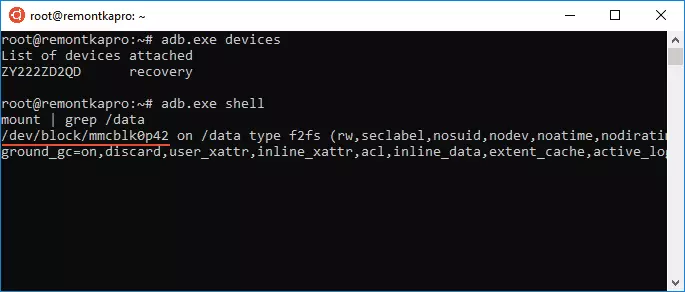
- Enter the Adb.exe Shell command and press ENTER.
In ADB Shell, in order, perform the following commands.
Mount | Grep / Data.As a result, we obtain the name of the BLOCK device that will be used further (do not lose sight of it, remember).
The next command is unmounting the DATA partition on the phone to be able to connect it as Mass Storage.
Umount / Data.Next finds the LUN index of the desired partition corresponding to the Mass Storage Device
Find / SYS -Name Lun *Multiple lines will be displayed, we are interested in those that have F_Mass_storage on the way, but for now we do not know which one (usually ending with simply lun or lun0)

In the following command, use the device name from the first step and one of the paths with the F_MASS_STORAGE (one of them corresponds to the internal memory). If it is entered incorrect, you will receive an error message, then try the next one.
ECHO / DEV / BLOCK / MMCBLK0P42> / SYS / DEVICES / VIRTUAL / ANDROID_USB / ANDROID0 / F_MASS_STORAGE / LUN / FILE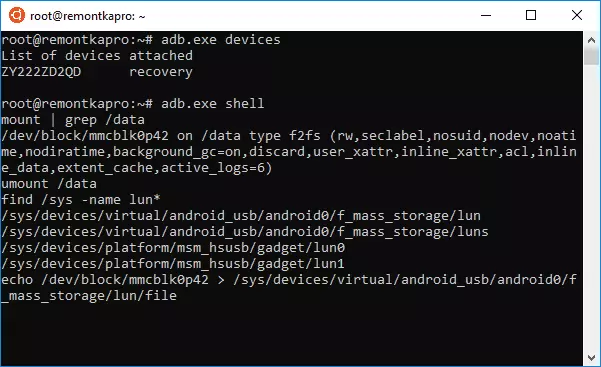
The next step is to create a script that connects the internal storage to the main system (everything below is one long line).
ECHO "ECHO 0> / SYS / DEVICES / VIRTUAL / ANDROID_USB / ANDROID0 / ENABLE && ECHO \" MASS_STORAGE, ADB \ "> / SYS / DEVICES / Virtual / Android_USB / Android0 / Functions && Echo 1> / Sys / Devices / Virtual / Android_USB / Android0 / Enable "> enable_mass_storage_android.shWe perform the script
sh enable_mass_storage_android.sh.
At this point, the ADB Shell session will be closed, and a new disk will be connected to the system ("Flashka"), which is the internal memory of Android.

At the same time, in the case of Windows, you may be asked to format the drive - do not do this (just Windows does not know how to work with the EXT3 / 4 file system, but many programs for data recovery are able).
Data recovery from connected internal android storage
Now that the internal memory is connected as a regular drive, we can use any data recovery program that can work with Linux sections, such as free PHOTOREC (available for all common OS) or paid R-Studio.
I try to perform actions with PHOTOREC:
- Download and unpack photorec from the official site https://www.cgsecurity.org/wiki/testDisk_download
- Run the program, for Windows and start a program in graphic mode, start the QPhotorec_win.exe file (Read more: Restore data in PhotoRec).
- In the main program window, select the Linux device (that new disk that we connected). We specify the folder to recover the data, as well as select the EXT2 / EXT3 / EXT file system type if you only need files of a specific type, I recommend to specify them manually ("File Formats" button), so the process will go faster.

- Make sure that the desired file system is selected (sometimes switches the "sam").
- Run file search (they will start on the second pass, the first is to search for file headers). When finding, they will automatically be restored to the folder you specify.

In my experiment from 30 remote from the internal memory of photos in perfect condition, 10 (better than nothing), for the rest - only thumbnails were found, PNG screenshots made before the hard reset were also found. R-Studio has shown approximately the same result.

But, one way or another, this is not a problem of a way that works, but the problem of data recovery efficiency as such in some scenarios. Also note that Diskdigger Photo Recovery (in the deep scanning mode with root) and Wondershare Dr. Fone for Android showed a very worst result on the same device. Of course, you can try any other means to restore files from partitions with Linux file system.
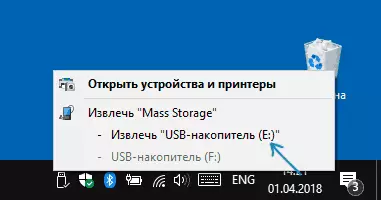
At the end of the recovery process, remove the connected USB device (using the appropriate methods of your operating system).
You can then simply restart the phone by selecting the appropriate item in the recovery menu.