

In this review, how to start the built-in video editor Windows 10 and about its capabilities that are with some probability are able to interest the novice user who needs to trim or connect video, add music, text and effects. If you need to perform more serious editing tasks, I recommend this article by the best free video edits, you can also interest you android video edits.
- Using the Windows 10 video editor
- Video Overview
Using the Windows 10 video editor
You can run the built-in Windows 10 video editor you can in the following ways:
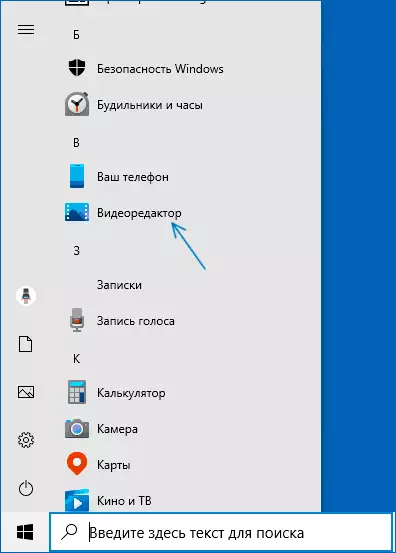
- Find the video editor point in the Start menu (but consider that in the early versions of the system it was absent in the specified location).
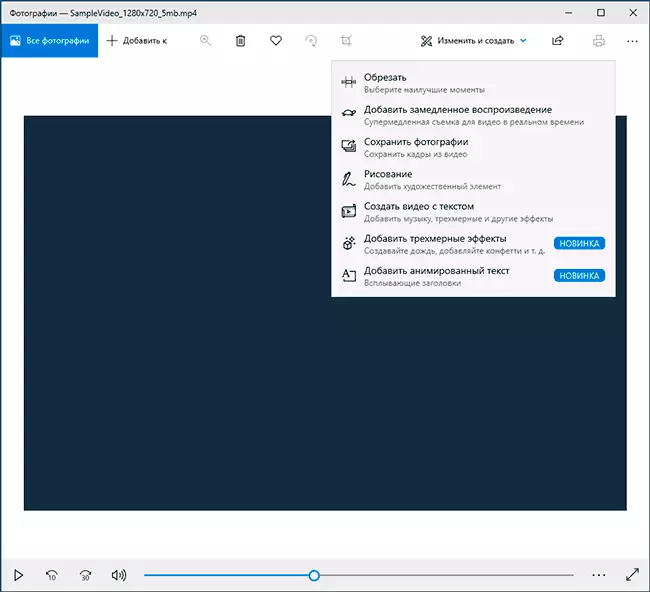
- Right-click on any video and select "Open using" - "Photos", then click on the "Change and Create" button in the window that opens the application and select the desired action in the menu: Trim, create video with text, add music and other.
- From the Start menu (or in any other way), run the built-in "Photos" application, then select the "video editor" item in the main menu (if it is not displayed, click "Advanced", and then select the desired item).
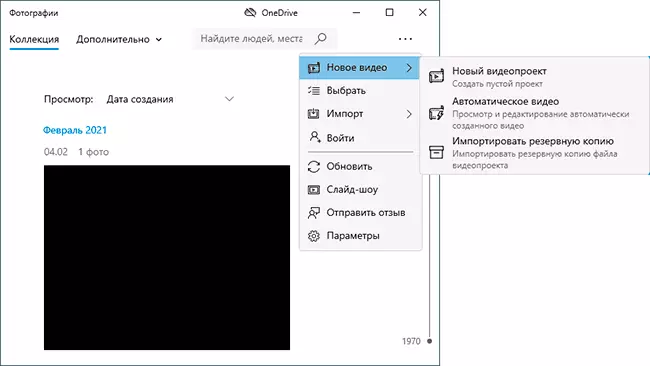
- Also in the "Photos" application, you can open the menu, then either create a new video project, or, if you wish, create automatic video with music (for example, from your photos).
Next, the use of the Windows 10 video editor will be considered when creating a video project from a "clean sheet" - after starting the first, third or fourth method.
The procedure for use in this case will be as follows:
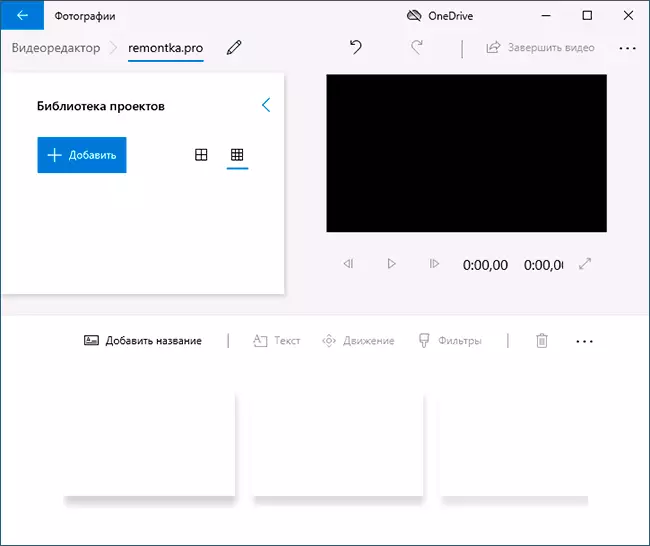
- Click the "New Video Project" button.

- Specify the name for the video being created.
- In the "Project Library" section, click the Add button and add video, photos and image files, music to be used in your project.
- After the desired elements are added, you can choose them in the project library and drag to the bottom of the video editor so as to arrange them in the order required for you (the process is shown below in the video review of the editor).
- By clicking on the "Trim", "divide", "Text" or "Movement" buttons, you can perform the appropriate actions on the video or image allocated at the bottom of the video editor.
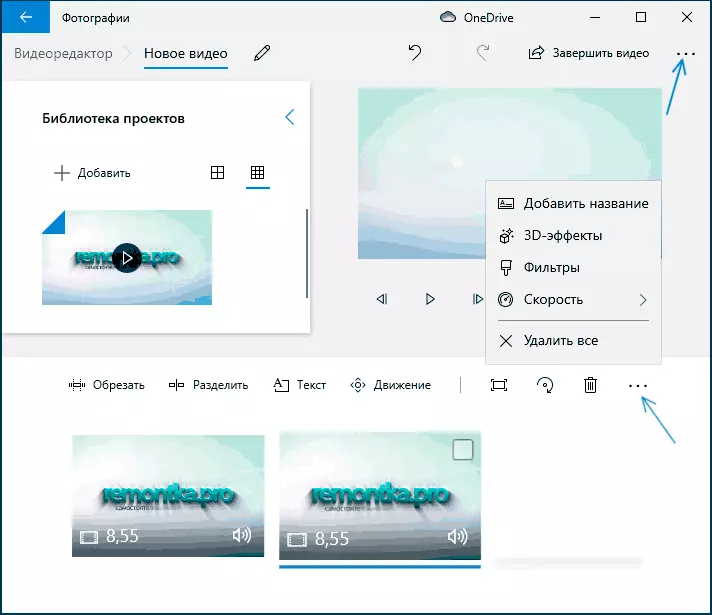
- Pay attention to the two menu buttons: The bottom works with the highlighted video fragment, the top - allows you to change the parameters of the entire final video (add background music, change the aspect ratio). They can be useful if items are not placed in the video editor window - with a narrow window, part of the control buttons are hidden in these menus.
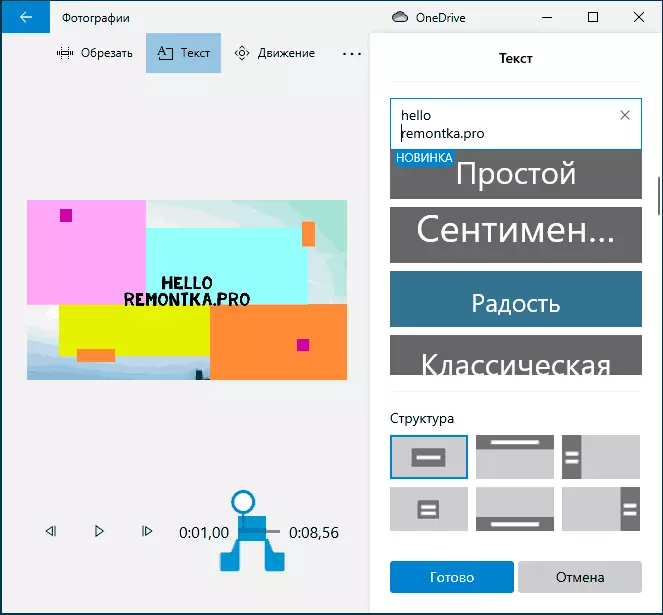
- The use of video work tools is implemented so to be understandable even to the very beginning user. For example, in the following image - add an animated text to the current video: Select the template, enter the text, with the help of markers, we specify, on which segment video needs to show text, and the "Structure" section serves to locate it in the frame.
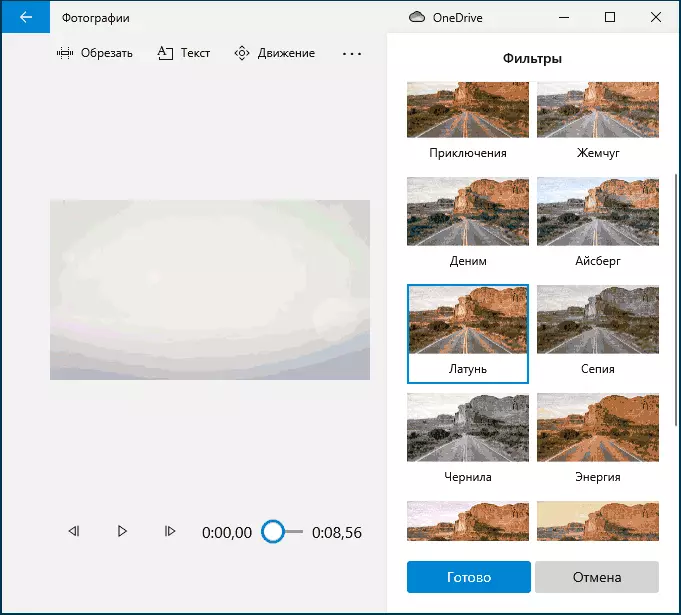
- Next - the "Filters" window to add an effect to the dedicated video, also nothing complicated.
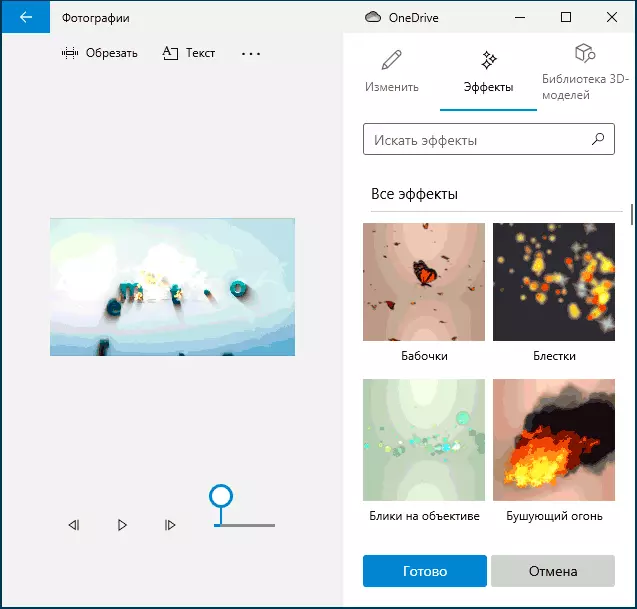
- Using the 3D-Effects item, you can add something over your video, the effects include and sound, which can be turned off.
- Additionally, I recommend to explore the context menu that opens when you click right-click on the fragment of your video below.
All the actions you run are saved to the project file that is available for later editing, but is not a video file that you can share.
If you want to save the ready video, in the form of a MP4 file (only this format is available), click the "Click Video" button at the top on the right, specify the video resolution (you can open the option "Advanced" and enable hardware video encoding speed), and then click "Export".
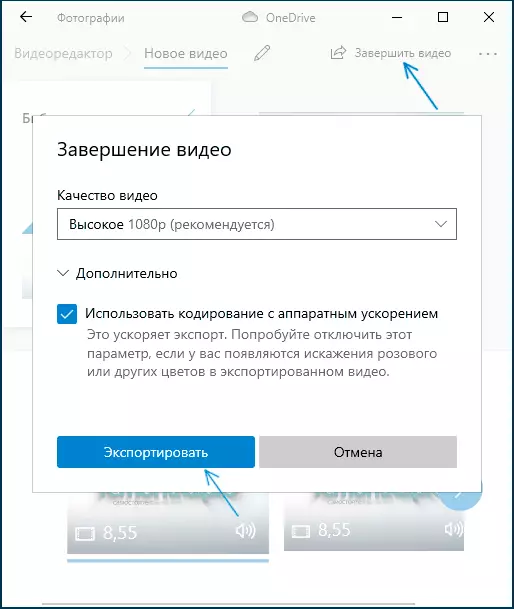
After pressing the button, you will need to specify the place of saving the finished video and wait for the completion of exports: consider that in some cases it may take a long time. Upon completion of the process, the ready video will open automatically.
Video Overview
Summing up, the built-in video editor of Windows 10 is a useful thing for an ordinary user (not a video editing engineer), which needs the ability to quickly and easily "blind" a beautiful video for personal purposes, without having to study third-party video editing programs.