

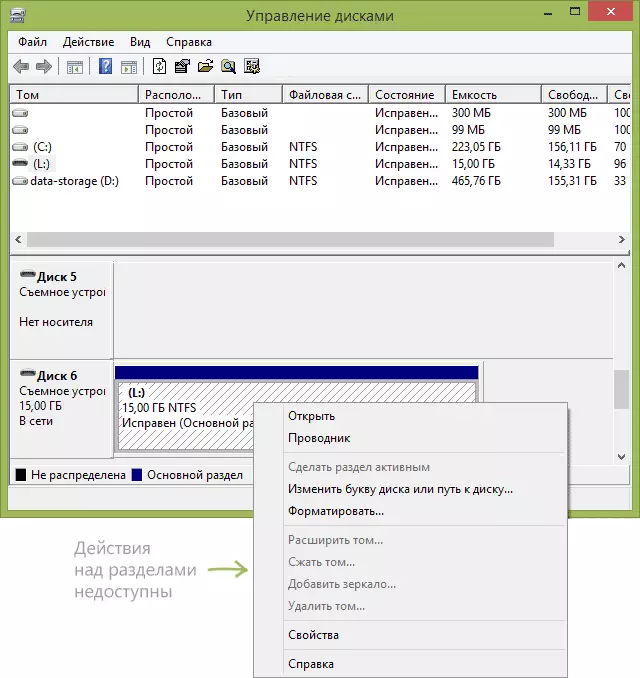
At the same time, delete partitions on a flash drive using the disk management utility in Windows 7, 8 and Windows 10 to the versions of Creators Update it is not possible: all points related to work on them ("Delete Tom", "squeeze that" and so on) Simply inactive. In this manual, details about removing partitions on a USB drive depending on the installed version of the system, also in the end there is a video guide to the procedure.
Note: Starting with Windows 10 version 1703, it is possible to work with flash drives containing multiple partitions, see how to split the flash drive to sections in Windows 10.
How to delete partitions on a flash drive to "Disk Management" (for Windows 10 1703, 1709 and more new)
As noted above, Windows 10 last versions can work with several sections on removable USB drives, including delete partitions in the built-in disk management utility. The procedure will be followed (ATTENTION: all data from the flash drive will be deleted during the process).
- Press the Win + R keys on the keyboard, enter diskmgmt.msc and press ENTER.
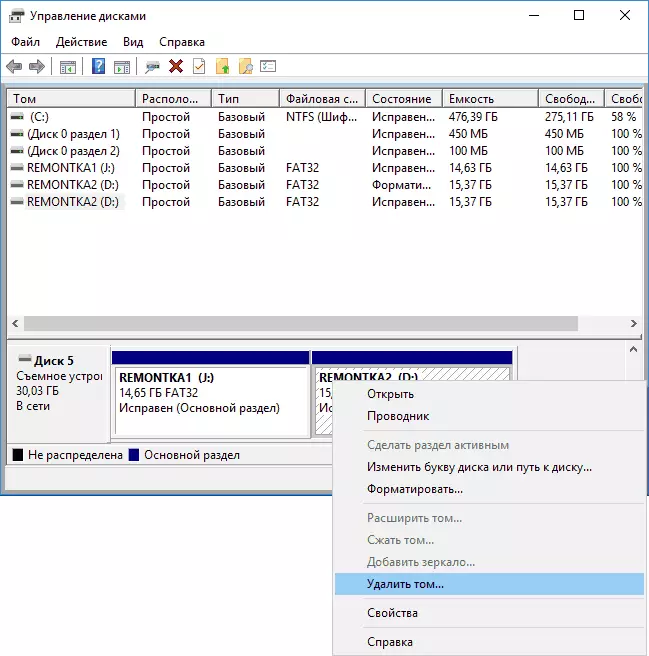
- At the bottom of the Disk Management window, find your USB flash drive, right-click on one of the sections and select "Delete TOM" menu. Repeat it for other volumes (delete only the last volume and then expand the previous everything is also impossible).
- When one unoccupied space remains on the drive, click on it right-click and select the menu item "Create a Simple Tom".
All further steps will be held in a simple volume creation wizard and upon completion of the process you will receive a single section that takes everything free space on your USB drive.
Deleting partitions on USB drive using diskpart
In Windows 7, 8 and Windows 10 early versions of the steps on the flash drive in the "Disk Management" utility are not available, and therefore will have to be resorted to the use of diskpart on the command prompt.
In order to delete all partitions on the flash drive (data will also be deleted, take care of their saving), start the command prompt on behalf of the administrator.
In Windows 10, start typing "Command Line" in searching for the taskbar, then right-click on the result and select "Run from the administrator name", in Windows 8.1 you can press the Win + x keys and select the desired item, and in Windows 7 Locate the command line in the Start menu, click on it right-click and select Start on behalf of the administrator.
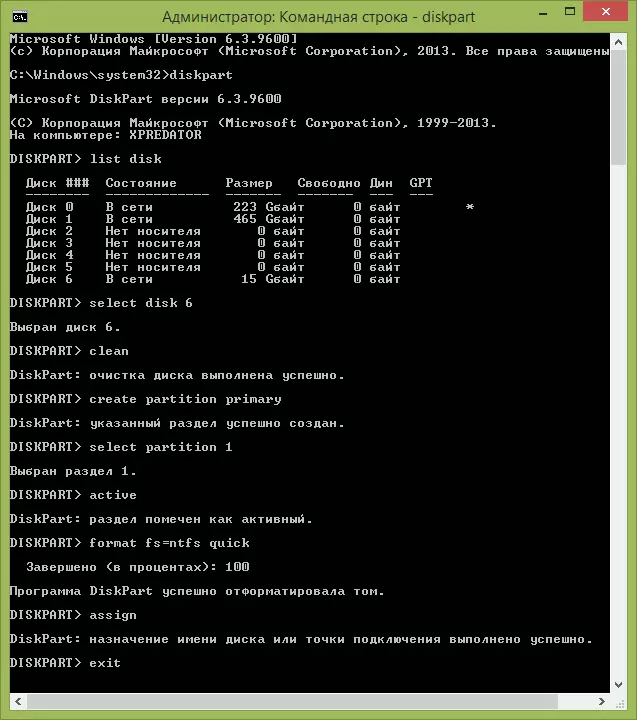
After that, in order, enter the following commands by pressing the ENTER after each of them (on the screenshot below the command list shows the entire process of executing a USB selection task):
- diskpart.
- LIST DISK.
- In the list of disks, find your flash drive, we need her number N. . Do not confuse with other drives (as a result of the actions described, the data will be deleted).
- SELECT DISK N (where n is the number of the flash drive)
- Clean (command will delete all partitions on the flash drive. You can delete them and one by one using List Partition, Select Partition and Delete Partition).
- From now on, there are no partitions on USB, and you can format it with standard Windows tools by obtaining one main section. But you can continue to use DiskPart, all commands below create one active section and format it in FAT32.
- CREATE PARTITION PRIMARY.
- SELECT PARTITION 1.
- Active.
- Format FS = FAT32 Quick
- Assign.
- EXIT.
On this, all the actions to remove partitions on the flash drive are completed, created one partition and the drive is assigned a letter - you can use the total memory available on USB.
In conclusion - the video instruction, if something is not clear.
If the described methods do not help, try using special programs for repairing a flash drive.