

In this manual, how to enable AHCI mode in Windows 10 after installing the system, if for some reason reinstalling with the AHCI pre-enabled in BIOS or UEFI mode is not possible, and the system was installed in IDE mode.
I note that practically for all modern computers with pre-installed OS, this mode is already included, and the change itself is especially relevant for SSD drives and laptops, since the AHCI mode allows you to increase the performance of SSD and, at the same time (albeit slightly) to lower power consumption.
And one more detail: the actions described in theory can also lead to undesirable consequences, such as the inability to launch OS. Therefore, it is possible for them only in the event that you know why you do, know how to get into BIOS or UEFI and are ready in case of something to correct the unforeseen consequences (for example, by reinstalling Windows 10 from the very beginning in AHCI mode).
Find out if the AHCI mode is currently enabled, you can look at the UEFI or BIOS settings (in the SATA device parameters) or directly in OS (see Screenshot below).

You can also open the disk properties in the Device Manager and on the Details tab to see the path to the equipment instance.

If it starts with SCSI, the disk works in AHCI mode.
Enable AHCI using the Windows 10 Registry Editor
In order to use hard drives or SSDs, we will need the Windows 10 administrator rights and the registry editor. To start the registry, press Win + R keys on the keyboard and enter the REGEDIT.
- Go to the HKEY_LOCAL_MACHINE \ SYSTEM \ CurrentControlSet \ System \ CurrentControlSet \ System \ CurrentControlSet \ System \ CurrentControlSet, double-click the Start parameter and set its value to 0 (zero).
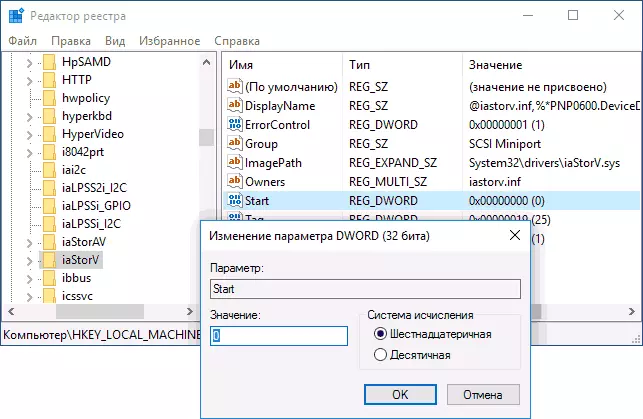
- In the next section of the HKEY_LOCAL_MACHINE \ SYSTEM \ CURRENTCONTROLSET \ SYSTEM \ CURRENTCONROLSET \ SYSECICES \ IASTORAV \ StartOnride for a parameter named 0 Set the zero value.

- In the HKEY_LOCAL_MACHINE \ System \ CurrentControlSet \ System \ Storahci section for the start parameter, set the value 0 (zero).
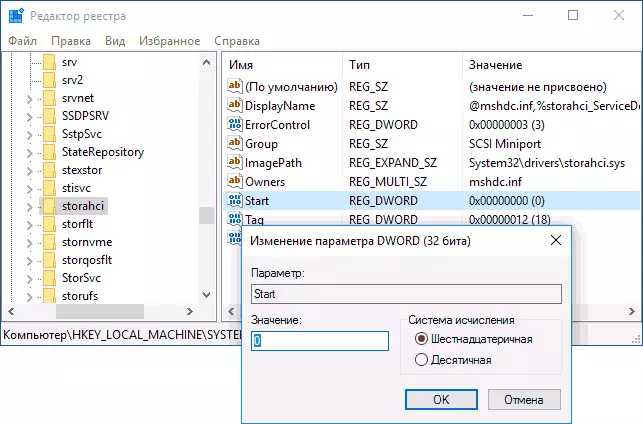
- In the HKEY_LOCAL_MACHINE \ System \ CurrentControlSet \ System \ Storahci \ StartOnride subsection for the name parameter 0, set the value zero.

- Close the registry editor.
The next step is to restart the computer and log in to UEFI or BIOS. At the same time, the first after rebooting the launch of Windows 10 is better to spend in safe mode, and therefore I recommend to enable secure mode in advance using Win + R - msconfig on the Download tab (how to log in to the Windows 10 secure mode).
If you have a UEFI, I recommend this in this case to do it through "Parameters" (Win + I) - "Update and Security" - "Restore" - "Special download options". Then go to "Troubleshooting" - "Advanced Parameters" - "UEFI Settings". For BIOS systems, use the F2 key (usually on laptops) or Delete (on PC) to enter the BIOS settings (how to log into BIOS and UEFI in Windows 10).
In UEFI or BIOS, find the SATA parameters select the drive mode. Install it in AHCI, then save the settings and restart the computer.
Immediately after restarting the OS, the SATA driver will begin to install, and upon completion you will be prompted to restart the computer. Do it: AHCI mode in Windows 10 is enabled. If for some reason the method did not work, pay attention also to the first option described in the article how to enable AHCI in Windows 8 (8.1) and Windows 7.