
I recommend to use the new and most relevant instructions for changing the firmware and setting the router for a binding work with the Beeline Provider
Go
See also: Configuring a DIR-300 Routher Video
So, today I will tell you how to configure D-Link DIR-300 REV. B6 to work with Internet provider Beeline. Yesterday I wrote instructions for setting up WiFi routers D-Link, which, in general, suitable for the history of Internet access providers, but, a fluid analysis made me approach the question of writing instructions for setting up the router - I will act on the principle: one router - One firmware is one provider.
1. Connect our router

Ports Wi-Fi Router D-Link DIR-300 NRU
I assume that you have already removed the DIR 300 NRU N 150 of the packaging. Connect the network cable Beeline (one that before it was connected to the computer's network card connector or which has just conducted installers) to the port on the back of the device designated "Internet" - usually, it has a gray edge. With the help of a cable attached to the router, connect it to the computer - one end into the computer's network card connector, the other - in any of the four LAN ports of your D-Link router. We connect the power adapter, turn on the router to the network.
2. Setting up PPTP or L2TP Beeline Connection for D-Link DIR-300 NRU B6
2.1 First of all, in order to avoid further bewilders about "why the router does not work", it is advisable to make sure that the static IP address and DNS server addresses are not specified in the local network connection settings. To do this, in Windows XP go to the Start -> Control Panel -> Network Connections; In Windows 7 - Start -> Control Panel -> Network Management Center and Sharing -> On the left, select "Adapter Parameters". Next, it is equally for both operating systems - click the right mouse button on the active connection on the local network, click "Properties" and check the IPv4 Protocol properties, they should look like this:

IPv4 properties (click to enlarge)
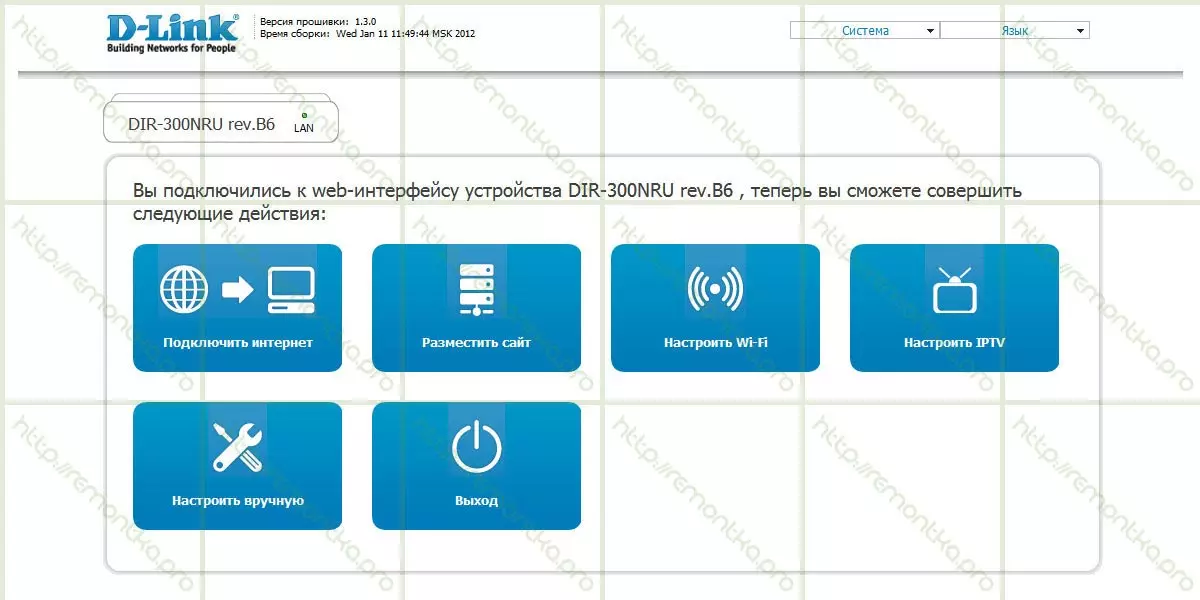
2.2. If all that is how in the picture, then go directly to the administration of our router. To do this, launch any Internet browser (a program with which you are viewing the Internet page) and enter: in the address bar: 192.168.0.1 Press ENTER. You must get to the page with a login and password query, at the top of the form to enter this data also specified the version of the firmware of your router - this manual for the DIR-300NRU Rev.b6 to work with the Beeline Provider.

Request for login and password DIR-300NRU
In both fields, we enter: Admin. (This is standard login and password for this WiFi router, they are listed on the sticker on its bottom. If for some reason they did not come up, you can try passwords 1234, Pass and empty password field. If it does not help, then maybe They were changed by someone. In this case, reset the router to the factory settings, to do this, hold the RESET button for 5-10 seconds on the rear panel DIR-300, release it and wait about a minute until the device reboots. After that, again Go to 192.168.0.1 and enter standard login and password).
2.3 If everything was done correctly, we must see the following whack:
Initial setup screen (click if you need to increase)
On this screen, select "Set up manually". And we get to the next page setting the DIR-300NRU Rev.b6: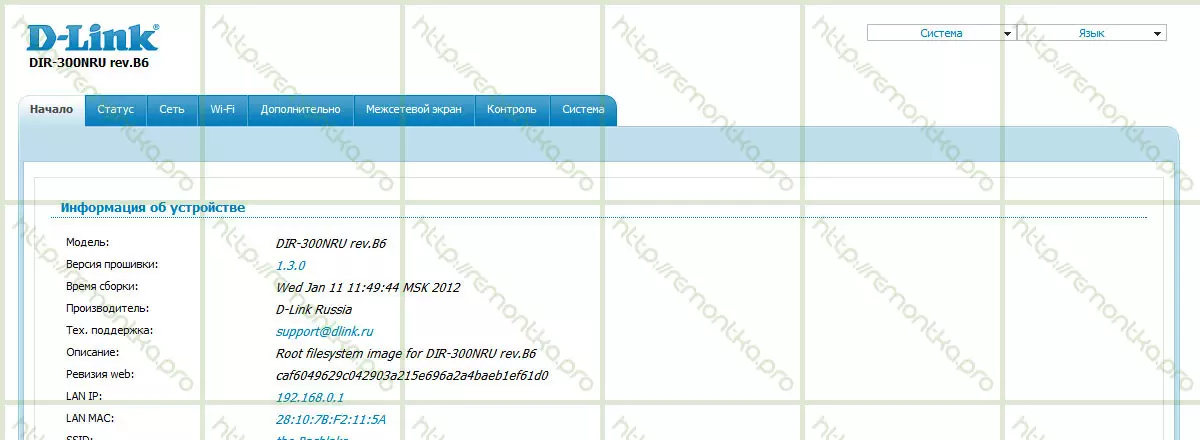
Start setting (click to enlarge)
Top select the "Network" tab and see the following: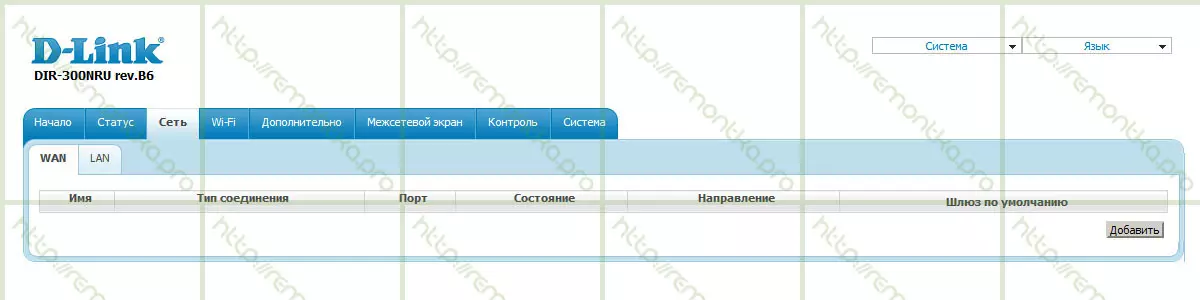
Connections Wi-Fi Routher
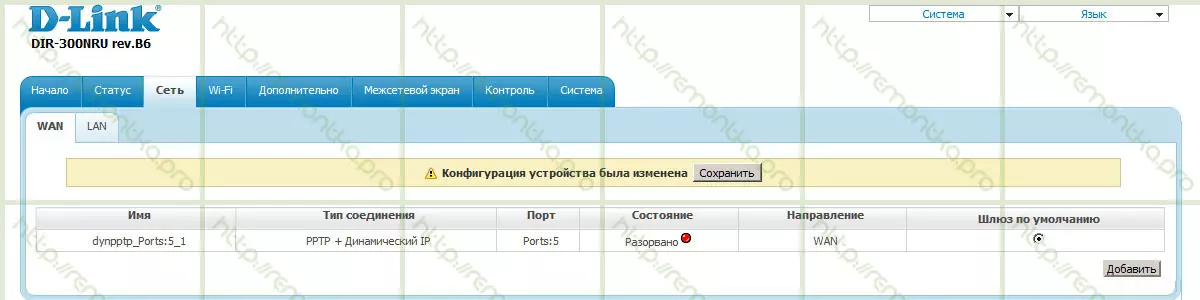
Boldly Zhmaakaz "Add" and go to one of the main stages: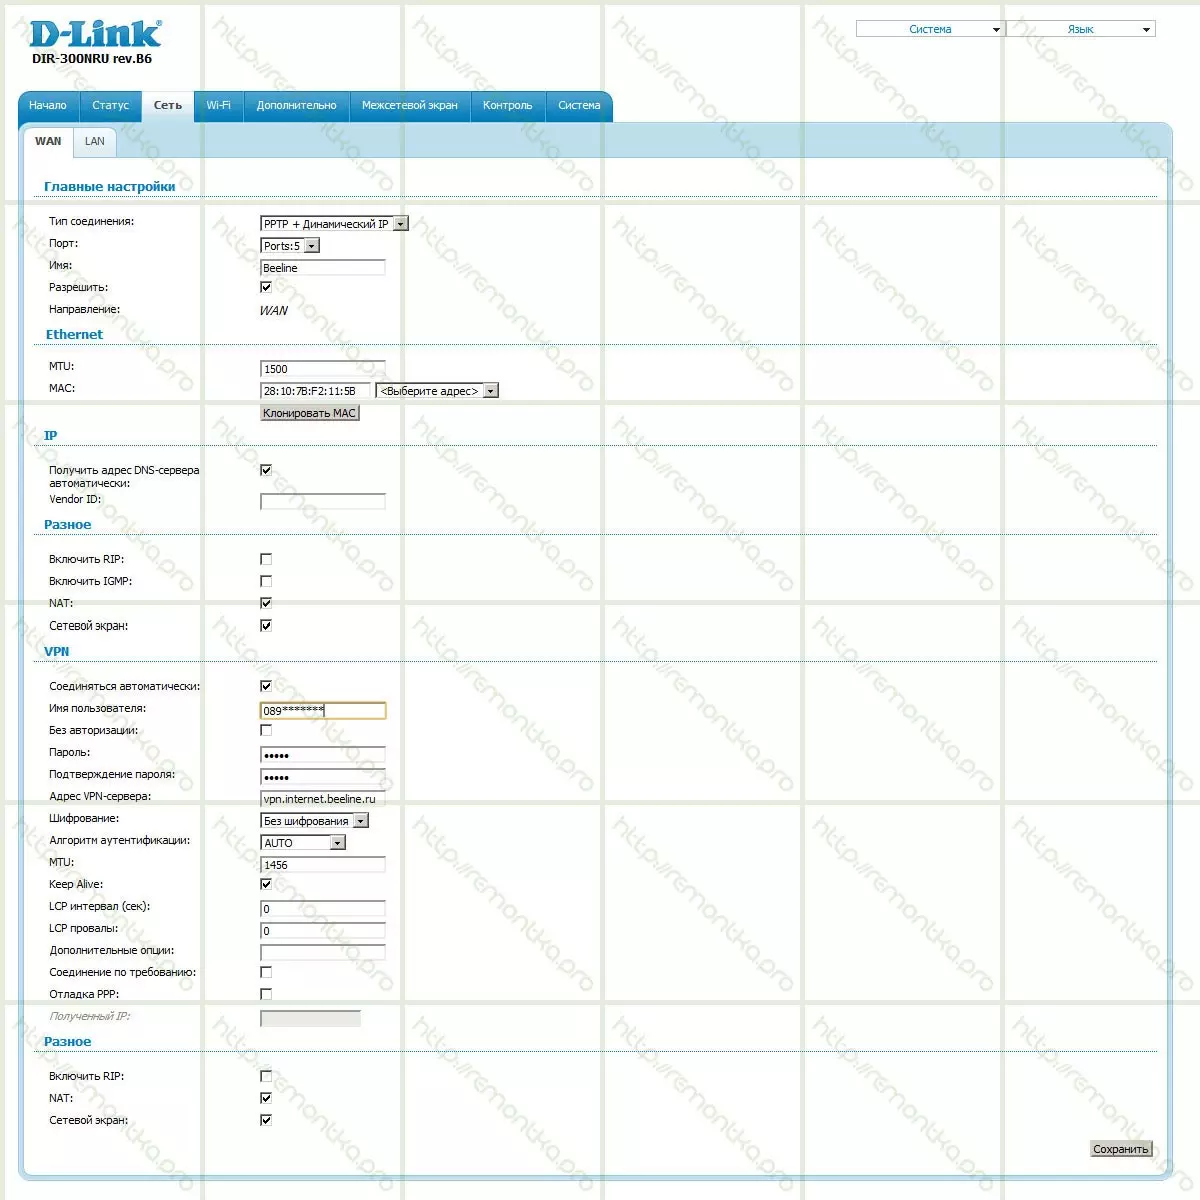
Setting up WAN for Beeline (click to see in full size)
In this window, select the type of WAN connection. Two types are available for Internet provider Beeline: PPTP + dynamic IP, L2TP + dynamic IP. You can choose any. UPD: No. Not any, in some cities only works L2TP principled difference between them. However, the settings will be different: for PPTP, the server's VPN address will be VPN.internet.beeline.ru (as in the picture), for L2TP - TP.internet.beeline.ru. We enter the username and password in the appropriate fields, issued by Beeline to access the Internet, as well as the password confirmation. We mark the checkboxes "connect automatically" and "Keep Alive". The remaining parameters do not need to change. Click "Save".
Saving a new compound
Once again, click "Save", after which the connection will automatically happen and, by going to the "Status" tab of the WiFi router, we must see the following picture:
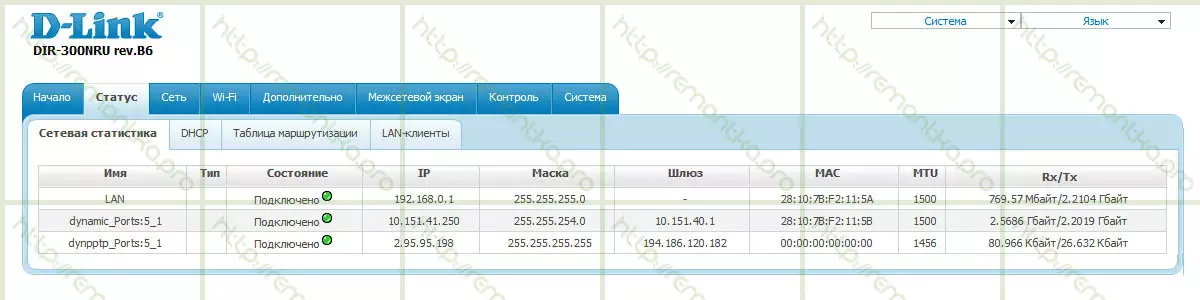
All connections are active
If you have everything as in the image, then access to the Internet should be available. Just in case, for those who first face Wi-Fi routers - when using it, you no longer need to use any connection (Beeline, VPN connection) on your computer, the router is now engaged in connecting it.
3. Configure Wireless WiFi Network
We go to the Wi-Fi tab and see: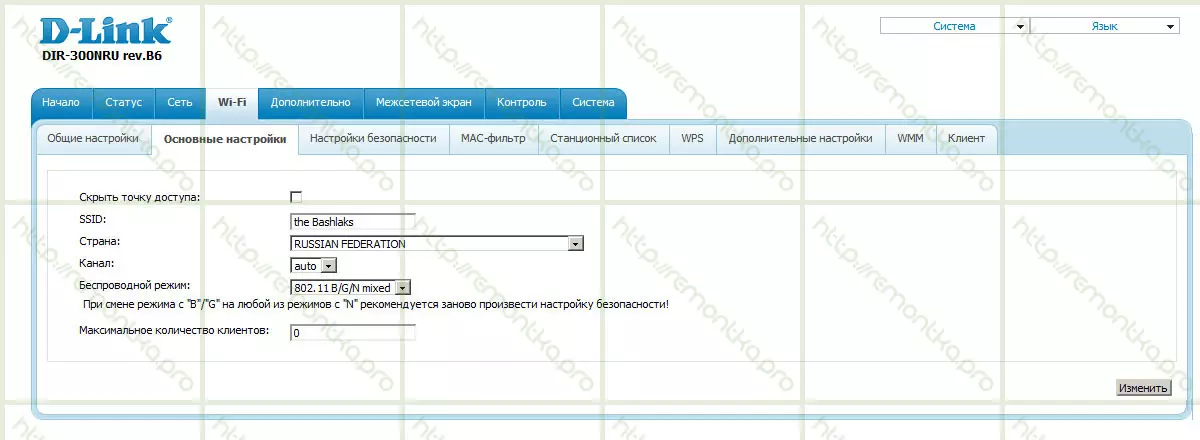
SSID settings
Here we ask the name of the access point (SSID). It can be any, at your discretion. You can also specify other parameters, but in most cases the default settings are suitable. After we set the SSID and click "Change", go to the "Security Settings" tab.
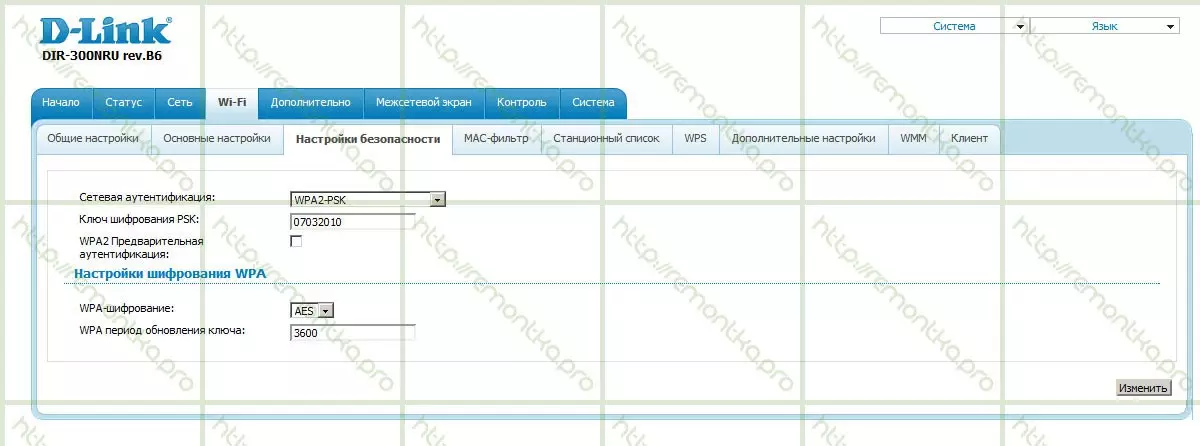
Wi-Fi security settings
Select the WPA2-PSK authentication mode (optimal, if your task is not allowed to use your Internet, but you want to have a relatively short and memorable password) and enter a password consisting of at least 8 characters and which will need to be used when connected Computers and mobile devices to a wireless network. Save settings.
Ready. You can connect to the created access point from any of your devices equipped with Wi-Fi and use the Internet. UPD: If not working, try changing the LAN address of the router to 192.168.1.1 in Settings - Network - LAN
If you have any questions related to the configuration of your wireless router (router) - you can set them in the comments.