

In this manual details how to hide a computer on the network in Windows 10, 8.1 and Windows 7 in two ways, about the difference between methods and additional information that can be useful.
- Change network profile
- Disabling network detection
- Using the command line
Change network profile
The easiest and fastest method is to change the network profile with "private" to "publicly available". The computer on which the "Public Network" profile is enabled, not visible on the network. However, consider that after changing the profile, your computer can continue to be shown on the remote computer in the "Network" section (enough to wait or restart it).
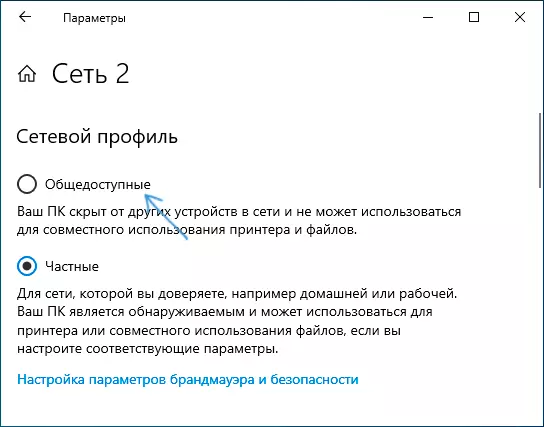
Change the network profile in the Windows 10 parameters (how to change the public network to private and vice versa in Windows 10), as well as in the network management center and shared access in previous versions of the system (clicking on the link to the current profile under the name of the active network).
The minus of this, as well as the following way - your computer does not just stop displaying on the network, but also loses the ability to connect to the local network resources, such as shared folders. If this is not a problem - you can use. In addition, from the point of view of security, the profile "publicly accessible network" may be preferable than "private".
How to hide a computer on the network by turning off network detection
You can not change the network profile, and disable network detection for the current profile. To do this, it is enough to perform the following steps:
- Go to the Network Management Center and Shared Access (how to go to the Network Management Center and Sharing Windows 10).
- Open the "Change Advanced Sharing Options" item.

- Open the properties of the current profile and disconnect the network detection for it.

After applying the settings so that the computer is not guaranteed to be displayed in the "Network" section, it is advisable to restart the current and remote computers.
Disable computer display on the local network using the command line
And one more method, the advantage of which is that when using it, access to network resources is maintained:
- Run the command prompt on behalf of the administrator.
- Enter the command Config Server / Hidden: Yes Press Enter.

- Be sure to restart the computer.
As in the previous case, before rebooting a remote computer, the PC or laptop can be displayed on it, which performed these actions. In order to continue to show the computer on the network again, use the same command, but with another parameter: Net Config Server / Hidden: NO