

All the following is suitable for 64-bit versions of Windows 7, Windows 10, 8 and 8.1 (32-bit versions are not supported). In addition, in order to successfully boot from the created drive, temporarily disconnect the Secure Boot in your UEFI BIOS, as well as enable CSM (Compatibility Support Module), all this is in the Boot Settings section. On the same topic: programs for creating a loading flash drive.
Creating a UEFI loader manually
Earlier, I wrote about how to make a Windows 10 UEFI boot flash drive in RUFUS, how to make the Windows 8 and 8.1 boot flash drive with UEFI support in the RUFUS program. You can use the specified manual if there is no desire to perform all actions on the command line - in most cases, everything goes successfully, the program is excellent.
In this manual, the UEFI boot flash drive will be created using the command line - run it on behalf of the administrator (in Windows 7, find the command line in standard programs, right-click and select the start on behalf of the administrator. In Windows 10, 8 and 8.1 Press Win keys. + X on the keyboard and select the desired item in the menu).
In the command line, enter the following commands:
- diskpart.
- LIST DISK.
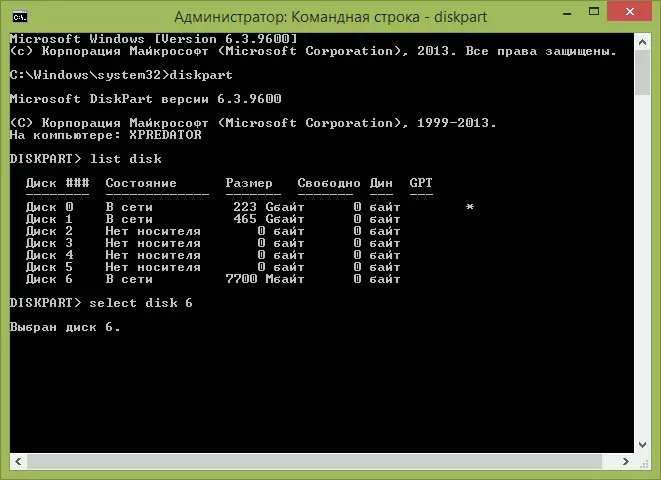
In the list of disks, look at what number the flash drive is connected to the computer, which will be recorded, let it be Number N. Enter the following commands (all data from the USB drive will be deleted):
- SELECT DISK N.
- Clean.
- CREATE PARTITION PRIMARY.
- Format FS = FAT32 Quick
- Active.
- Assign.
- List Volume
- EXIT.
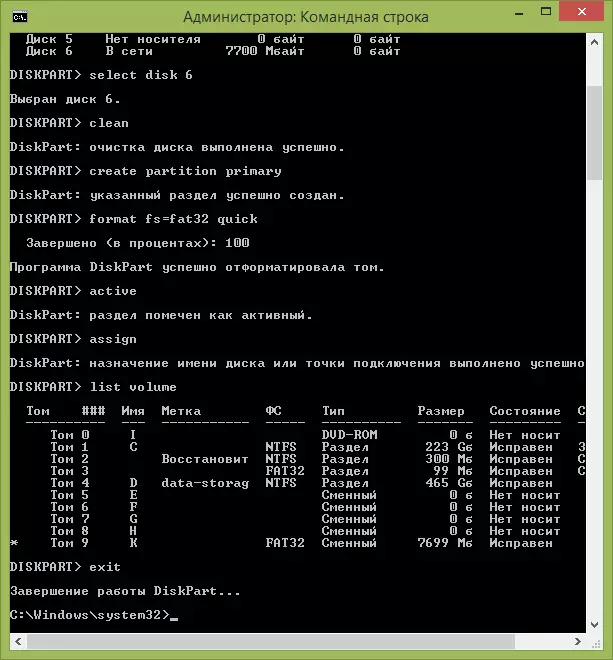
In the list that will be displayed after executing the List Volume command, pay attention to the letter that was assigned a USB to the drive. However, it can be viewed in the conductor.
Copy Windows Files on USB
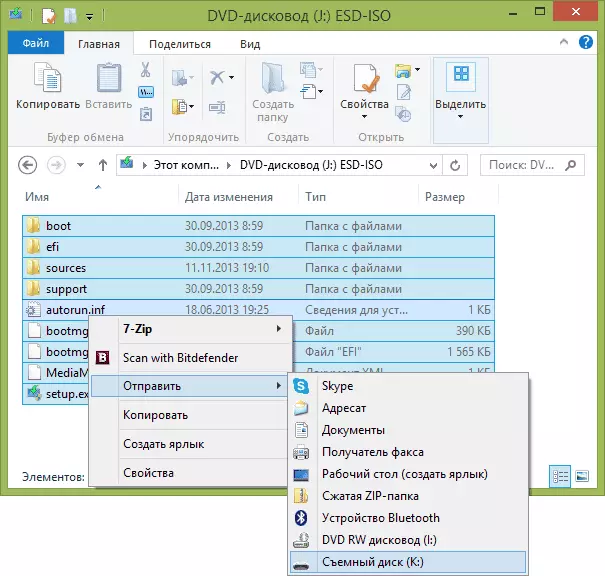
The next step is to copy all files from the Windows 10, 8 (8.1) distribution or 7 to the prepared USB flash drive. For novice users, I will note: You do not need to copy the ISO file itself if you use the image, its contents required. Now more.If you create a USB UEFI drive on a computer with Windows 10, Windows 8 or 8.1
In this case, if you have an ISO image, mount it in the system, click on the image file right-click and select "Connect" to "Connect".
Select all the contents of the virtual disk, which will appear in the system, right-click and select "Send" - "Removable Disk" (if there are several of them, then specify the one that you need).
If you do not have a disk image, and the DVD installation disk is similarly copying all its contents on the USB flash drive.
If you have on Windows 7
If you are using Windows 7 on your computer and you have any program to mount images, such as Daemon Tools, mounte an image with the OS distribution and copy all its contents to the USB drive.If you do not have such a program, you can open the ISO image in the archiver, for example, 7zip or WinRAR and unpack it on the USB flash drive.
Extra step when creating a boot flash drive with Windows 7
If you need a UEFI bootable flash drive to install Windows 7 (x64), then you will also need to do the following steps:
- On the USB flash drive, copy the EFI \ Microsoft \ Boot folder to one level above, to the EFI folder.

- Using the 7Zip or WinRAR archiver, open the sources \ install.wim file, go to folder 1 \ Windows \ boot \ efi \ bootmgfw.efi and copy this file somewhere (on the desktop, for example). For some options, this file may not be in the folder 1, but in the following by number.
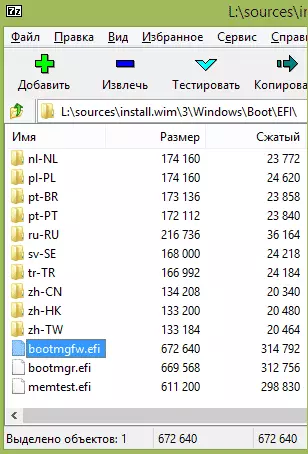
- Rename the bootmgfw.efi file in bootx64.efi
- Copy the bootx64.efi file in the EFI / BOOT folder on the boot flash drive.
On this installation USB flash drive is ready. You can perform a clean installation of Windows 7, 10 or 8.1 using UEFI (Do not forget about Secure Boot and CSM, what I wrote above. See also: How to disable Secure Boot).