

In this manual, it is detailed how to enable virtualization into BIOS / UEFI and possible problems that may occur when it is turned on on computers and laptops with Windows 10, 8.1 or Windows 7.
- Enabling Virtualization in Bios / UEFI
- Problems when you enable virtualization
- Video instruction
Enabling Virtualization in BIOS / UEFI Computer or Laptop
The main action to enable virtualization is to enable the appropriate option in the BIOS / UEFI. This option can be called Virtualization, Intel Virtualization Technology, Intel VT-X, AMD-V and be in a slightly different sections of the BIOS settings, but the logic of the action will always be the same:
- Go to the BIOS computer or laptop. Usually, this is done by pressing the DEL key, on the laptop - F2 or F10 (sometimes in combination with the Fn key). In Windows 10, a simple input may not work, then you can use the input method in UEFI through special download options, more details: how to go to BIOS / UEFI Windows 10.
- After logging, find where the virtualization option is included (then some examples will be shown), turn it on (set the value to Enabled).
- Save the BIOS settings (you can usually select Save & Exit on the EXIT tab).
And now, a few examples, where it is precisely the inclusion of virtualization on different brands of motherboards and laptops. By analogy, you will most likely be able to find it:
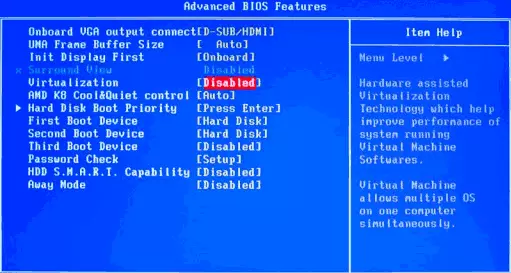
- Gigabyte motherboard - Bios Features tab, option Intel Virtualization Technology (another option - VT-D is also better to include).

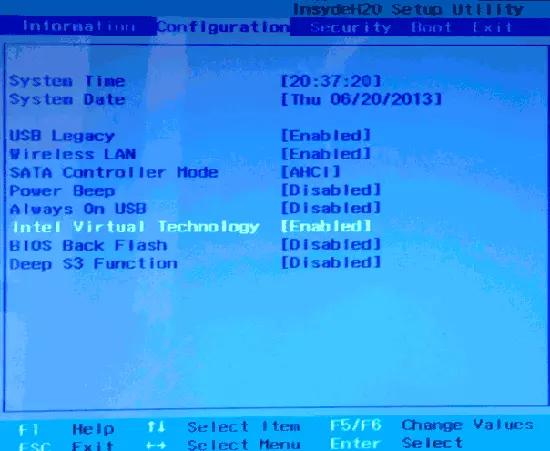
- InsyDeh2O on laptops - the Configuration tab (but, in my opinion, I also met other options in the same BIOS).
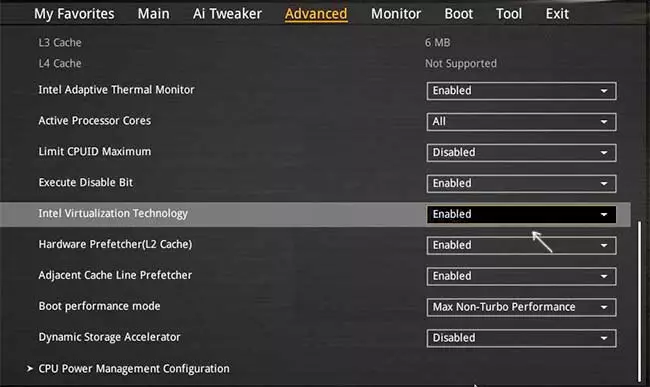
- The ASUS motherboard is the Advanced section, or Advanced - CPU Configuration.
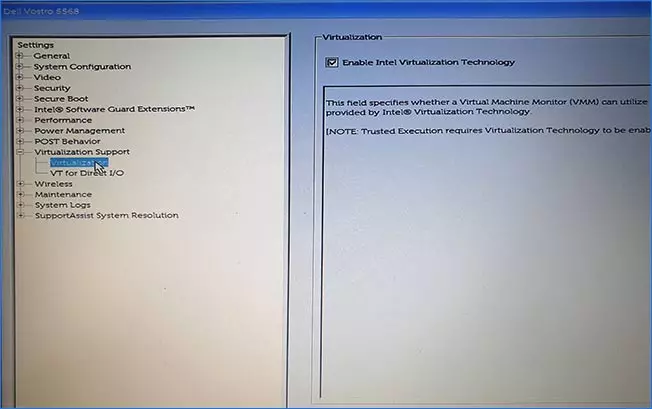
- Some Dell laptops are the Virtualization Support section.
- Many other BIOS options are simply on the Advanced Configuration tab, sometimes you need to go to the CPU Feature subsection or CPU Configuration.
Logic location of the required item To enable virtualization, all manufacturers are similar and, knowing the usual options on the option, you will find the item even on the motherboard of another manufacturer.
Problems when you enable virtualization
The most common problems when you want to enable virtualization on your computer:- Virtualization Technology is not active in BIOS
- In BIOS / UEFI there is no item to enable virtualization
- Virtualization is included in the BIOS / UEFI, but the emulator or virtual machine in Windows 10 or 8.1 writes that is disabled.
In the first two cases, the problem may wonder that your processor does not support virtualization. Look for the official specifications of your processor on the Internet, usually there is also information about virtualization support. Also, on some laptops, the processor can support virtualization technology, but it is disabled and the BIOS does not provide options for its inclusion - in this case, unfortunately, it cannot offer anything, but you can try to update the BIOS (theoretically, the option can add).
In the second case, the reason is usually lies in that in Windows 10 or 8.1, the Hyper-V virtual machine or sandbox is enabled. Disconnect it in the components:
- Open the control panel, go to "Programs and Components".
- Open the left "Enable and Disable Windows Components" item.
- Disconnect Hyper-V components and "Sandbox" (if any).
- Apply the settings and be sure to restart the computer.
If the specified actions did not help, try this option: Run the command prompt on behalf of the administrator, enter the command in it (pressing ENTER after it)
BCDEDIT / SET {CURRENT} HYPERVISORLAUNCHTYPE OFFClose the command prompt and restart the computer.
How to enable virtualization - video instruction
If in your case it did not work, describe in the comments that it is not that the program or Android emulator is reported that virtualization is not included and what has already been done: perhaps the solution is found.