

In this instruction, details about the functions and use of the EasyContextMenu program to edit the elements of the Windows context menu. If you are interested in how it is done manually, as well as other features, pay attention to the individual instructions: how to remove items from the context menu of Windows 10, how to change the menu items "Open with" Windows 10 to change the "Start" context menu.
Using EasyContextMenu to edit the context menu of Windows
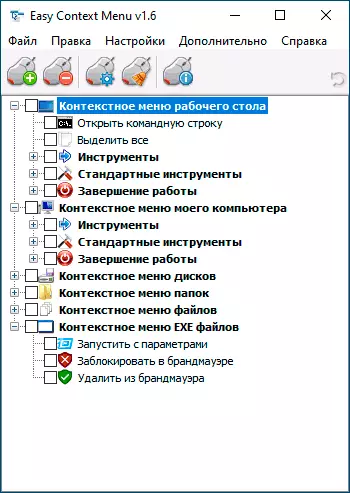
After running the EasyContextMenu program (if necessary, enable Russian interface language, go to Options - Languages and turn it on) You will see a list of context menus, the editing of which is possible in the program:
- Desktop context menu
- The context menu of my computer (appearing when you right-click on "This computer").
- Context menu discs
- Folder menu
- File menu (excluding type)
- Context menu EXE files
For each of the menu, the program already provides a list of the most frequently used actions, and you can include them, noting the corresponding element.
In order for the changes to be applied, in the File menu, click "Apply Changes", after that you can check the new context menu.

In the event that no action you need in the list, you can create it yourself:
- Open the command list editor in the "File" menu or by clicking on the button with the image of the mouse and gear.
- Select a specific menu in which you want to create your item and subsequently in it (you can create your own by clicking "Add Menu" after selecting the desired context menu).
- Click "Add Command" and specify the executable file on the computer to start the desired command.
- Specify the name of the context menu item, as well as the parameters of the program started or action if necessary. Select the context menu item icon and set other necessary parameters if necessary (for example, start-up on behalf of the administrator). Click "Save".
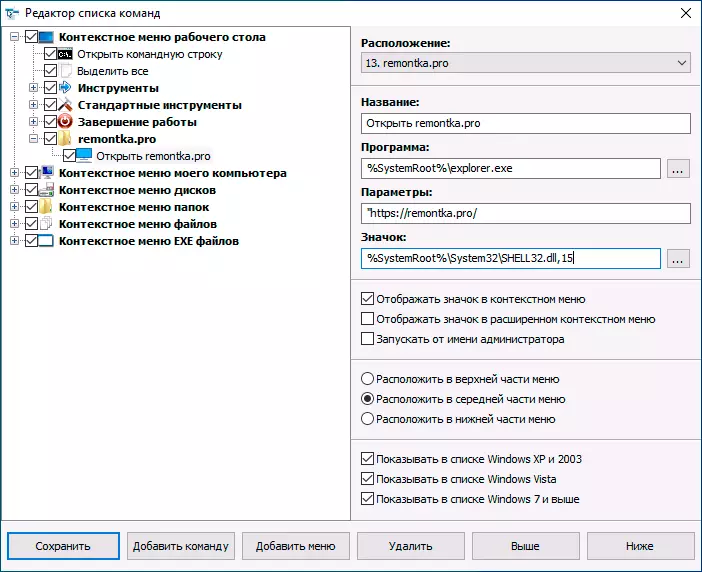
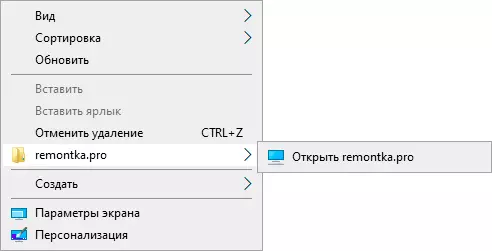
- Now the action you created will be available in the main EasyContextMenu, where it can be enabled, apply changes, and it will appear in the appropriate context menu of Windows.
Among the additional features of EasyContextMenu:
- In the "File" menu item - "Cleaning the context menu" you can remove unnecessary items added by other programs already available in it.

- In the "Advanced" menu, there are several useful options that allow, for example, remove the arrows from the shortcuts, or remove the signature of the "label" when creating a shortcut.
- After examining the editor of the command list, you can find out, with which commands are implemented separate actions, for example, blocking access to a folder and a file or access ("to become the owner") to it.
- Available Saving current command list settings and subsequent recovery at any time.
- You can make it so that the individual items of the context menu appear only when Holding SHIFT (however, it did not work in my test).
Video Demonstration of the process of changing the items of the context menu using EasyContextMenu
Summing up: Very comfortable and useful free utility. If you have the tasks of setting up the context menu of Windows - I recommend to use. The official website where you can download EasyContextMenu - https://www.sordum.org/7615/easy-context-Menu-V1-6/, the download button is at the bottom of the specified page before comments.