
Simple deletion of this folder is impossible, due to the lack of access to it. However, if you need to remove WindowsApps for one reason or another, especially if we are talking about this folder on a Disk d or other not on the system section, you can do this by setting up access rights accordingly, about it - in the instructions.
Delete WindowsApps folder on Disk D or Program Files
Regardless of which location you need to delete the WindowsApps folder, the actions will be the same. Consider that by deleting the folder you also delete and the applications installed in it and, if for a folder on a non-system disc section (for example, disk D) is relatively safe, when you delete WindowsApps from Program Files, there may be problems (do it only at your own fear And the risk) and part of the subfolders will not be removed.
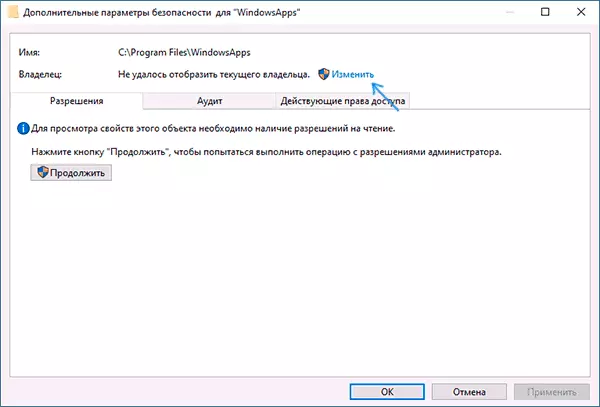
- Right-click on the WindowsApps folder and open its properties, and then go to the Safety tab and click the Advanced button.

- Click "Change" in the "Owner" paragraph.
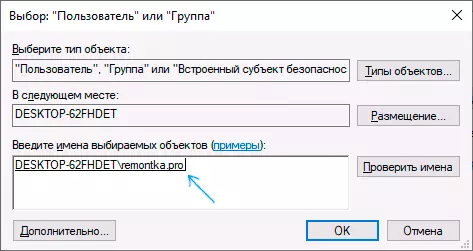
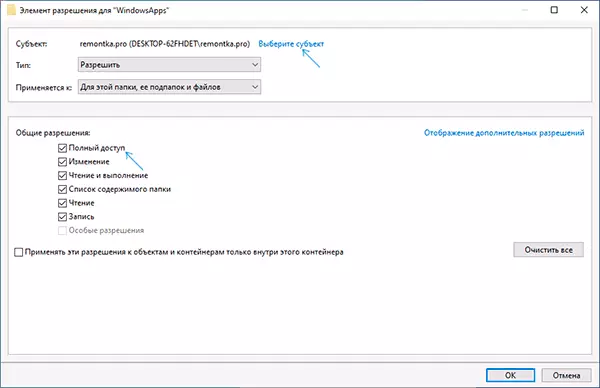
- In the "Enter the names of the selected objects" enter the name of your user, and then click the Check Names button. If the name was entered correctly, the name of the computer is added to the username, as in the screenshot. For the Microsoft account, you can enter the appropriate e-mail as a name. Click OK.
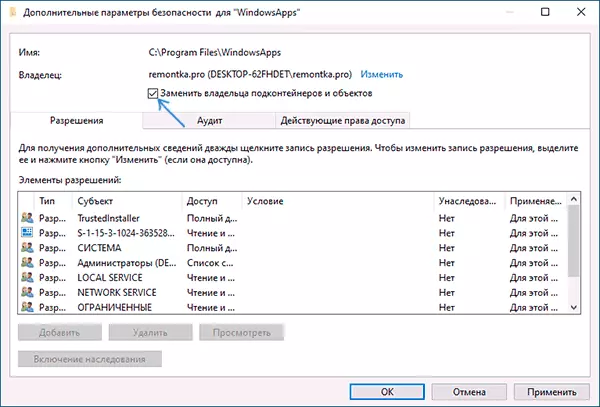
- Mark the item "Replace the owner of subcontaineers and objects" and click "Apply". Wait for the application to apply.
- Click OK. You will return to the folder properties window. In it, press the "Advanced" button again on the Safety tab.
- Click "Change Permissions", and then the Add button. In the Subject field, specify your user, as you did it on the 3rd step, and then set the "Full Access" mark and click OK.
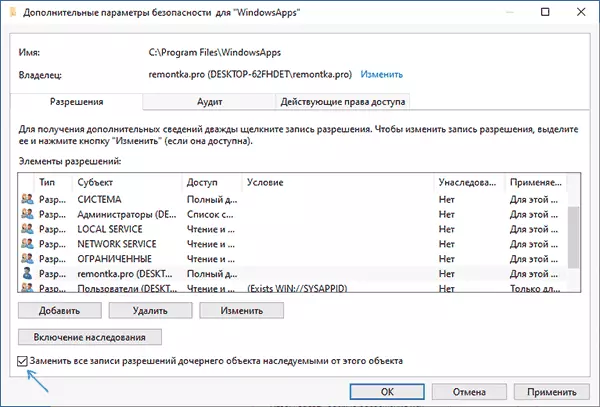
- Set the "Replace all records of the child object permissions" mark and click OK. Wait for the completion of the use of security parameters. Consider that when changing them for system applications (if you delete WindowsApps on a C drive), you may fail, you will have to click "continue" (the rights to the specified subfolder will not be changed).
After applying the security settings, delete the WindowsApps folder in the usual way. Consider: If any of the applications in the WindowsApps folder work at the present time, you can get a message that the removal is not possible, since this folder or file is open in another program.
In this case, you can start deleting folders inside WindowsApps until it is clear which of the folders is not deleted (and by its name you can install the appropriate application).
If after deleting you will again download applications from the Windows 10 store, while the folder will be used as a save space on the disk system, the WindowsApps folder will be automatically created again.