This instruction will describe in detail how to clean the laptop from dust, and this is safe for a novice user and relatively not expensive.
see also:
- Cleaning the laptop from dust (second way, for more confident users)
- The laptop is very hot
- Laptop turns off during the game
Modern laptops, as well as their more compact option - ultrabooks are quite powerful hardware, "iron", which, in the process, it is typical to produce heat, especially in cases where the laptop performs complex tasks (the best example is modern games). So if your laptop becomes hot in certain places or turns off by itself at the most inappropriate moment, and the laptop fan buzzes and makes noise louder than usual, the most likely problem is the overheating of the laptop.
If the laptop warranty has expired, you can safely follow this manual in order to clean your laptop. If the guarantee is still in force, here you need to be careful: most laptop manufacturers provide for deprivation of warranty in the event of self-disassembly of the laptop, namely, we will do.
The first way to clean the laptop - for beginners
This method of cleaning the laptop from dust is intended for those who are not well versed in computer components. Even if you did not have to disassemble computers and the more laptops earlier, follow the steps below and everything will turn out.

Required tools:
- Screwdriver, allowing to remove the bottom cover of the laptop
- Sprayed aircraft (existing on sale)
- Clean dry surface on which cleaning will be cleaned
- Antistatic gloves (optional, but preferably)
Step 1 - Remove the back cover
First of all, turn off your laptop completely: it should not be in sleep or hibernation mode. Disable the charger and remove the battery if it is provided for your model.The process of removing the lid may differ, but in general, you will need:
- Unscrew the screws on the rear panel. It should be borne in mind that on some laptop models, the screws can be under rubber legs or stickers. Also in some cases, the screws can also be on the side edges of the laptop (usually rear).
- After all the screws are unscrewed, remove the lid. In most laptop models, you need to move the lid in any side. Take it carefully if you feel that "something interferes" something, make sure that all the screws are unscrew.
Step 2 - Cleaning the fan and radiator

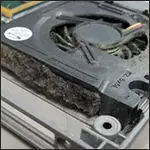
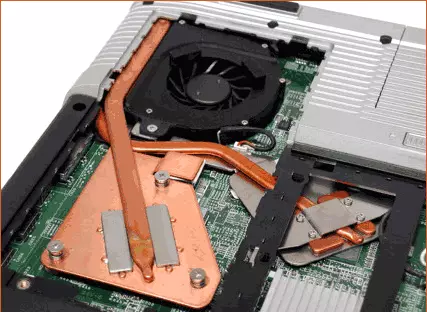
Most modern laptops have a cooling system similar to what you can see in the photo. The cooling system uses copper tubes connecting the video card chip and the processor with the radiator and the fan. In order to clear the cooling system from large pieces of dust, it is possible to use cotton chopsticks for a start, and then clean the residues using a sphailed air can. Be careful: tubes for heat dissipation and radiator ribs can be able to accidentally, and this is not worth doing.

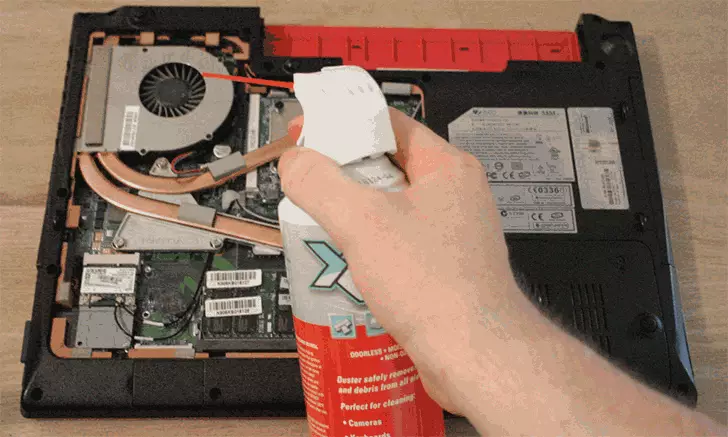
The fan can also be cleaned with compressed air. Use short "pixy" so that the fan does not rotate too fast. Also note that there are no objects between the cooling fan blades. Press up the fan should not. Another point - a compressed air cylinder should be kept vertically, without turning, otherwise liquid air can fall on the fee, which, in turn, can cause damage to electronic components.
In some models of laptops there are several fans and radiators. In this case, it suffices to repeat the above-described cleaning operations with each of them.
Step 3 - Additional cleaning and assembly of a laptop
After you have finished with the previous step, it is not bad to blow away dust from all other open parts of the laptop, using the same sprinkled aircraft.
Make sure that you accidentally have not treated any loops and other connections in a laptop, then place the lid in place and screw it, returning the laptop to its original state. In cases where the screws are hidden behind rubber legs, they have to be glued. If this applies to your laptop - be sure to do it, in cases where the ventilation holes are at the bottom of the laptop, the presence of the "legs" is required - they create a gap between the solid surface and the laptop in order to provide air access to the cooling system.
After that, you can return the laptop battery to the place, connect the charger and check it in operation. Most likely, you note that the laptop began to work quieter and not so much warmer. If the problem remains, and the laptop itself turns off, then it is possible, the matter in the thermal paste or something else. In the next article, I will tell you how to complete the cleaning of the laptop from dust, replace the thermal colon and is guaranteed to get rid of overheating problems. However, there will be some knowledge of computer equipment: if you do not have them and described here, I would not help, I would recommend contacting the company that performs repair computers.
