

First of all, I want to draw your attention to the fact that you can create an image of the loading flash drive and have many tools for this, but usually it is not an ISO image. The reason for the fact that ISO images are images of a CD (but not any other drives) data to which are recorded in a certain way (at least an ISO image and can be recorded on the USB flash drive). Thus, there is no "USB TO ISO" type or a simple way to create an ISO image from any boot flash drive and in most cases an image of IMG, IMA or BIN is created. However, the option how to create a loading image of ISO from the loading flash drive is available, and it will be described first further.
Image of a flash drive using Ultraiso
Ultraiso is a very popular program in our latitudes to work with disk images, creating and writing. Among other things, with Ultraiso, you can make the image of a flash drive, and for this it is offered two ways. In the first way we create an ISO image from the loading flash drive.
- In Ultraiso with a connected flash drive, drag the entire USB drive to the window with a list of files (empty immediately after startup).
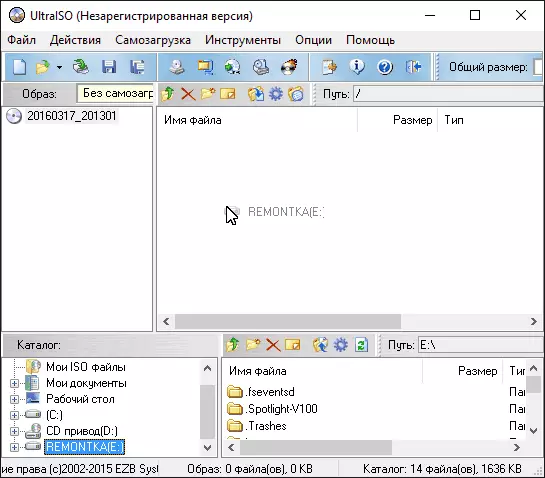
- Confirm the copying of all files.

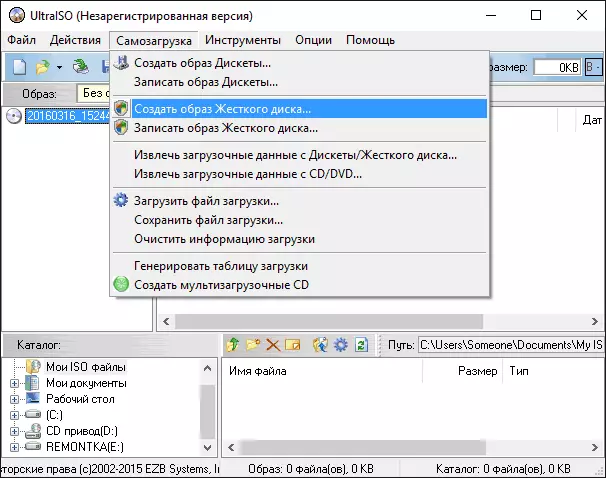
- In the Program menu, open the "Self-loading" item and click "Remove the boot data from a floppy disk / hard disk" and save the download file to the computer.
- Then, in the same section of the menu, select "Download Download File" and download the previously extracted download file.
- Using the File menu - "Save As", save the finished ISO image of the loading flash drive.

Creating a full image of a flash drive in USB Image Tool
The first, the easiest way to create an image of a flash drive (not just bootable, but also any other) is to use the free USB Image Tool.

After starting the program, in the left part you will see a list of USB drives connected. The switch is present above: "Device Mode" and "Partition Mode". The second paragraph makes sense to use only when there are several sections on your drive and you want to create an image of one of them.
After selecting a flash drive, it is enough to click the "Backup" button and specify where to save the image in the img format. Upon completion, you will receive a full copy of your flash drive in this format. In the future, in order to record this image on the USB flash drive, you can use the same program: Press "Restore" and specify, from which image it should be restored.

Note: This method is suitable if you need to make an image of some existing flash drives in order to ever restore the same flash drive to the previous state. Record the image to another drive, even exactly the same volume may not work, i.e. This is a kind of backup.
You can download a USB image tool from the official site https://www.alExpage.de/USB-Image-Tool/DownLoad/
Creating a flash drive image in Passmark ImageUSB
Another simple free program that does not require installation on a computer and allows you to easily create a complete USB drive (in .bin format) and, if necessary, write it on the USB flash drive again - ImageUSB by Passmark Software.

To create a flash drive image in the program, follow these steps:
- Select the desired drive.
- Select Create Image From USB Drive
- Choose a place to save a flash drive
- Click the Create button.
In the future, to record the previously created image of the USB flash drive, use the Write Image to USB Drive item. At the same time, the program supports not only .bin format, but also conventional ISO images.
Download ImageUSB from the official page https://www.osforensics.com/tools/write-usb-images.html
How to create an ISO flash drive image in imgburn
Attention: Recently, the ImgBurn program described below may contain various additional unwanted programs. I do not recommend this option, it was described earlier when the program was clean.
In general, if necessary, you can make an ISO image of the loading flash drive. True, depending on what is on USB, the process may not be so simple as it was in the previous paragraph. One way to use the free ImgBurn program, which can be downloaded on the official website https://www.imgburn.com/index.php?Act=Download
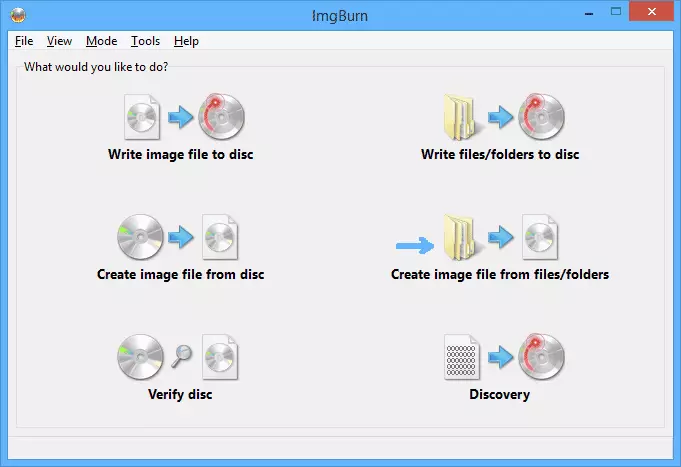
After starting the program, click "Create Image File From Files / Folders", and in the next window, click the image of the folder under the "plus" folder, select the source flash drive as the folder used.
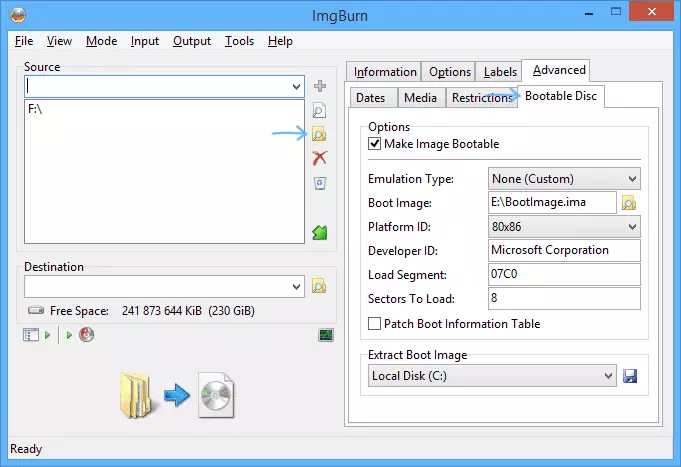
But that's not all. The next step is to open the Advanced tab, and in it - bootable disk. It is here that you need to make manipulations in order for the future ISO image to be bootable. Main item here - Boot Image. Using the Extract Boot Image field at the bottom you can extract the boot record from the flash drive, it will be saved as a bootimage.ima file in the place where you wish. After that, in the "Main Point", specify the path to this file. In some cases it will be enough to make the loading image from the flash drive.
If something goes wrong, then part of the error program corrects independently determining the type of drive. In some cases, it will be necessary to independently understand what: as I said, a universal solution for turning any USB in ISO, unfortunately, there is no, except for the method described at the beginning of the article using the Ultraiso program. It can also be useful: the best programs for creating a loading flash drive.