

In theory, Windows task scheduler is a way to run some kind of program or process when a certain time or conditions occurs, but it is not exhausted with this. By the way, due to the fact that many users do not know about this tool, removal from the autoload of malicious programs that can prescribe their launch in the scheduler, it turns out to be more problematic than with those that prescribe themselves only in the registry.
More on Windows administration theme
- Windows administration for beginners
- Registry editor
- Local Group Policy Editor
- Work with Windows services
- Disc management
- Task Manager
- View events
- Task Scheduler (this article)
- System Stability Monitor
- System monitor
- Resource monitor
- Windows Firewall in Increased Safety Mode
Launch of the task scheduler

As always, I will start with the way to start the Windows job scheduler from the "Run" window:
- Press the Windows + R keys on the keyboard.
- In the window that appears, enter Taskschd.msc
- Click OK or ENTER (see also: 5 ways to open the task scheduler in Windows 10, 8 and Windows 7).
The next way to work in Windows 10, 8 and in Windows 7 - go to the "Administration" folder of the control panel and launch the task scheduler from there.
Using job scheduler
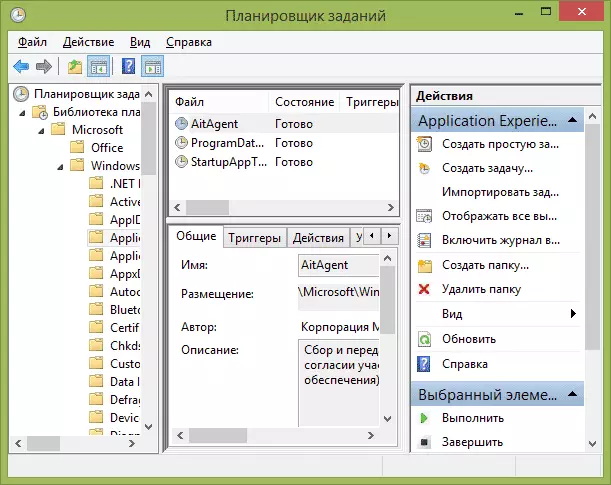
The task scheduler has about the same interface as other administration tools - on the left side of the tree structure of the folders, in the center - information about the selected element, on the right - the main actions on the tasks. Access to the same actions can be obtained from the corresponding item of the main menu (when you select a specific task or folder, the menu items are changed to the following item related to the selected).
Main actions in task scheduler
In this instrument you are available to the following actions on the tasks:
- Create a simple task - Creating a job using the built-in wizard.
- Create a task - The same as in the previous paragraph, but with manual setting of all parameters.
- Import task - Importing previously created task you exported. It can be useful if you need to configure a specific action on multiple computers (for example, starting an antivirus check, sites blocking and so on).
- Display all tasks performed - Allows you to see the list of all tasks that are started at the moment of time.
- Enable all tasks log - Allows you to enable and disable the job scheduler logging (writes all the actions running the scheduler).
- Create a folder - Used to create your own folders in the left pane. You can use for your own convenience, to understand what and where you created.
- Delete folder - Delete a folder created in the previous paragraph.
- Export - Allows you to export the selected task for subsequent use on other computers or on the same, for example, after reinstalling the OS.
In addition, you can call a list of actions by clicking the right mouse button on a folder or task.
By the way, if you have suspicions for the presence of malicious software, I recommend to look into the list of all tasks performed, it may be useful. It will also be useful to enable the task log (disabled by default), and look into it after a pair of reboots to see which tasks are executed (use the Logue tab by selecting the "Task Planner Library" folder.

In the task scheduler there are already a large number of tasks that are necessary for the work of Windows itself. For example, automatic cleaning of the hard disk from temporary files and disk defragmentation, automatic maintenance and computer check during downtime and others.
Creating a simple task
Now let's see how to create a simple task in the task scheduler. This is the easiest way for novice users who do not require special skills. So, choose the item "Create a simple task".
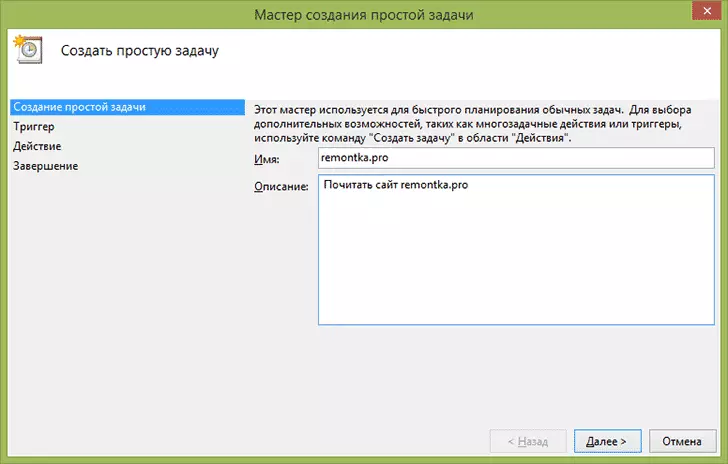
On the first screen you will need to enter the name of the task and, if desired, its description.

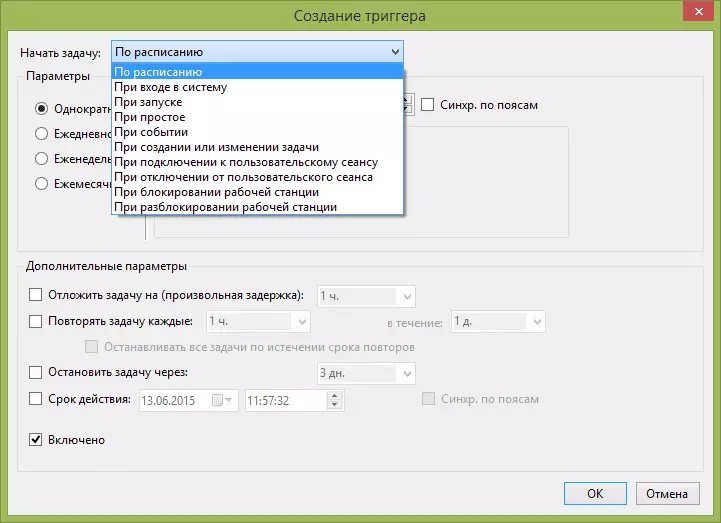
The next item is to select when task will be performed: you can perform it in time, when you log in to Windows or turn on the computer, or by the emergence of any event in the system. When choosing one of the items, you will also be asked to set the execution time and other details.

And the last stage, choose which action it will be run - start the program (you can add arguments to it), the output of the message or sending the email message.
Creating a task without using a wizard
If you need a more accurate task setup in the Windows job scheduler, click "Create Task" and you will find many parameters and options.

I will not describe the full process of creating a task in detail: in general, everything is quite clear in the interface. I will note only significant differences compared with simple tasks:
- On the Trigger tab, you can set several parameters at once for launch it - for example, when simple and when you lock the computer. Also, when selecting the "on schedule" item, you can configure execution in certain numbers of the month or the days of the week.
- On the Action tab, you can define a launch of several programs at once or perform other actions on your computer.

- You can also configure the task execution at a simple computer, only when powered by outlet and other parameters.

Despite the fact that there are a large amount of various options, I think they will not be difficult to figure out - all of them are called quite clearly and mean exactly what they are reported in the title.
I hope that someone outlined can be useful.