

In this case, the screenshot file will be saved in the system folder Images / Screen Snapshots (Actual path: C: \ Users \ user_name \ Pictures \ Screenshots). If you wish, we can change the folder for the preservation of screenshots and then on how to do it.
Change screenshot preservation folder
In order to change the Windows 10 screenshot folder, you first create a folder to which you would like to save the default screen pictures when you press the WIN + PRINT SCREEN keyboard shortcut.
After that, follow these simple steps:
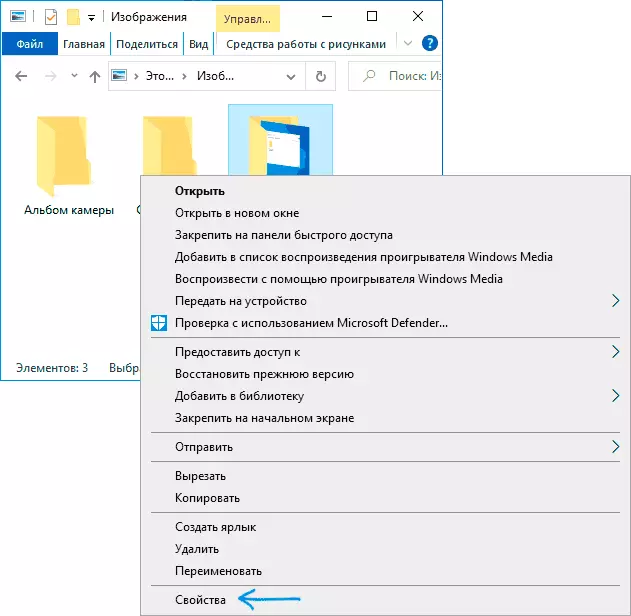
- In the Explorer, go to the "Image" system folder.
- Right-click on the Screen Snapshots folder and select "Properties". If there is no such folder, create a screenshot using the key-mentioned key, the folder will be automatically created.
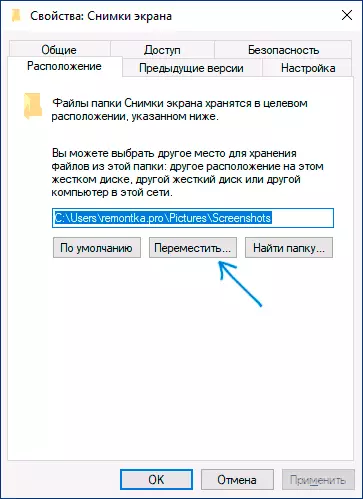
- In the folder properties, click the Location tab and click the "Move" button.
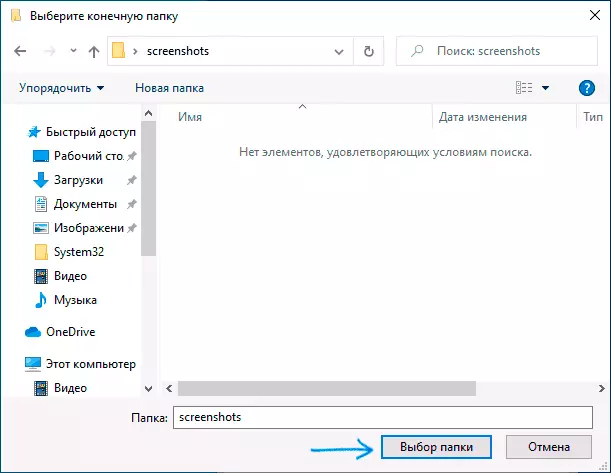
- Go to the folder where you would like to save the screenshots and click "Folder Selecting".
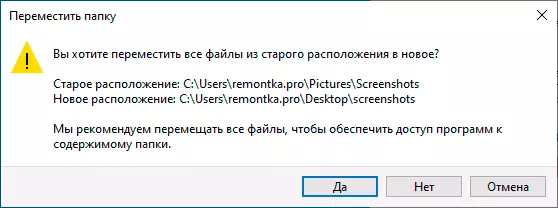
- Apply the settings made. If you confirm the changes, you will be prompted to move existing files from the old screenshot folder to the new one - here is the choice of your discretion.
- Note: After changing the screenshots folder, the name of the new folder will be displayed in Windows 10 as "Screenshots", although the actual path to it will be exactly the one that you specified. For example, you have chosen the "Remontka.pro" folder on the desktop for the new location, after that this folder on the desktop will be visible under the name "Screen Snapshots", although it will be possible to access it in the real name.
Video instruction
This is completed on this process. If in the future you want to return the original location of the folder, go to the properties of the new screenshot folder and on the Location tab, click the Default button.