

Disabling indexing is possible by changing the corresponding system parameters in the control panel, including for each disk separately and by disconnecting the appropriate service. In this simple instruction details how to disable the indexing of Windows 10 in various ways. It may also be interesting: Setting up SSD for Windows 10, SSD software.
- Disabling indexing in the Windows 10 control panel and disk properties
- Disable indexing service (Windows Search)
Turn off the indexing of Windows 10 in the control panel parameters
The standard method of setup and disable Windows 10 indexing is to use the corresponding partition in the control panel:
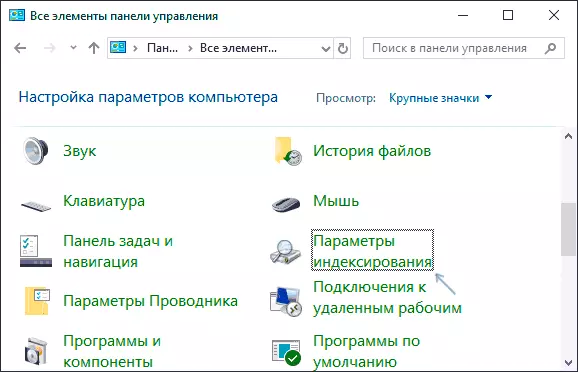
- Open the control panel, and then - indexing parameters. You can simply start typing in the search for the taskbar word "indexing" to quickly open the desired item.
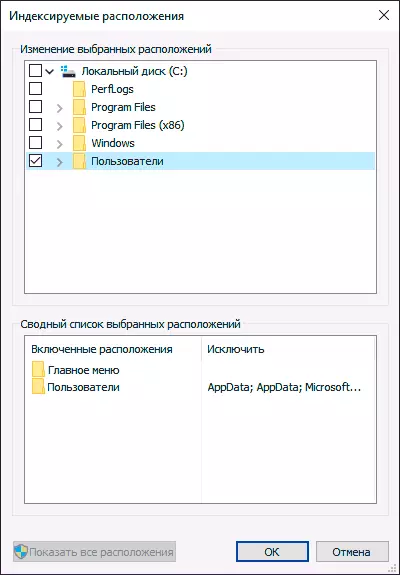
- In the window that opens, you will see a list of locations for which indexing is enabled. To change this list, click the Edit button.

- Uncheck from those locations that do not need to index and apply the settings.
Additionally, you can disable the indexing of the contents of files on separate disks (for example, only for SSD) as the most cost-resource indexing operation. To do this, it is enough to perform the following steps.
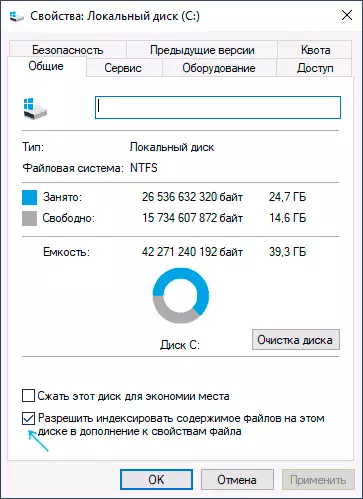
- Open the properties of the desired disk.
- Remove the "Allow Index the contents of files on this computer in addition to the file properties" and apply the settings made.
As you can see, everything is relatively simple, but at the same time the indexing service itself on the computer continues to work.
Disable Windows 10 Indexing Service (Windows Search)
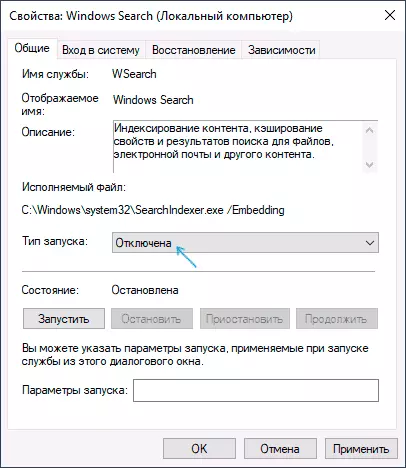
If you need to completely disable the indexing of Windows 10, it is possible to do this by turning off the corresponding system service called Windows SEARCH:
- Press Win + R keys on the keyboard, enter Services.msc.
- Find in the list of services "Windows SEARCH".
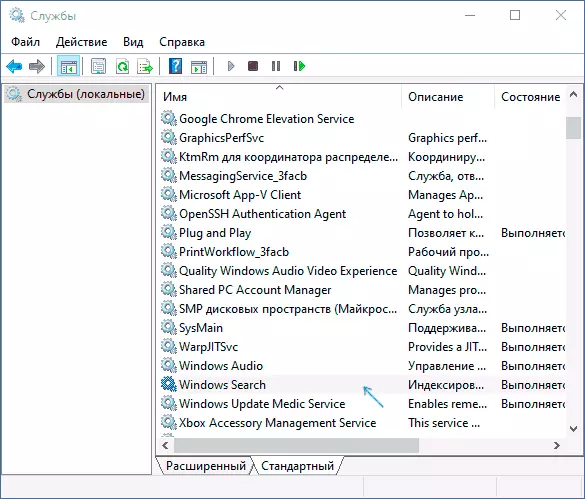
- In the start type, set "disabled", apply the settings and restart the computer (if you just disable and stop, it starts again).
After that, the indexing in Windows 10 will be completely disabled, but the search for parameters, system elements and the installed programs in the taskbar will continue to work, as well as search by files, if you use the search box in the conductor (in the latter case, you will see a notice that that the search can be slow, since indexing is not performed).