

In this summary of the Installation of Phoenix OS, the use and basic settings of this operating system based on Android (current in time - 7.1, option and 5.1), designed in such a way that its use is convenient on ordinary computers and laptops. About other similar options in the article: How to install Android on a computer or laptop.
Phoenix OS interface, other features
Before moving to the issue of installing and running this OS, briefly about its interface so that it was clear what it is.
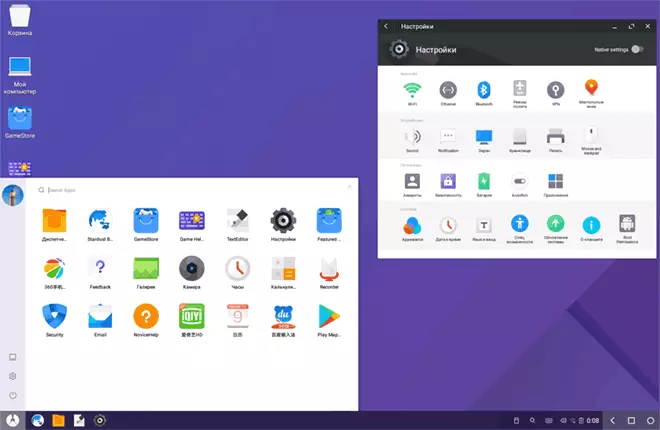
As already noted, the main advantage of Phoenix OS compared to the clean Android x86 is that it is "sharpened" under convenient use on ordinary computers. This is a full Android OS, but with a familiar desktop interface.
- The Phoenix OS provides a full-fledged desktop and a kind of startup menu.
- Recycled settings interface (but you can enable Android standard settings using the Native Settings switch.
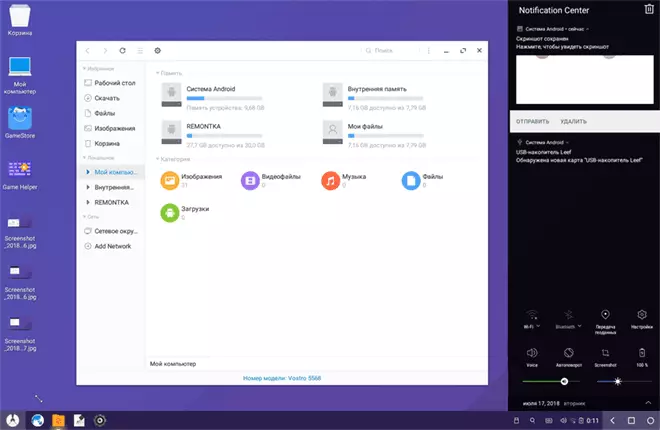
- Notifications Panel Made in Windows Style
- Built-in file manager (which can be started on the "My Computer" icon) resembles a familiar conductor.
- The operation of the mouse (right click, scrolling and similar functions) are similar to those for desktop OS.
- NTFS is supported for working with Windows discs.
Of course, there is also the support of the Russian language - both interface and input (however, it will have to be configured, but further in the article will be demonstrated as it is).
Installing Phoenix OS
On the official website http://www.phoenixos.com/en_ru/download_x86 is represented by Phoenix OS based on Android 7.1 and 5.1, and each is available for download in two versions: as a regular installer for Windows and as the ISO boot image (supports and UEFI and BIOS / LEGACY loading).- The advantage of the installer is a very simple Installing PHOENIX OS as a second operating system on a computer and easy removal. All this without formatting disks / partitions.
- The advantages of the ISO image is the ability to run PHOENIX OS from a flash drive without installing on a computer and see what it is. If you want to try this option - just download the image, write to the USB flash drive (for example, in RUFUS) and download the computer from it.
Note: The installer also has the creation of the PHOENIX OS boot flash drive - just run the Make U-Disk item in the main menu.
Phoenix OS system requirements on the official website are not very accurate, but the general essence of them comes down to the need for an Intel processor not older than 5 years and at least 2 GB of RAM. On the other hand, I assume that the system will be launched on the Intel Core of the 2nd or 3rd Generation (which is more than 5 years old).
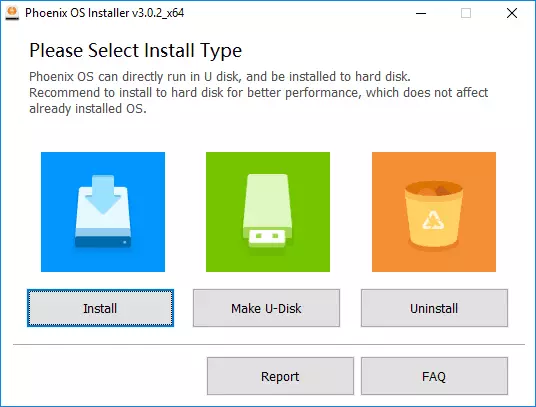
Use Phoenix OS Installer to install Android to a computer or laptop
When using the installer (EXE PhoenixosInstaller file from the official site), steps will be as follows:
- Run the installer and select "Install".
- Specify the disk to which the Phoenix OS will be installed (it will not be formatted or storm, the system will be in a separate folder).
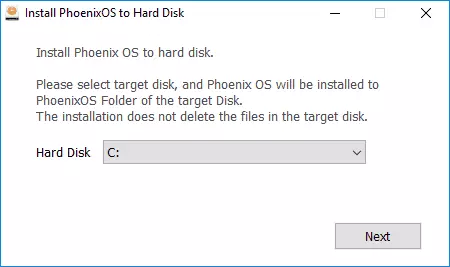
- Specify the size of the "Internal Memory of Android", which you want to highlight the system being installed.
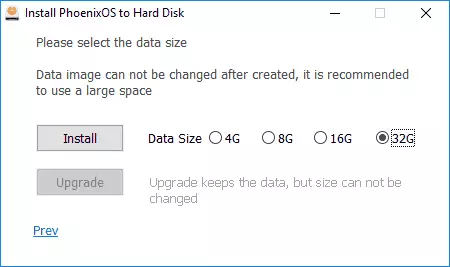
- Click the "Install" button and wait for the installation.
- If you installed Phoenix OS to a computer with UEFI, you will also remind you that the Secure Boot should be disconnected.
After the installation ended, you can restart the computer and, most likely, you will see a menu with a choice which OS download is Windows or Phoenix OS. If the menu does not appear, and the Windows load immediately started, select the PHOENIX OS start using Boot Menu while turning on the computer or laptop.
About the first enabling and configuring the Russian language in the "PHOENIX OS Basic Settings" section further in the instructions.
Run or Installing Phoenix OS from a flash drive
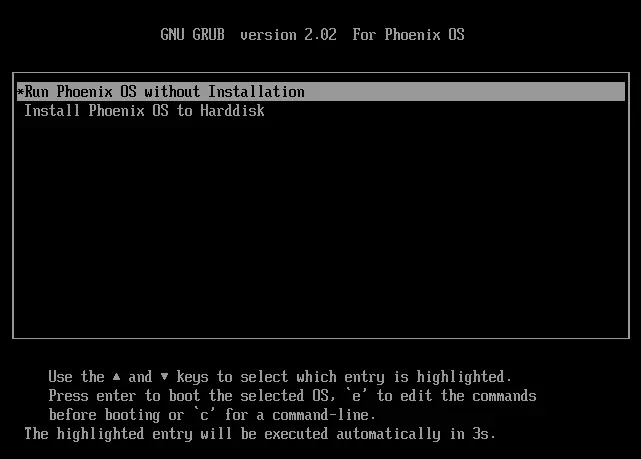
If you have selected the use of the boot flash drive, then when downloading from it you will have two action options - launch without installing (RUN PHOENIX OS WITHOUT INSTALLATION) and installation on a computer (Install Phoenix OS to Harddisk).
If the first option is most likely to cause questions, the second is more complicated than the installation using the EXE installer. I would not recommend it to novice users who do not know the assignments of various partitions on the hard disk, where the loader of the current OS and such details is located, there is not a small probability to damage the main system loader.
In general terms, the process consists of the following steps (and very similar to the Linux installation as the second OS):
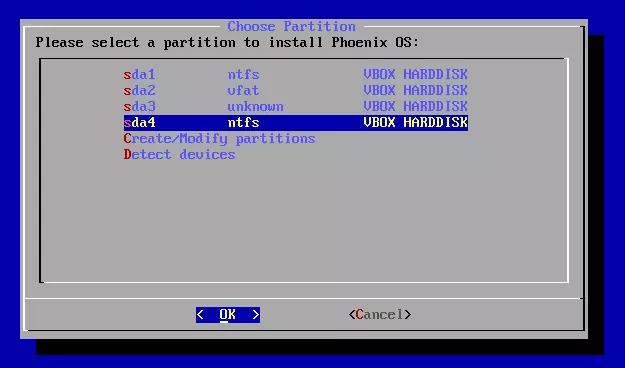
- Selecting a section for installation. If desired, change the disk markup.
- If desired, the formatting of the section.
- Selecting a section to record the Phoenix OS bootloader, if you wish, formatting a section.
- Installing and creating an image of "internal memory".
Unfortunately, it is not possible to describe this method in the framework of the current instruction in more detail in the framework of the current instruction, too many nuances that depend on the current configuration, partitions, type of loading.
If you install the second OS, different from Windows - a simple task, easy to cope here. If not, then be careful (it is easy to get a result when only Phoenix OS will be loaded or neither one of the systems) and maybe better resort to the first installation method.
PHOENIX OS Basic Settings
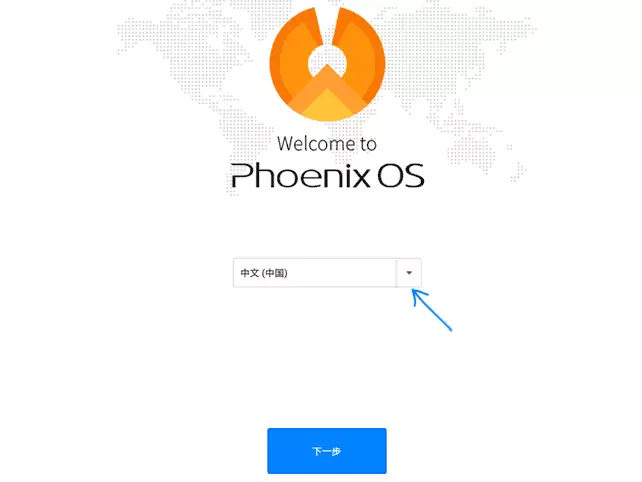
The first launch of the Phoenix OS occurs long enough ("hanging" on System Initializing a few minutes), and the first thing you see is a screen with inscriptions in Chinese. Select "English", click "Next".
The following two steps are relatively simple - connecting to Wi-Fi (if any) and creating an account (just enter the administrator name, by default - Owner). After that, you will get to the Phoenix OS desktop with the English language of the default interface and the English language input language.
Next, I describe how to translate Phoenix OS into Russian and add the English input language from the keyboard, as this may not be quite obvious to the novice user:
- Go to "Start" - "settings", open the item "Languages & Input"
- Click on "Languages", click "Add Language", add the Russian language, and then move it (drag the mouse for the button on the right) to the first place - this will turn on the Russian interface language.
- Return to the "Languages & Input" item, which is now called "Language and Enter" and open the "Virtual Keyboard" item. Turn off the Baidu keyboard, leave the Android Keyboard included.
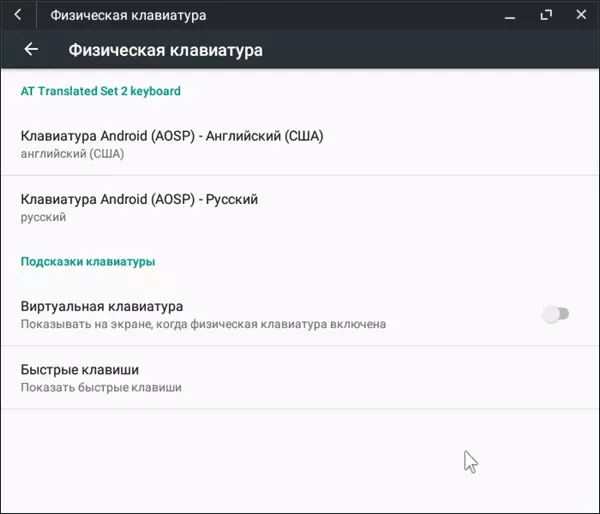
- Open the "Physical Keyboard" item, click on the "Android AOSP-Russian keyboard" and select "Russian".
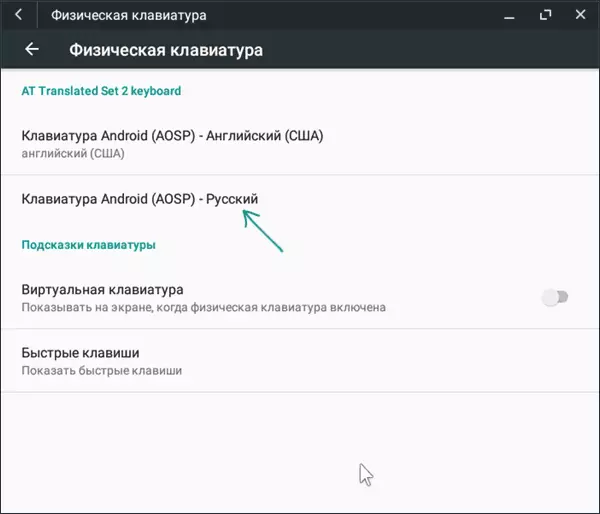
- As a result, in the "Physical Keyboard" section, it should look like in the image below (as we see not only it is indicated that the Russian keyboard, but also under it is indicated by small font - "Russian", which was not in step 4).
Ready: Now the Phoenix OS interface in Russian, and you can switch the keyboard layout using Ctrl + Shift.
Perhaps this is the main thing that I can pay attention here - the rest is not very different from the Windows and Android mixture: there is a file manager, there is a Play Market (but if you wish, you can download and install applications in the form of APK via the built-in browser, see how Download and install APK applications). I think there will be no special difficulties.
Removing Phoenix OS from Computer
In order to remove the Phoenix OS, set by the first way, from your computer or laptop:
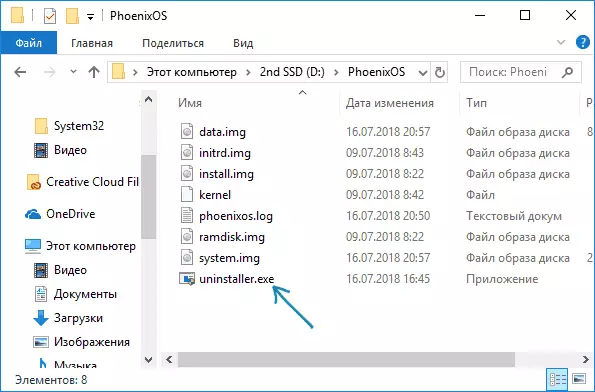
- Go to the disc to which the system was installed, open the Phoenix OS folder and run the uninstaller.exe file.
- Further steps will be to specify the reason for the removal and pressing the "Uninstall" button.
- After that, you will receive a message that the system has been removed from the computer.
However, I note here that in my case (tested on the UEFI system), Phoenix OS left its bootloader on the EFI section. If in your case something similar happens, you can delete it using Easyuefi or manually deleting the PhoenixOS folder from the EFI section on your computer (which will first have to assign a letter).
If suddenly, after deletion, you will encounter the fact that Windows is not loaded (on the UEFI system), make sure that the Windows Boot Manager is selected as the first boot point in the BIOS parameters.