
In case, if the second hard disk is not shown in the BIOS, it happened after any actions inside the computer or simply after installing the second hard disk, then I recommend checking first, but everything is connected correctly: how to connect a hard drive to a computer or Laptop. And separate instructions on the topic M.2 and SATA SSD in Windows 10 - what to do if Windows 10 does not see SSD.
How to "enable" the second hard disk or SSD in Windows
All that we need to correct the problem with a disk that is not visible is the built-in disk management utility, which is present in Windows 7, 8.1 and Windows 10.
To start it, press the Windows + R keys on the keyboard (where Windows is a key with the appropriate emblem), and in the "Run" window that appears, type diskmgmt.msc then press ENTER.
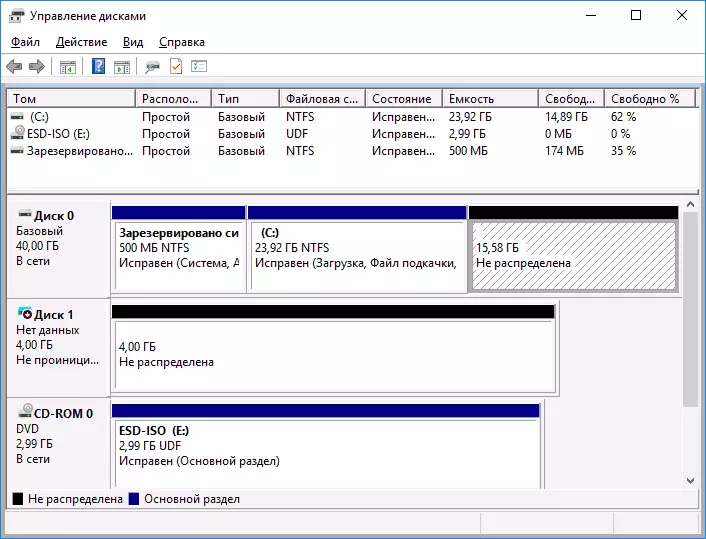
After a short initialization, the disk management window opens. In it, you should pay attention to the following things at the bottom of the window: whether there are disks, in the information about which the following information is present.
- "There is no data. Not initialized "(in case you are not visible physical HDD or SSD).
- Are there on the hard disk of the area in which it is written "not distributed" (if you do not see the section on one physical disk).
- If there is no other, but instead you see the RAW section (on the physical disk or logical partition), as well as the NTFS or FAT32 section, which is not displayed in the Explorer and does not have a letter of the disk - just click on it right mouse button By such a section, and select either "format" (for RAW), or "assign a disk letter" (for an already formatted partition). If there were data on the disk, see how to restore the RAW disk.
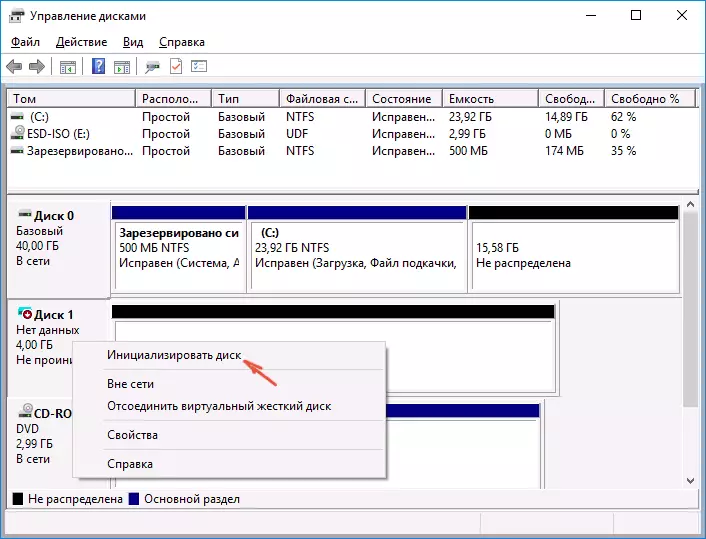
In the first case, right-click on the name of the disk and select the menu item "Initialize Disk". In the window that will appear after this, you must select the partition structure - GPT (GUID) or MBR (in Windows 7 such a choice may not appear).
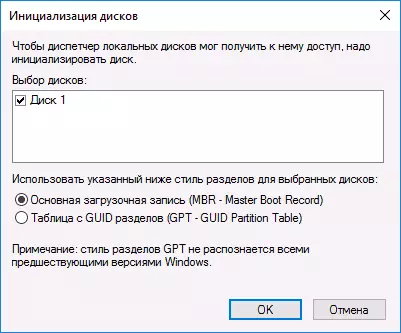
I recommend using the MBR for Windows 7 and GPT for Windows 8.1 and Windows 10 (provided that they are installed on a modern computer). If you are not sure, choose the MBR.
Upon completion of the initialization of the disk, you will receive the area "not distributed" on it - i.e. The second of the two cases described above.
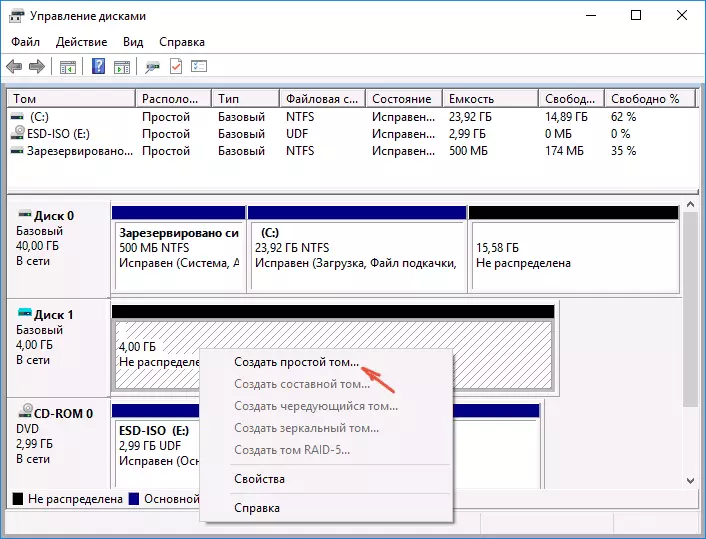
The next step for the first case and the only one for the second is to click right-click on the unallocated area, select the menu item "Create a simple Tom".
After that, it remains only to follow the instructions of the volume creation wizard: assign the letter, select the file system (if you doubt, then NTFS) and size.
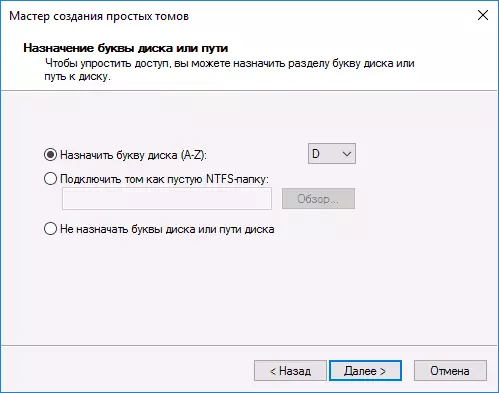
As for the size - by default, a new disk or section will occupy all free space. If you need to create multiple partitions on one disk, specify the size manually (less available free space), then do the same actions with the remaining not distributed place.
Upon completion of all these actions, the second disk will appear in Windows Explorer and will be suitable for use.
Video instruction
Below is a small video manual, where all the steps to add the second disk to the system (turn it on in the conductor), described above are shown visually and with some additional explanations.Make a second disc visible using the command line
Attention: the next way to correct the situation with the missing second disk using the command line is given only for information purposes. If the above-described methods did not help you, and at the same time you do not understand the essence of the commands below, it is better not to use them.
I also note that the specified actions are applicable to the basic (not dynamic or RAID discs) without extended sections.
Run the command prompt on behalf of the administrator, after which enter the following commands in order:
- diskpart.
- LIST DISK.
Remember the disk number that is not visible, or the number of that disc (hereinafter - n), the partition on which is not displayed in the conductor. Enter the SELECT DISK N and press ENTER.
In the first case, when the second physical disk is not seen, use the following commands (ATTENTION: Data will be deleted. If the disc has stopped displayed, but it has been data, do not make it possible, it is easy enough to just assign a disk letter or use the program to restore the lost partitions. ):
- Clean (Cleans disk. Data will be lost.)
- CREATE PARTITION PRIMARY (here you can also specify the size = s parameter, setting the partition in megabytes, if you want to make several partitions).
- Format FS = NTFS Quick
- Assign Letter = D (prescribe the letter D).
- EXIT.
In the second case (there is an unallocated area on a single hard disk, not visible in the conductor) we use all the same commands, with the exception of Clean (disc cleaning), as a result, the section creation operation will be made precisely on the unallocated location of the selected physical disk.
Note: In methods using the command line, I described only two basic, most likely options, however, and others are possible, so you have been done only in the event that you understand and confident in your actions, and also took care of the data preservation. For more information about working with DiskPart, you can read on the official Microsoft page to create a partition or logical disk.