
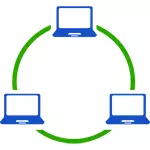
I note that today, when Wi-Fi router (wireless router) is almost every apartment, the creation of a local network does not require additional equipment (as all devices are connected via a cable or Wi-Fi router) and will allow you not only to transmit Files between computers, but, for example, view video and listen to music stored on a hard disk of a computer on a tablet or compatible TV, without dropping it to the USB flash drive (this is just one example).
If you want to make a local network between two computers using a wired connection, but without a router, you will need not a regular Ethernet cable, but the Cross-Over cable (look on the Internet), except when modern Gigabit Ethernet adapters are installed on both computers MDI-X support, then the usual cable
Note: If you need to create a local network between two Windows 10 or 8 computers via Wi-Fi using a computer-computer wireless connection (without router and wires), then to create a connection, use the instructions: Configuring the Wi-Fi Connection Computer Computer (AD -Hoc) in Windows 10 and 8 to create a connection, and then the steps below to configure the local network.
Creating a local network in Windows - Step-by-step instructions
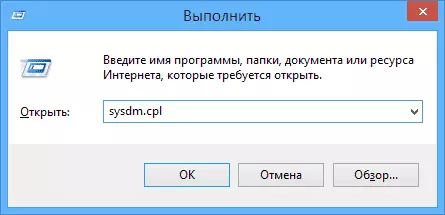
First of all, set the same name of the working group for all computers that must be connected to the local network. Open the "My Computer" properties, one of the rapid ways to do this - press the Win + R keys on the keyboard and enter the SYSDM.CPL command (this action is equally for Windows 10, 8.1 and Windows 7).

Overviews the tab you need, in which you can see, to which working group the computer owns, in my case - workgroup. In order to change the name of the working group, click "Change" and set a new name (Do not use Cyrillic). As I said, the name of the working group on all computers should coincide.
The next step, go to the Windows Network and Sharing Center (it can be found in the control panel, or using the right click on the connection area in the notification area).

For all network profiles, enable network detection, automatic configuration, sharing files and printers.

Go to "Advanced Sharing Options", go to the "All Network" section and in the last "Sharing Password Protection" item, select "Disable common access with password protection" and save the changes.
As a preliminary result: one name of the working group must be installed on all computers, as well as network detection; On computers, folders from which should be available on the network, you should enable sharing files and printers and disable common access with password protection.
The above is enough if all computers in your home network are connected to one router. With other connection options, you may need to set a static IP address on the same subnet in the LAN connection properties.
Note: In Windows 10 and 8, the computer name on the local network is set automatically when installed and usually looks not the best and does not allow you to identify the computer. To change the computer name, use the instructions to change the Windows 10 computer name (one of the ways in the manual is suitable for previous versions of OS).
Providing access to files and folders on a computer
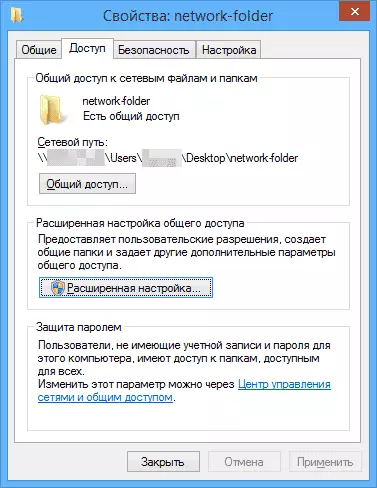
In order to provide sharing to the Windows folder on the local network, right-click on this folder and select "Properties" and go to the "Access" tab, click the "Advanced Settings" button.
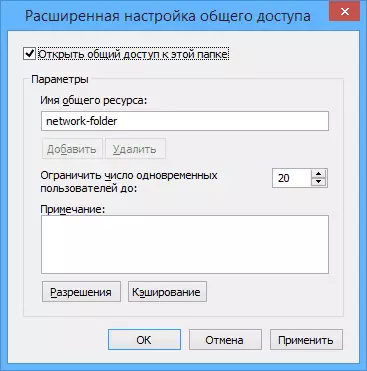
Set the "Open Share Access" mark, and then press "Permissions".

Check the permissions that are necessary for this folder. If you want only reading, you can leave default values. Apply the settings made.
After that, in the folder properties, open the Safety tab and click the Edit button, and in the next window - "Add".
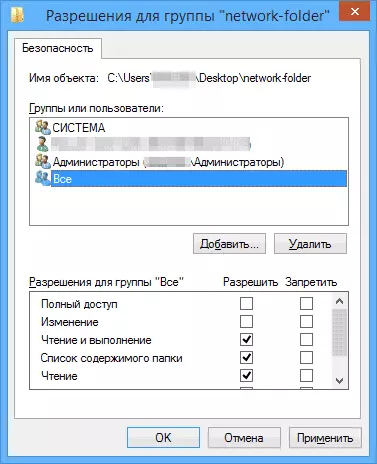
Specify the username (group) "All" (without quotes), add it, after which, set the same permissions that set the previous time. Save the changes made.
Just in case, after all the manipulations done, it makes sense to restart the computer.
Access to folders on the local network from another computer
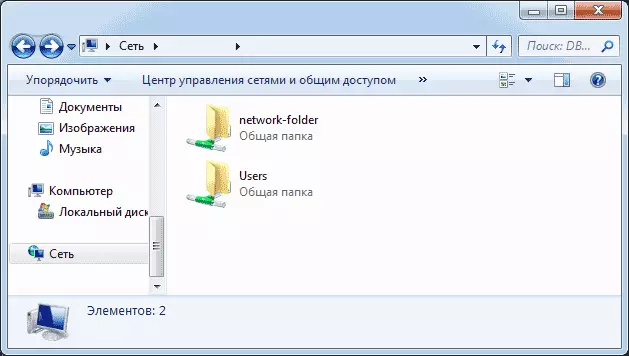
This setting is completed: Now, from other computers, you can access the folder on the local network - go to the "Explorer", open the "Network" item, well, then, I think everything will be obvious - open and do with the contents of the folder all, What was installed in permissions. For more convenient access to the network folder, you can create its label in a convenient location. It may also be useful: how to configure a DLNA server in Windows (for example, to play movies from a computer on a TV).