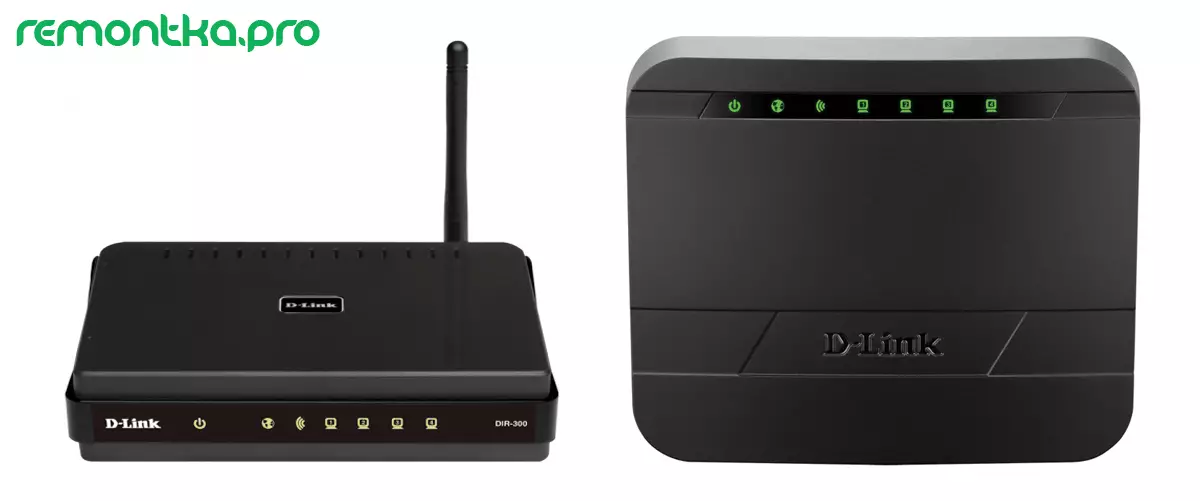
Wi-Fi routers D-LINK DIR-300 REV. B6 and B7.
See also: Setting up the DIR-300 video, setting the D-Link DIR-300 router for other providers

When you click on any of the images in this manual, you can see the enlarged version of the photo.
Connect D-Link DIR-300
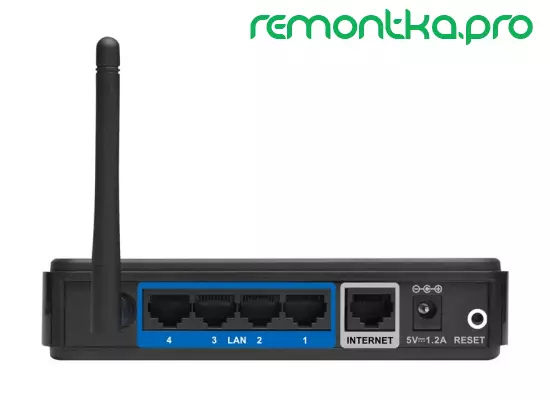
Wi-Fi Router DIR-300 NRU, Rear Side
There are five connectors on the reverse side of the router. Four of them are signed by LAN, one - WAN. To work properly, you must connect the Rostelecom cable to the WAN port, and one of the wire is connected one of the LAN ports with the network card connector of your computer from which the subsequent setting will be made. Connect the router to the electrical network and wait for about a minute when it boots.
If you are not sure which connection settings on the local network are used on your computer, I strongly recommend checking that in the connection properties it is set to: to receive the IP address automatically and receive DNS servers automatically. How to do: In Windows 7 and Windows 8, go to the control panel - the network management center and shared access - the adapter parameters, right-click on the "LAN connection", select the properties context menu item where you can see Your current installations. For Windows XP, the following path: Control Panel, Network Connections, and then - Similarly with Windows 8 and 7.
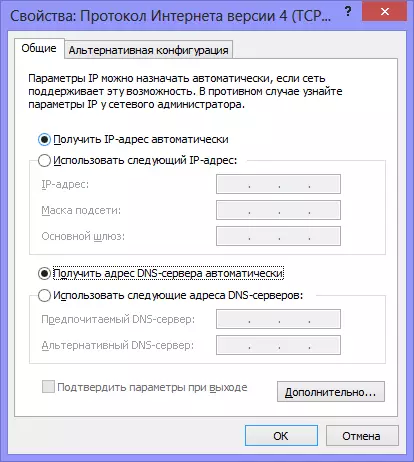
Correct Local Connection Settings for Setting DIR-300
That's all, with the connection of the router, we are finished, go to the next stage, but you first want to watch the video.
Setting up the DIR-300 router for Rostelecom video
In the video instructions below, for those who do not like to read, the quick setup of the Wi-Fi router D-Link DIR-300 with various firmware to work on the Internet Rostelecom is shown. In particular, it is shown how to connect the router and configure the connection, as well as put a password on a Wi-Fi network to exclude unauthorized access.Firmware router D-Link DIR 300 B5, B6 and B7
This item on how to flash the DIR-300 Router last firmware from the manufacturer. To use D-Link DIR-300 Rev. B6, B7 and B5 with Rostelecom Changing the firmware is not mandatory, but I still think that this procedure will not be excess, and perhaps and facilitates the following actions. For what it is necessary: As new models are released by the D-Link DIR-300 routers, as well as in connection with various errors arising from this device, the manufacturer manufactures new software versions for its Wi-Fi routers, which corrected detected The shortcomings that, in turn, leads to what it is easier for us to configure the D-Link router and we experience fewer problems with its work.
The firmware process is very simple and be sure that you can easily handle it, even if I have never come across anything to do so. So, let's begin.
Download File Firmware from the Official Site
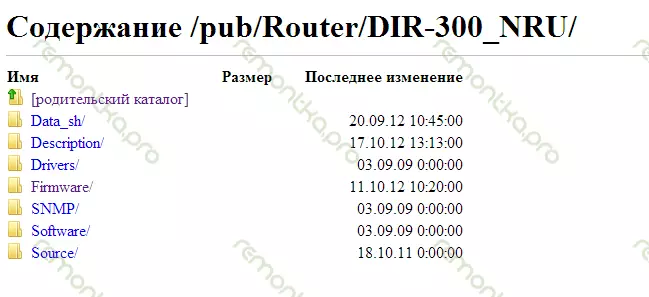
Firmware for DIR-300 on D-Link
Go to the site ftp.dlink.ru, where you will see a list of folders.
You should go to Pub, Router, DIR-300_NRU, Firmware, and then go to the folder corresponding to the hardware revision of your router. How to find out the version number was mentioned above. After you went to the B5 B6 or B7 folder, you will see two files there and one folder. We are interested in the firmware file with the .bin extension to be downloaded to the computer. In this folder, the latest firmware version is always located, so you can safely download, then save the file in the location you know on the computer. At the time of writing the instruction, the latest firmware version for D-Link DIR-300 B6 and B7 - 1.4.1, for DIR-300 B5 - 1.4.3. Regardless of which the router revision, you, the Internet configuration for Rostelecom for all of them will be exactly the same.
Update firmware
Before starting the firmware process, we recommend temporarily disconnect the Rostelecom cable from the WAN port of your router and leave only the cable from the LAN connector to your computer. Also, if you bought a router from the hands or took from someone from friends, I will not be superfluous to reset it, leading to the factory settings. To do this, press and hold the RESET button on the back of the device 5-10 seconds.
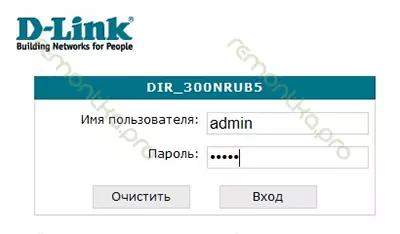
Password request for old firmware DIR-300 REV B5
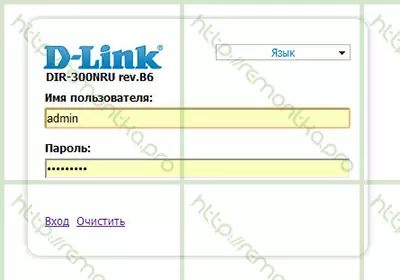
D-Link DIR-300 B5, B6 and B7 with firmware 1.3.0
Open any Internet browser and enter the following address in the address bar: 192.168.0.1, press ENTER, and if all previous steps have been completed correctly, then you will find yourself on a login and password page to enter the DIR-300 NRU settings. Standard login and password for this router - Admin / Admin. After entering them, you must be directly on the settings page. Depending on which firmware is already installed on your device, this page may differ slightly outwardly.
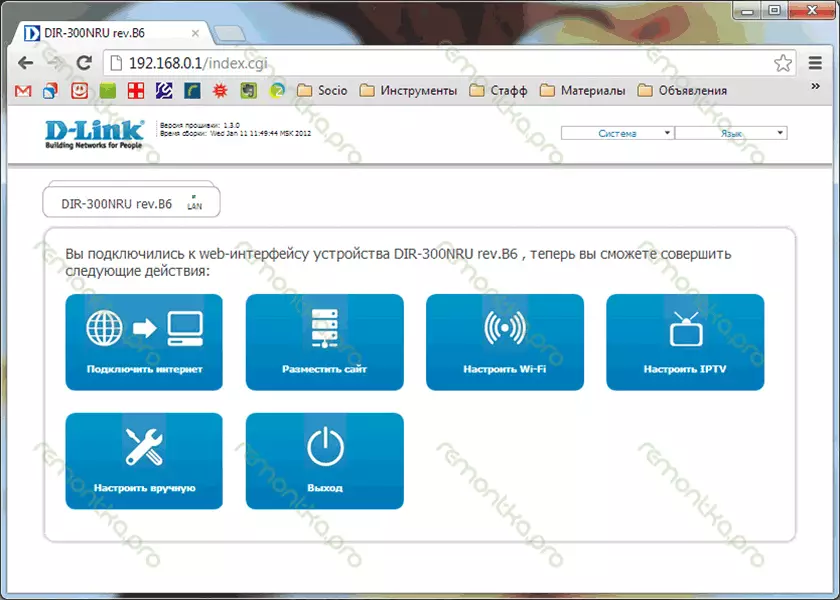
D-Link DIR-300 NRU Routher Settings page with firmware 1.3.0
If the firmware version is used 1.3.0, then you should select: Customize manually - System - Update software. For earlier software versions, the path will be shorter: System - software update.
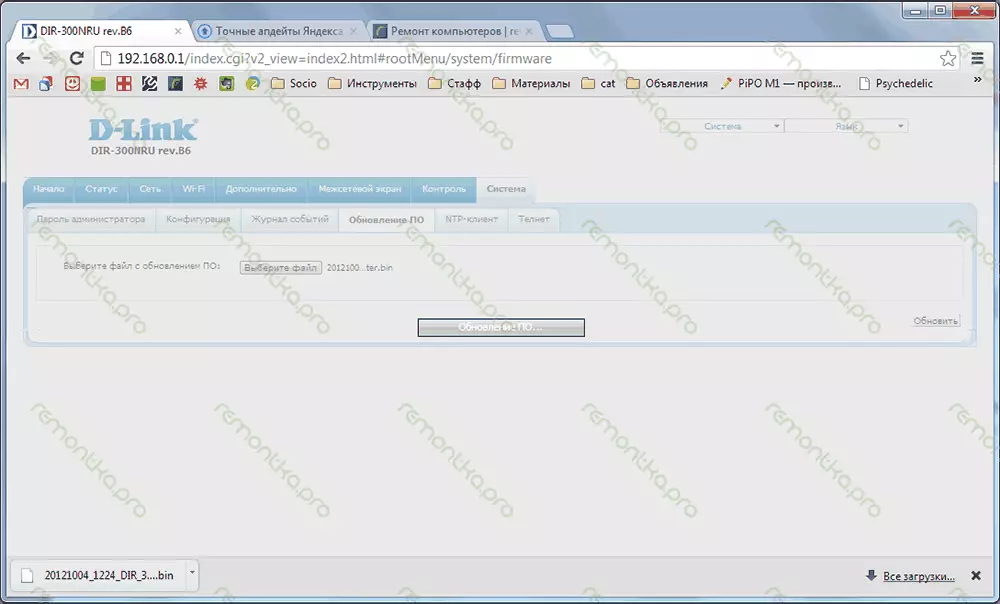
D-Link DIR-300 firmware update
In the field designed to select a file with a new firmware, specify the path to the file loaded from the site. The last thing to be done is to click "Update" and wait for the completion of the update process, after which the router may behave in the following ways:
1) Report that the firmware has been successfully updated and suggest entering a new password to access its settings. In this case, we ask a new password and get to the new DIR-300 settings page with firmware 1.4.1 or 1.4.3 (and maybe by that time you read it, already released and more new)
2) Not report anything. In this case, simply enter the IP address 192.168.0.1 to the address bar of your browser, login and password and go to the next instruction point.

D-Link DIR-300 Password request on firmware 1.4.1
Setting up PPPOE Rostelecom connection on D-Link DIR-300 with new firmware
If when executing the previous point of the manual, you turned off the Rostelecom cable from the port of the WAN router, now the time to connect it back.
Most likely, now in front of your new settings page of your router, in the upper left corner of which the hardware and software revisions of the router - B5, B6 or B7, 1.4.3 or 1.4.1 are indicated. If the interface language has not switched automatically into Russian, then you can do it manually using the menu in the upper right corner.
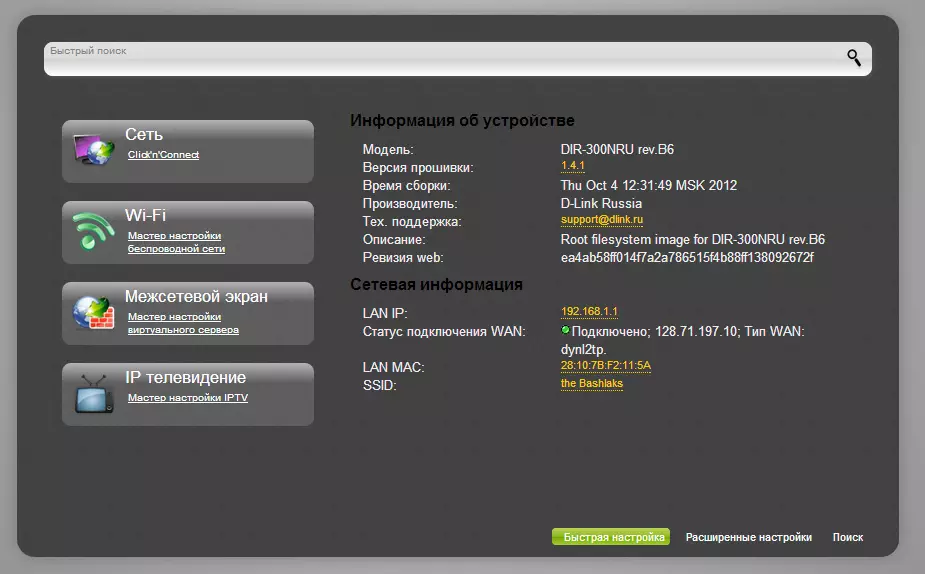
Setting up firmware DIR-300 1.4.1
At the bottom of the page, select the "Advanced Settings" item, and on the following - click on the "WAN" link located in the Network tab.
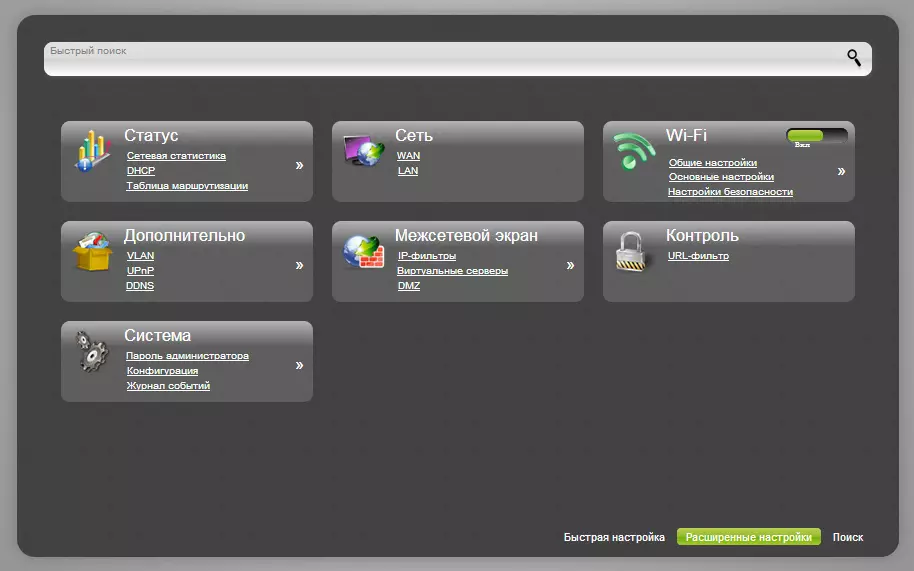
Extended Routher Settings
As a result, we must see a list of connections and, at the moment, there must be only one connection. Click on it, the Properties page will open. At the bottom, click the Delete button, after which you will again find yourself on the page with the list of connections that are now empty. To add a Rostelecom connection you need, press the button "Add" and the next thing you should see - setting the parameters of the new connection.
For Rostelecom, use the type of PPPOE connection. The connection name is any, at your discretion, for example - Rostelecom.
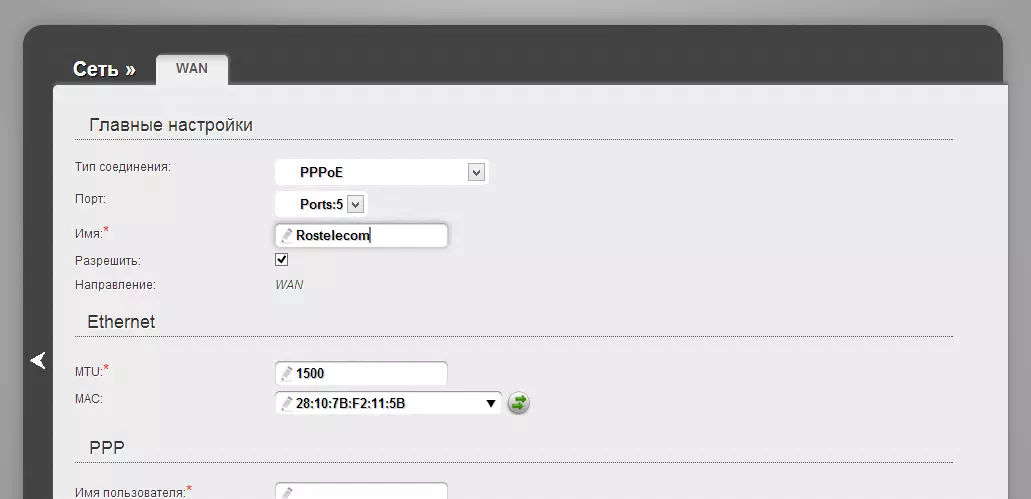
Setting up PPPoE for Rostelecom on DIR-300 B5, B6 and B7
Go down below (in any case, on my monitor) to PPP settings: You need to enter a login, password and confirmation of the password issued to you Rostelecom.
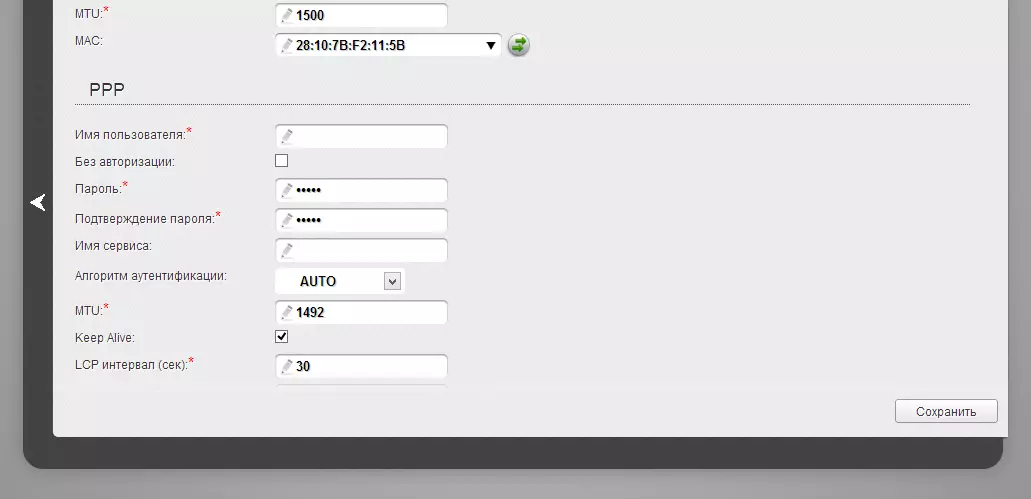
Login and password for PPPoe Rostelecom
The remaining parameters can be not changed. Click "Save". After that, a light bulb will turn around in the upper right corner of the page and another button "Save". We save. If everything was done correctly, then you can already start using the Internet. One important point that many do not take into account: so that everything worked through the router, which had previously occurred on the computer. Rostelecom connection do not start - from now on, this connection will be installed the router itself.
Configure Wi-Fi Connection Settings
From the Advanced Settings page we go to the Wi-Fi tab, select the "Basic Settings" item and set the desired name of the SSID wireless access point. After that, click "Change".
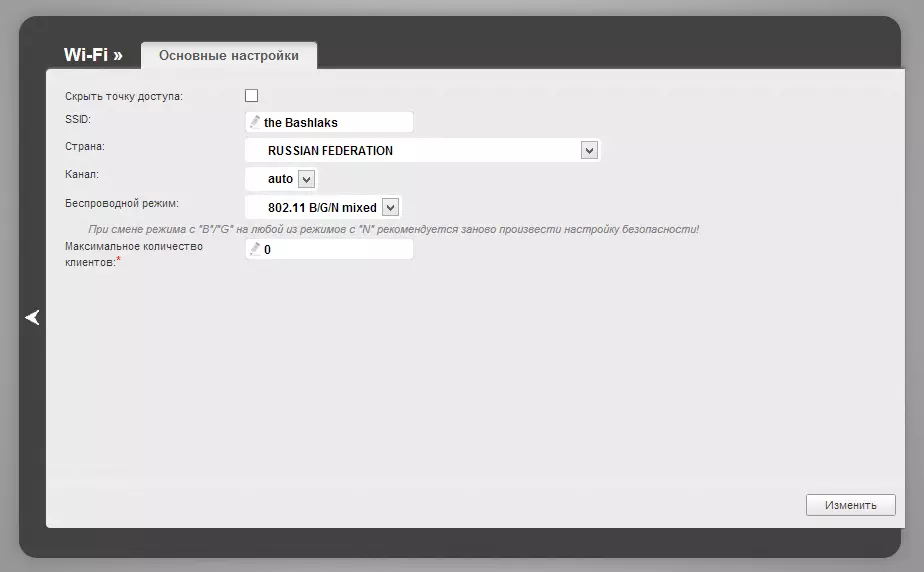
Wi-Fi Access Point Settings
After that, it is also recommended to install a password on your wireless network. To do this, go to Wi-Fi security settings, select the authorization type (WPA2 / PSK recommended), and then enter any password of at least 8 characters - this will help protect your wireless network from unauthorized access. Save the changes made. That's all: now you can try to use the Internet on a wireless Wi-Fi connection from a laptop, tablet, or any other equipment.
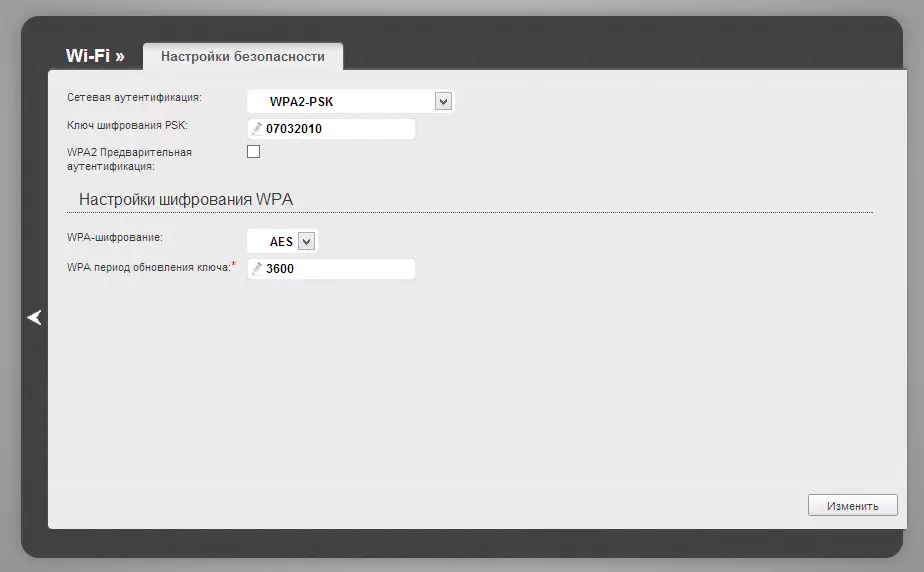
Installing the password on Wi-Fi D-Link DIR-300
If for some reason something does not work, the laptop does not see Wi-Fi, the Internet has only on a computer or there are other problems during the D-Link DIR-300 clock for Rostelecom, pay attention to this article which sets out the most common problems when setting up routers and typical user errors, well, and, accordingly, ways to solve them.
Configure TV Rostelecom on D-Link DIR-300
Setting up digital television from Rostelecom on firmware 1.4.1 and 1.4.3 does not constitute an even account anything complicated. You should simply select IP TV on the main page of the router settings, then select the LAN port to which the television console will be connected.
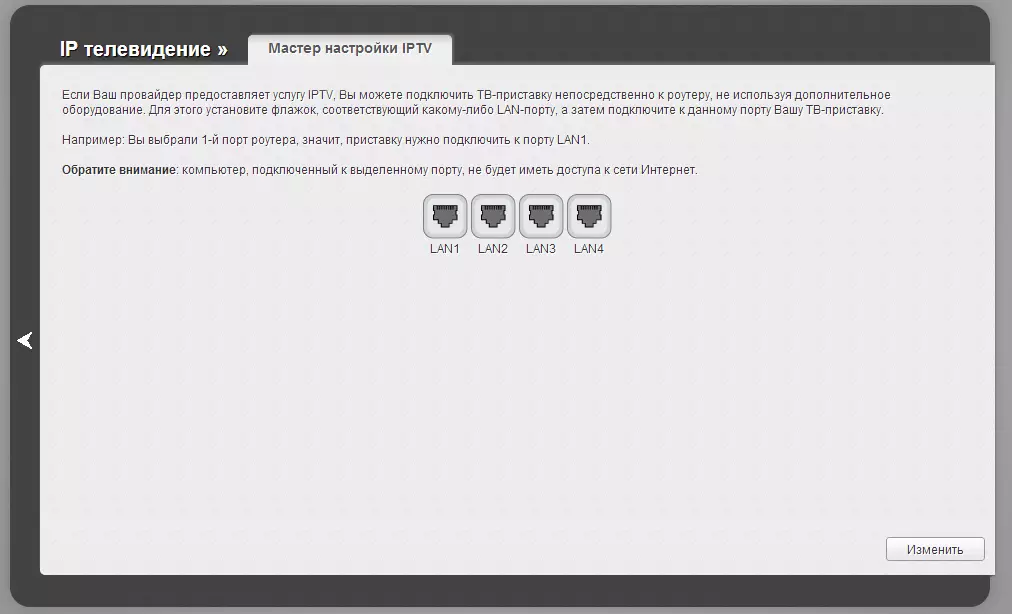
Configure TV Rostelecom on D-Link DIR-300
Immediately I note that IPTV is not the same as SMART TV. To connect Smart TV to the additional settings, you do not need to do - simply connect the TV with a router using a cable or wireless Wi-Fi network.
